Author: lokesh naidu

  • Tandoori Chicken

    Tandoori Chicken

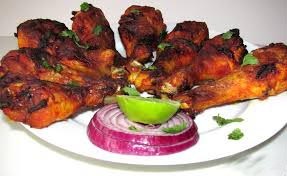
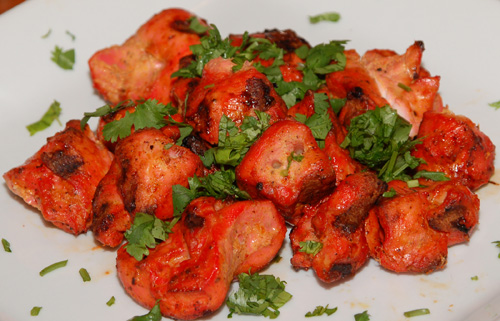
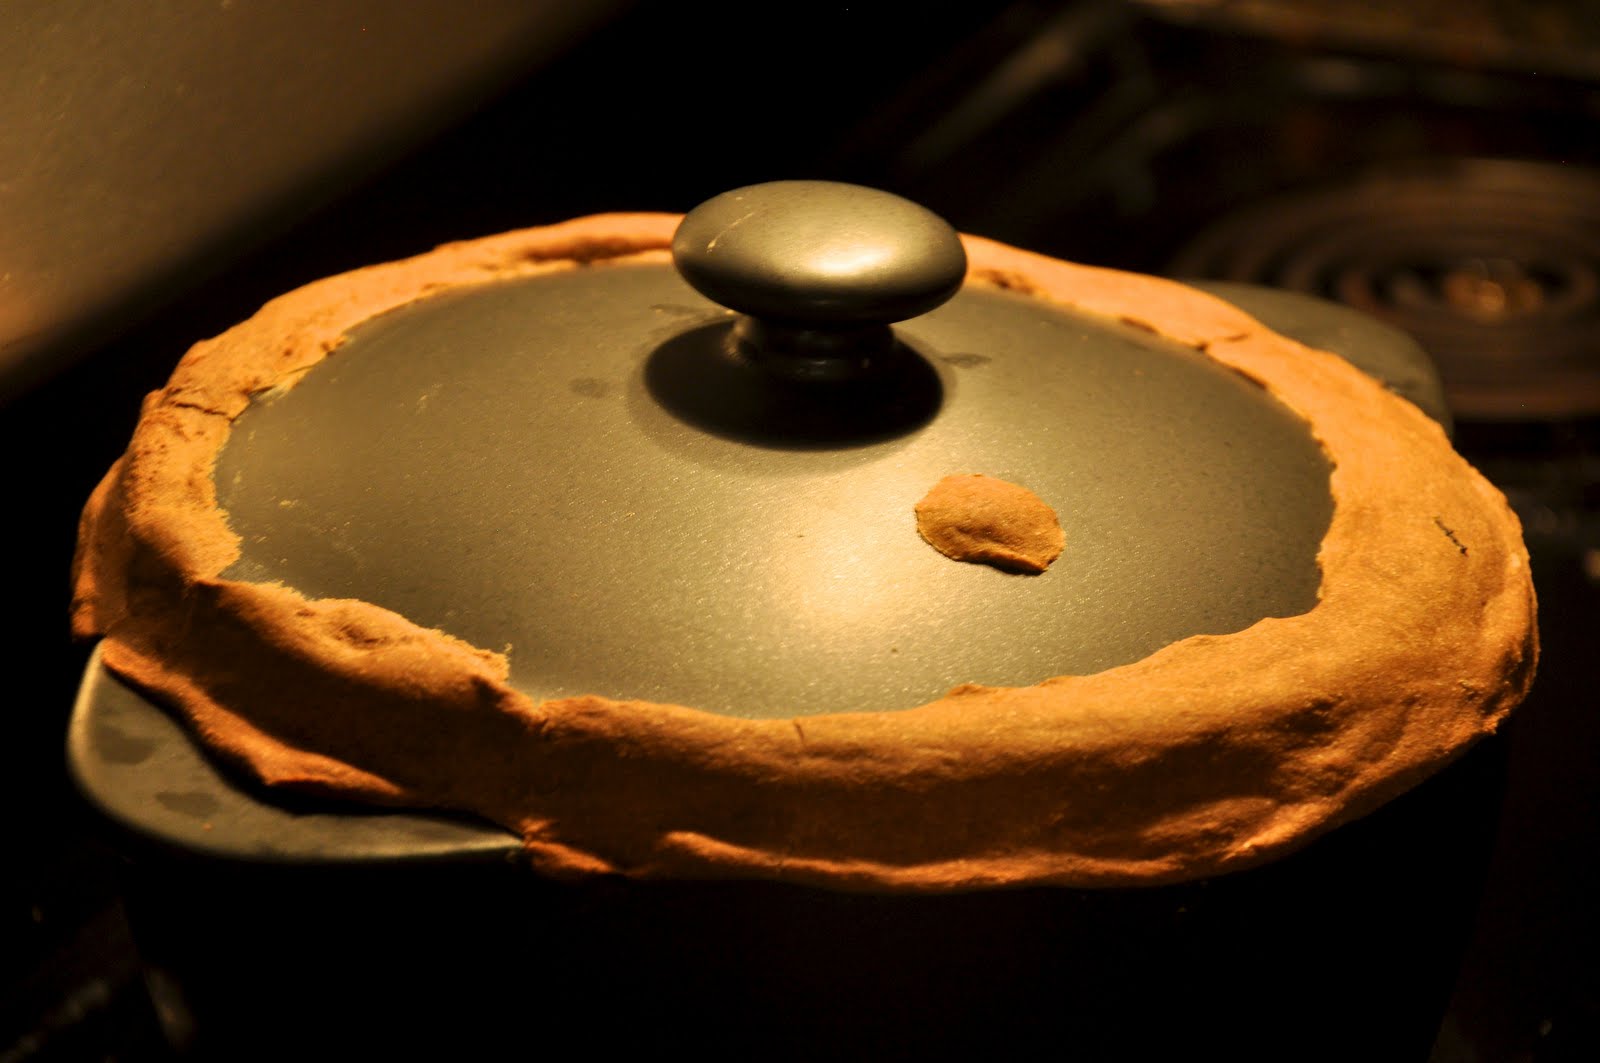
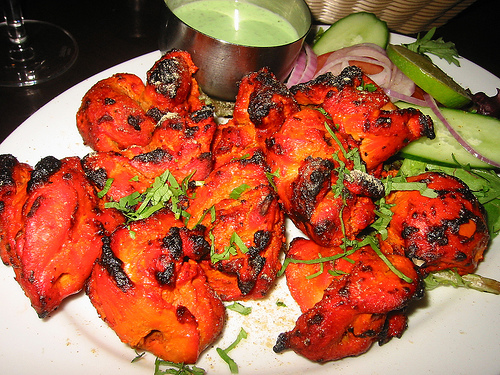
    Tandoori chicken is a famous South Asian dish which is made out of roasted chicken by adding spices and yogurt.The name Tandoor chicken is originated from the preparation process itself,as it is prepared in a cylindrical clay oven called Tandoor. Tandoor is heated by using wood or charcoal.By doing so we can heat the meat directly on live fire.By doing so we can remove the excess fat present in it and the meat gets cooked with the fat and juice in it.These Tandoor are generally maintained at high temperatures.

    This spicy mouth watering tandoori chicken is originated in Punjab region.The tandoori chicken has became official from the incident that took place once at Moti Mahal, where the first Prime Minister of India Jawaharlal Nehru was served this dish, he inherently enjoyed the dish and made it a regular dish at official banquets.This is generally cooked at very high temperatures on a traditional grill.

    Spicy mouth watering Tandoori chicken recipe
    Spicy mouth watering Tandoori chicken recipe

    Ingredients:

    1) Take 3/4 kg of Chicken(  leg pieces are more advisable )
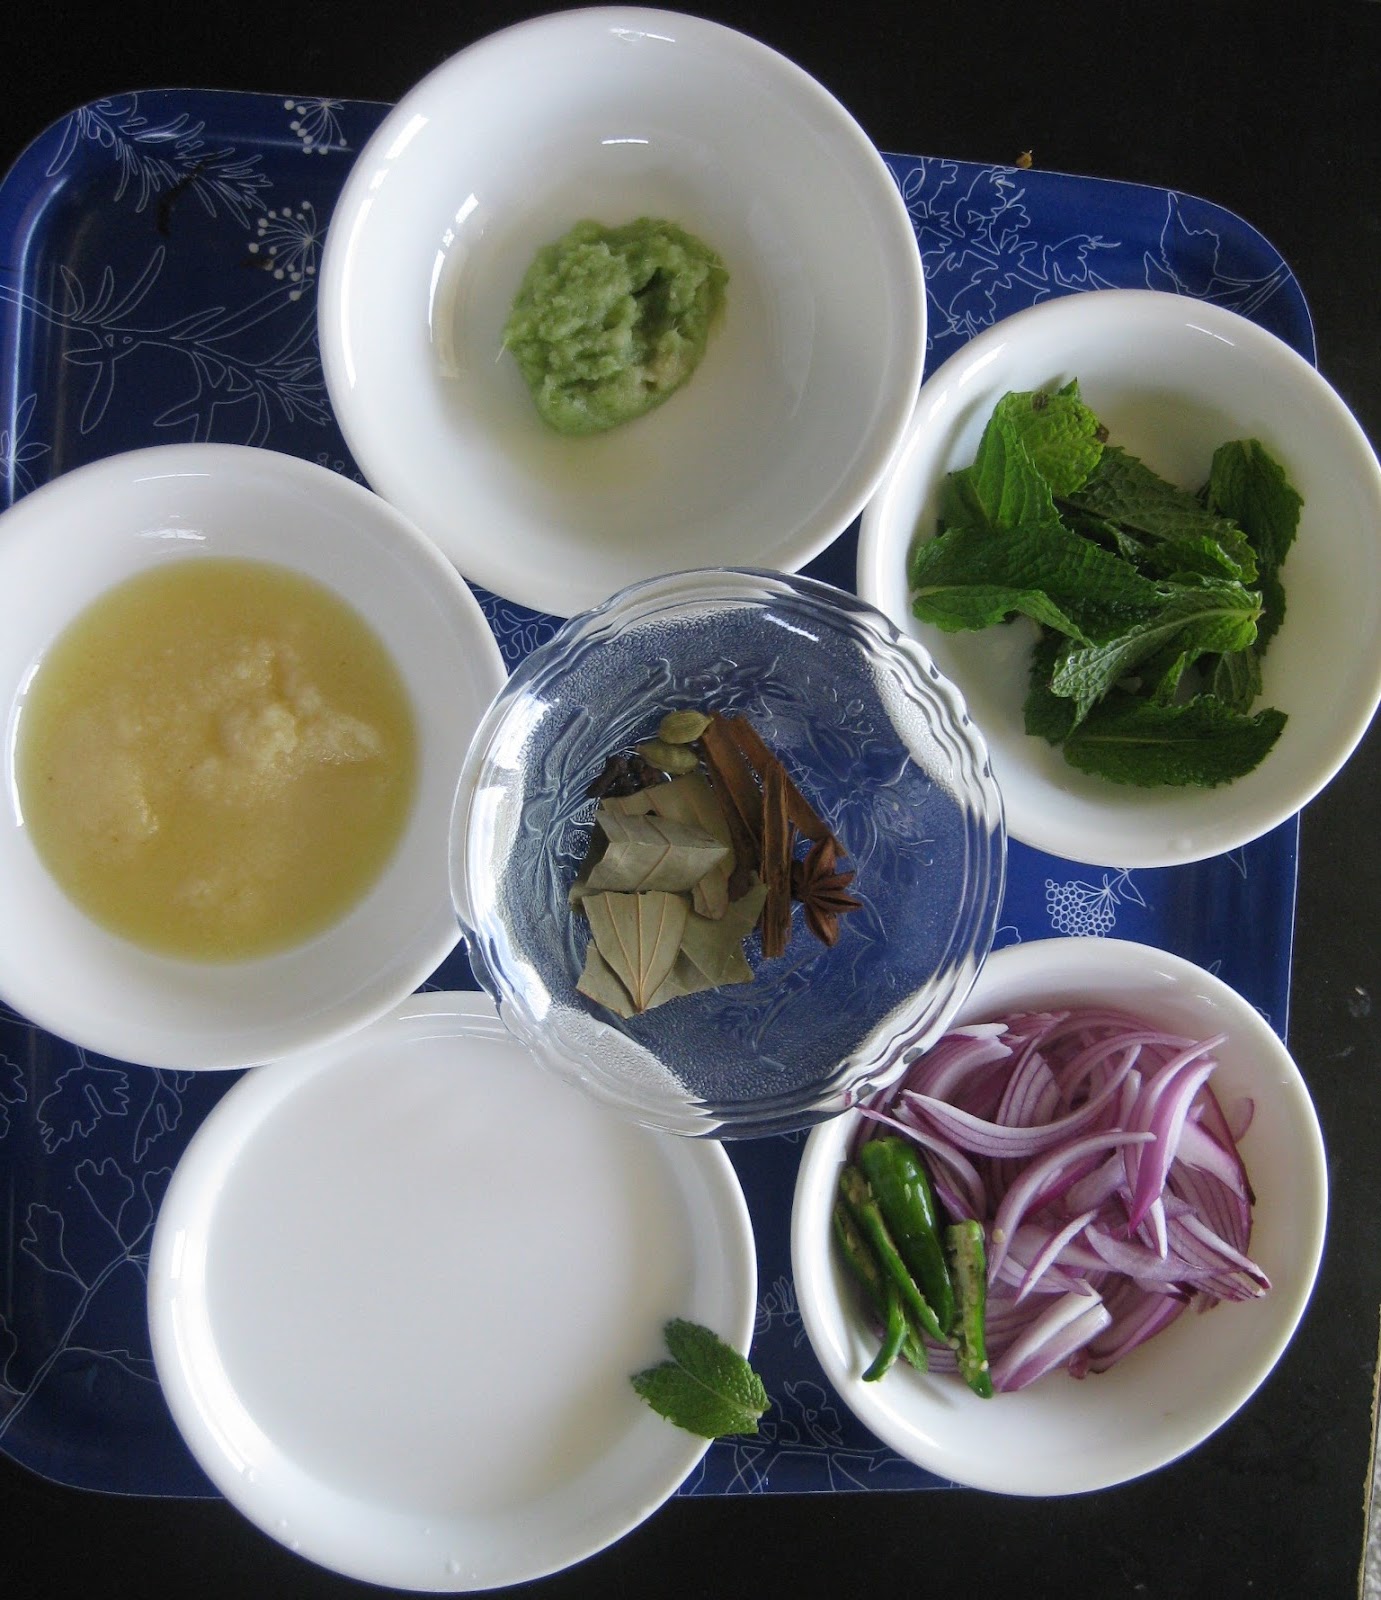
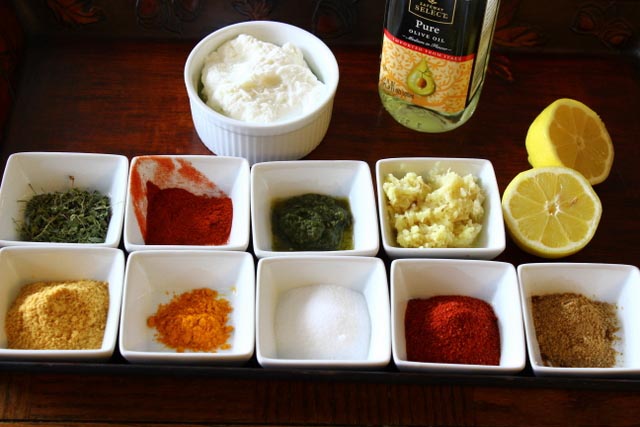
    For marinade:

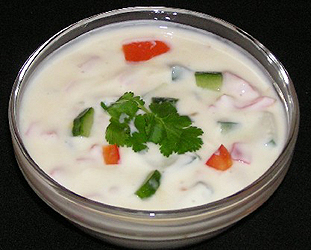
    1) Take one cup of yogurt or curd of low fat

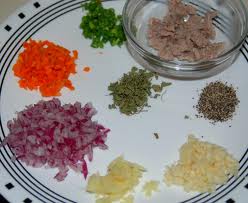
    2) Take chopped onion slices

    3) Take half slice of lime

    4) Take one clove garlic

    5) Take 1/2 inch of ginger and peel off the skin

    6) Take two green chilli

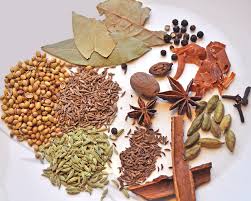
    7) Take one and half table spoon of garam masala

    8) Take salt that is sufficient for taste

    9) Take red food color and orange food color

    For Baking:

    1) Take a cookery tray

    2) Take Aluminum foil

    3) Take a pastry brush (this is optional)

    Ingredients required for making tandoori chicken
    Ingredients required for making tandoori chicken

    Preparation:

    For making delicious Chicken tandoori it takes about 30 minutes of cooking process,but before starting the cooking process the chicken that is taken must be marinated for one whole night so that it gives a better taste.The preparation of chicken tandoori can be learned easily by step by step process.
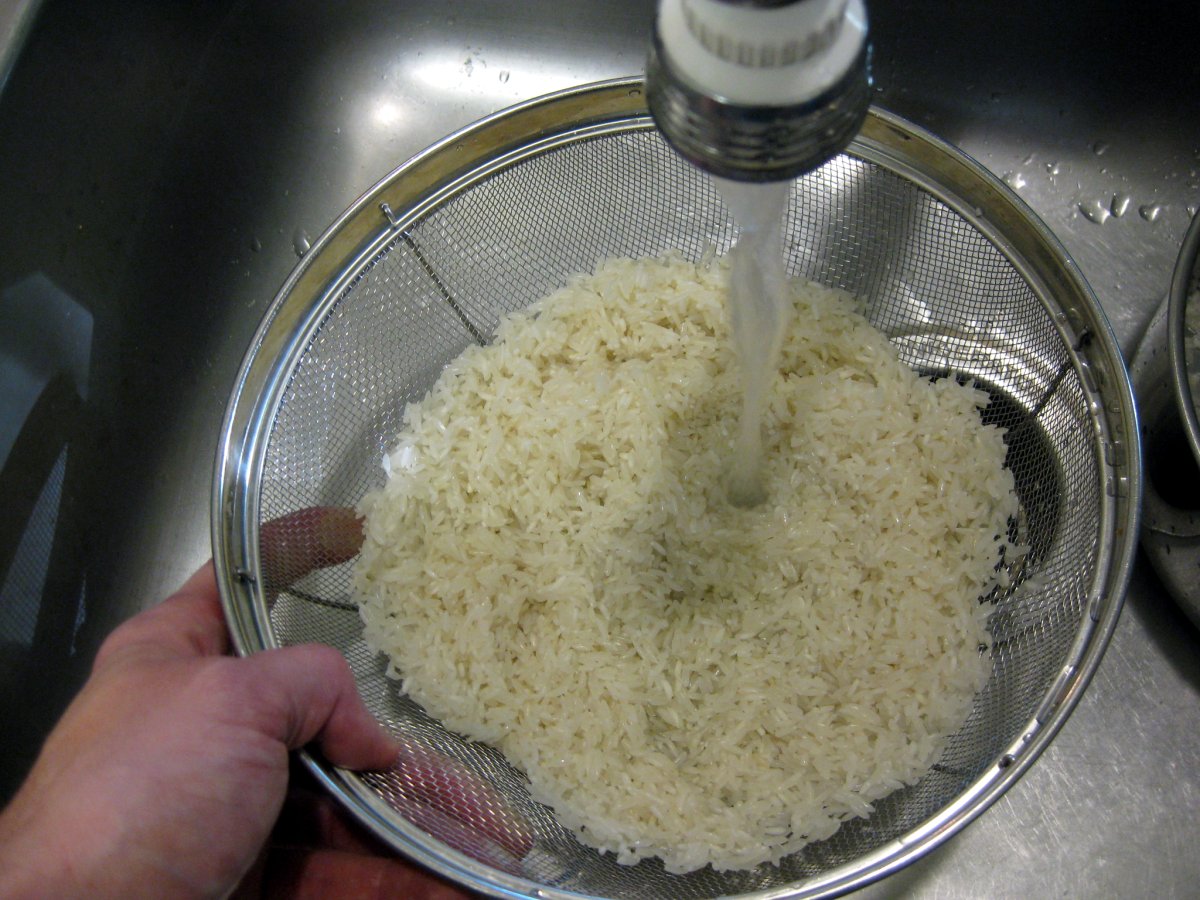
    Step 1:

    For the first step of preparation we have to take chicken and wash it thoroughly so that the waste matter and dust particles that get stuck to the chicken gets washed away.After washing the chicken let them drain and arrange those pieces on a in a plate.Make sure you do not remove the skin part as it actually protects the flesh when you bake it.Make deep slits on either side of the leg pieces such that the bone gets touched to the knife.This will help the chicken to marinate well.
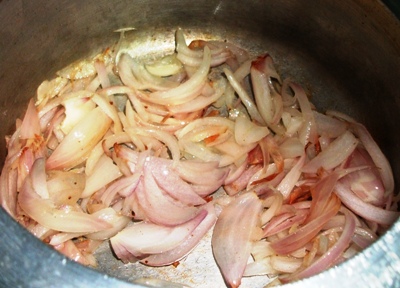
    Making deep slits on either side of chicken legs
    Making deep slits on either side of chicken legs

    Step 2:

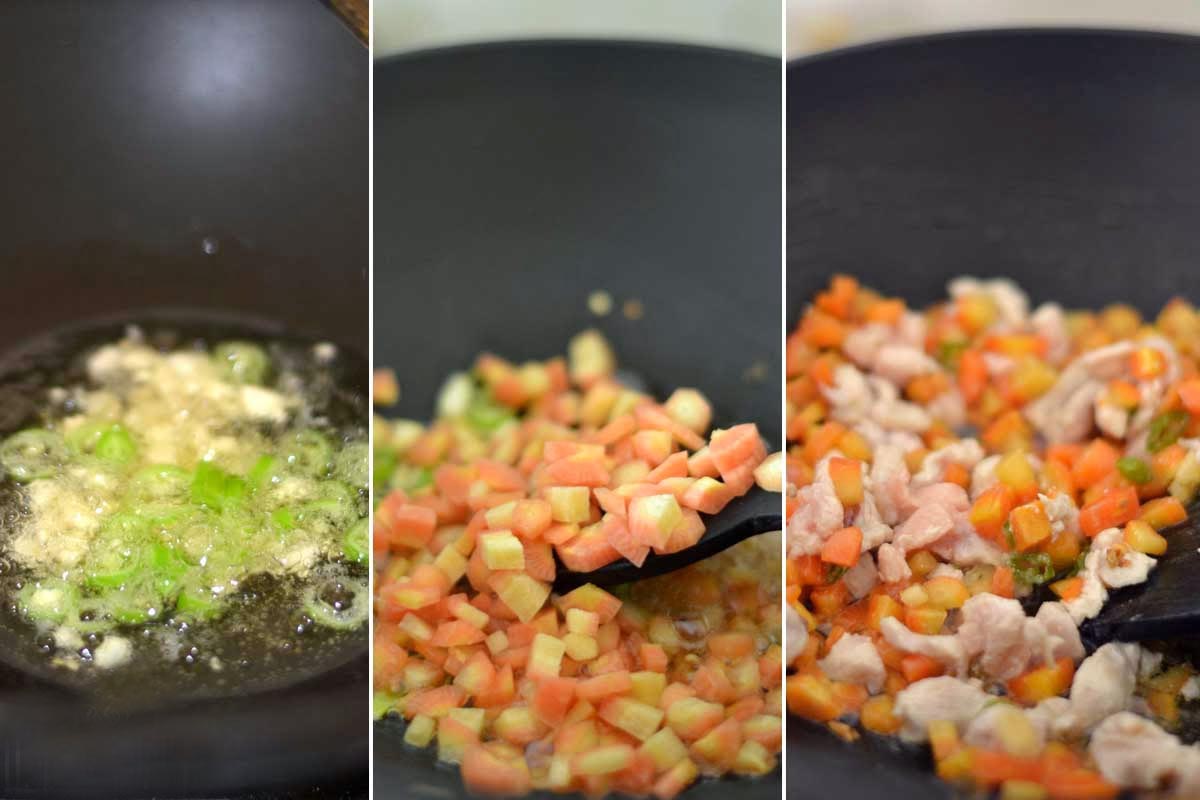
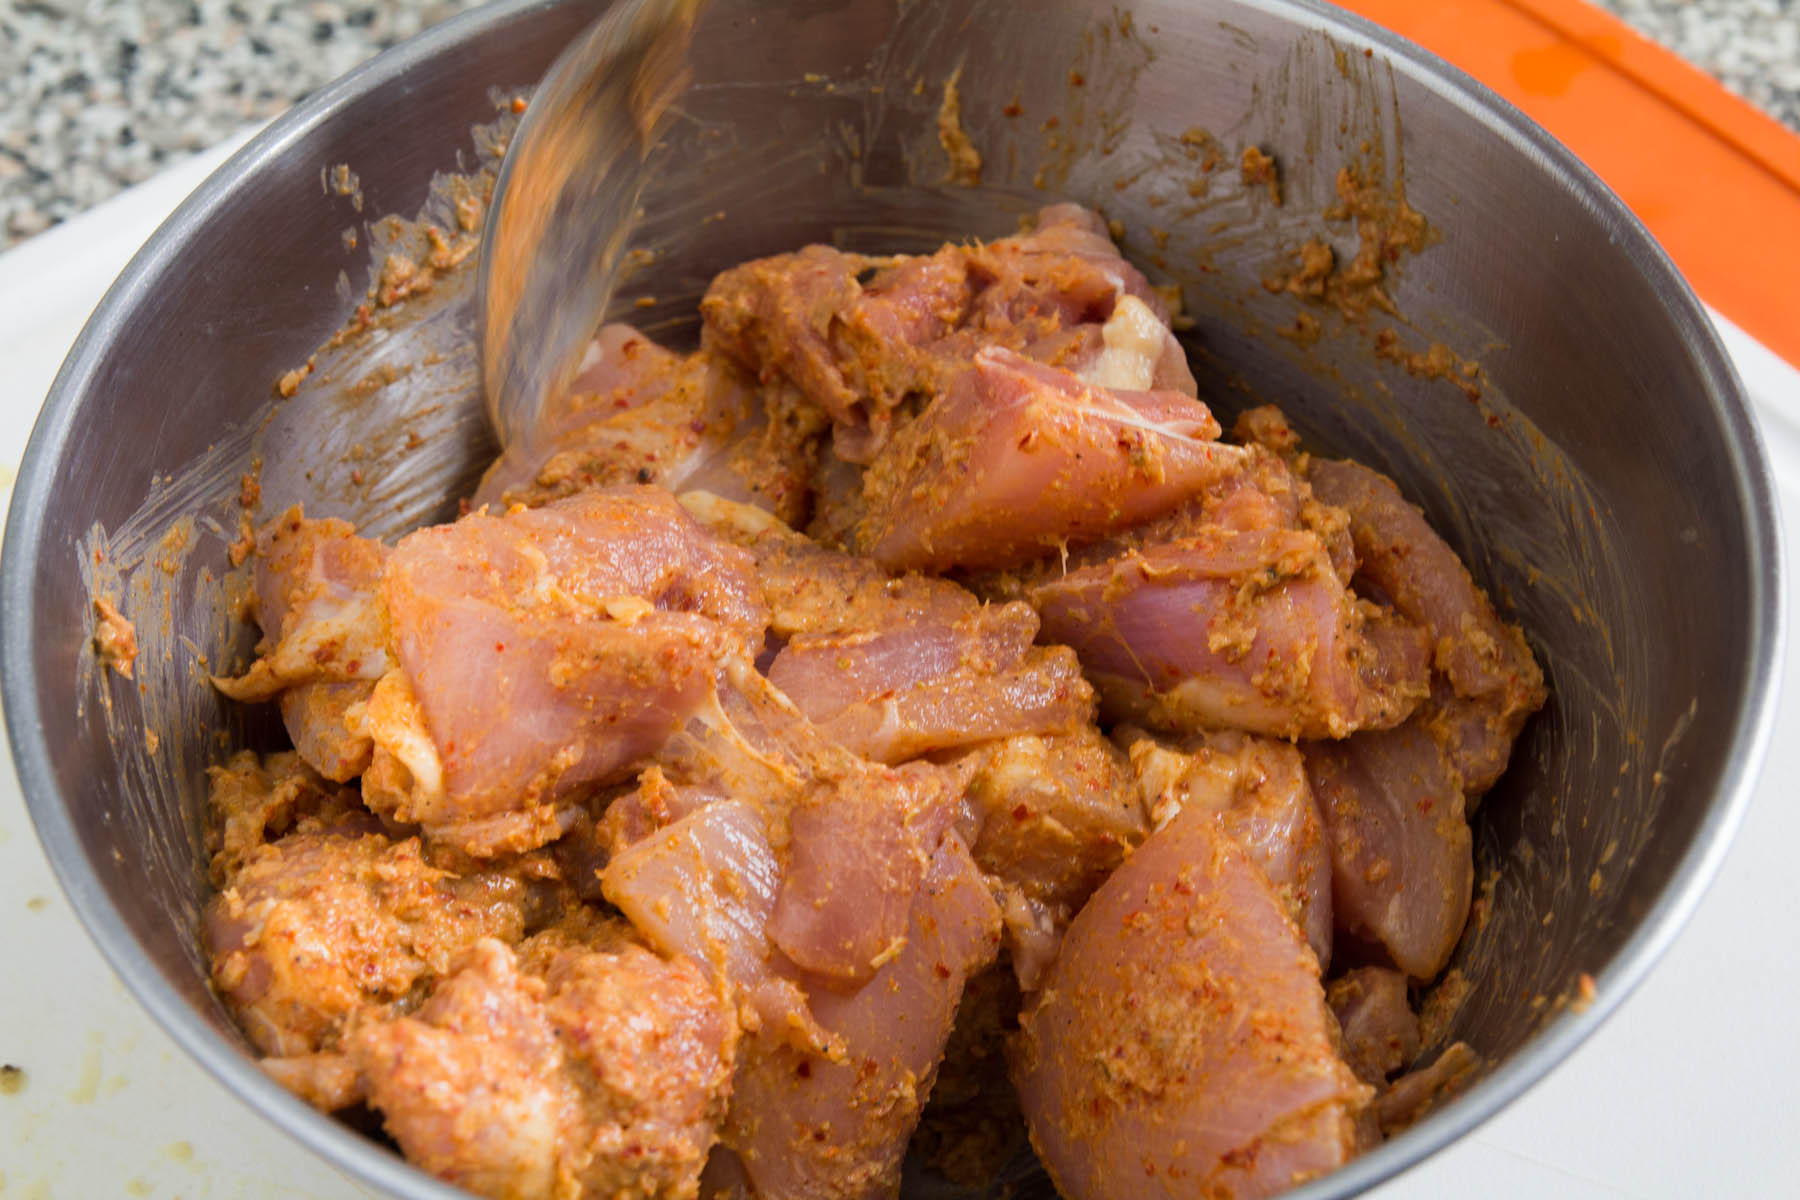
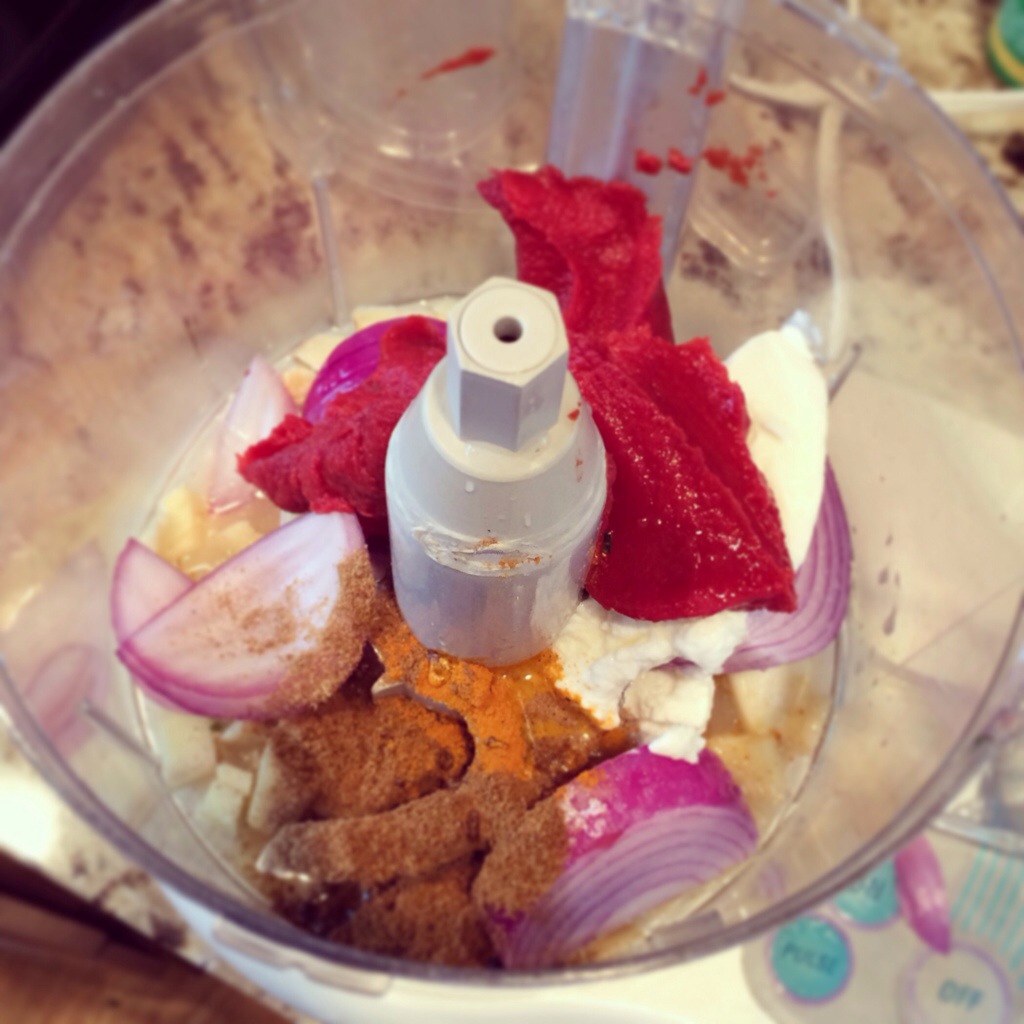
    Take a deep bowl and squeeze the half slice of lime into it,to this add salt that is sufficient for taste.Mix these well until the salt gets mixed in the lemon juice.Now take a leg piece add lemon juice to it and take some of it in the hand and do massage the chicken piece well.repeat this process to all the chicken pieces.As soon as this process is completed keep it in a refrigerate it for 20 to 30 minutes.Now take a mixie and add curd, garam masala, tomato sauce, ginger, garlic, one table spoon of salt, green chili, sliced onion and grind it until a smooth paste is formed.

    Ingredients are well mixed to form a smooth paste
    Ingredients are well mixed to form a smooth paste

    Step 3:

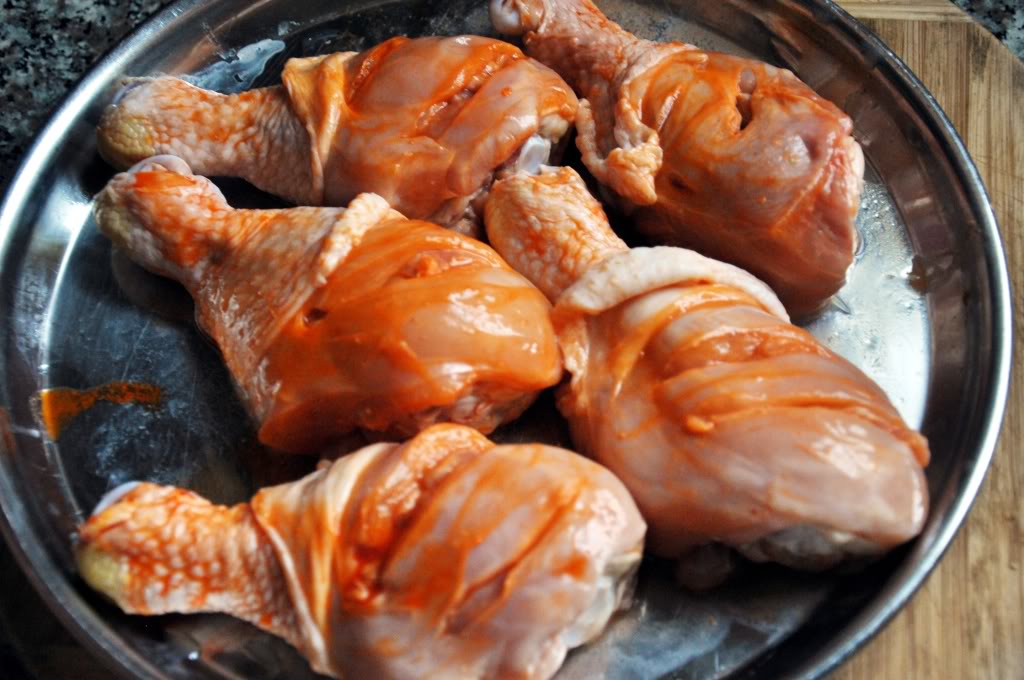
    After the paste is ready,now take the chicken pieces from the refrigerator into a bowl and mix them with lime, food color, few drops of water.Make sure each piece gets the mixture eventually.After this process is completed your chicken will look all red.Take the marinade in a large bowl and add each piece individually and massage the paste into the slits and on both sides and leave it in the bowl.After doing so, keep them back in the refrigerator for at least 8 hrs or one whole day.The chicken gets more taste a the marination time increases.

    Chicken Piecies must be marinade for atleast 8 hours
    Chicken Pieces must be marinade for at least 8 hours

    Step 4:

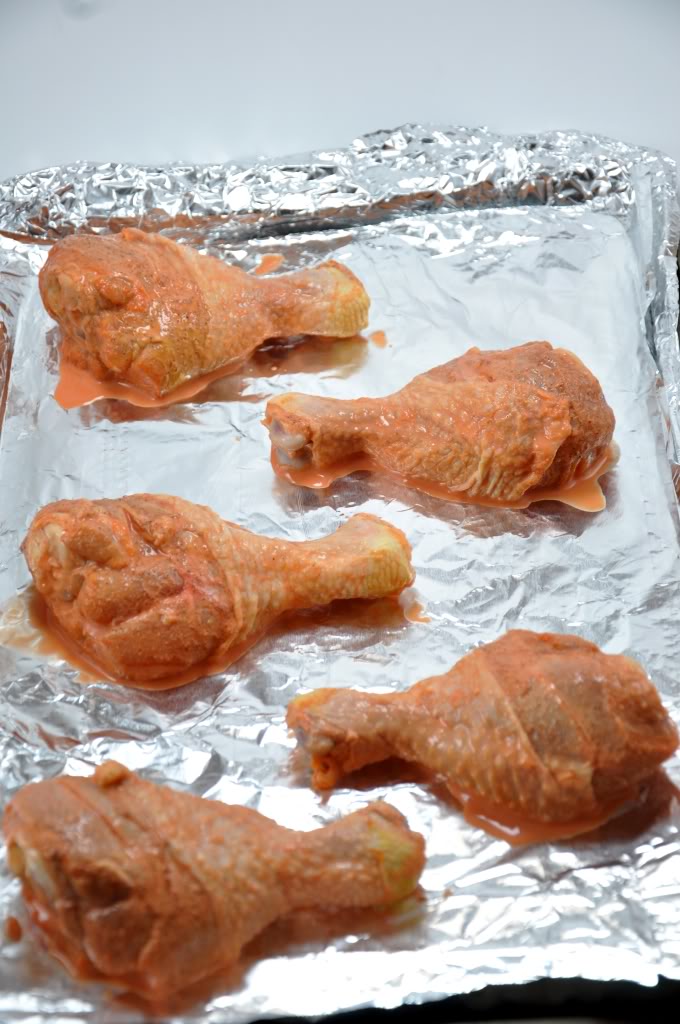
    On the next day after marination of chicken pieces get ready for making tandoori.At first clean up the oven and heat it alone for a very high temperature that is available in one’s oven.Now take a cookery and line it with the aluminum foils that we have taken earlier.As this process is going on take the marinade chicken from the refrigerator and shake it once so that the excess paste that get stuck to it will be removed.Now place it on a cookery sheet and wrap the tail of these chicken pieces with a cookery sheet.
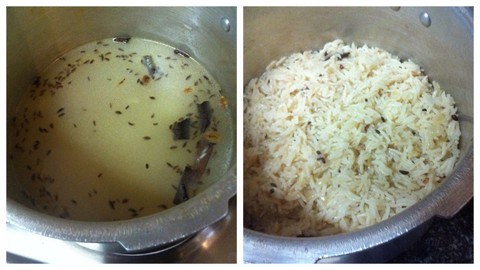
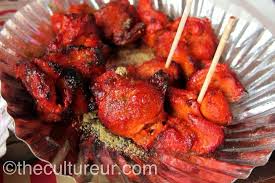
    Chicken tandoori preparation process
    Chicken tandoori preparation process

    Step 5:

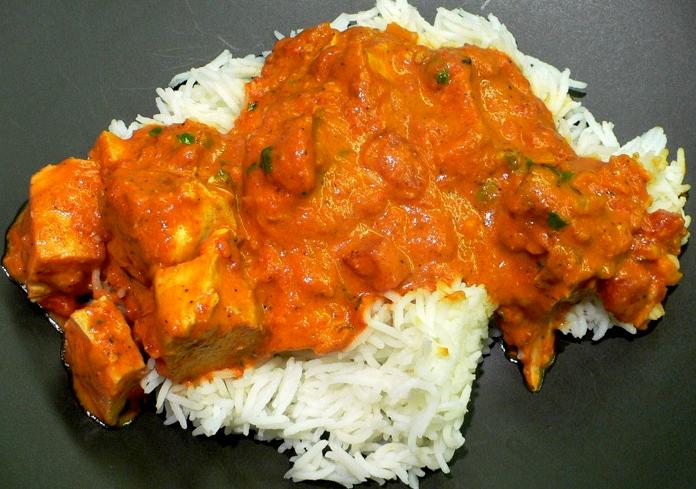
    Now place this pieces in a tray carefully in the middle of the oven.Allow them to get fried in the oven for about  15 minutes.After it gets cooked, slowly remove the tray by using oven mitts.Again add some marinade using a spoon ad please note that you should not touch them directly as it may hurt you.allow it to get cooked for about ten minutes.At this moment all the juice that is present in the chicken gets burnt and gets completely cooked because of the extreme temperature.Then take the tray out.That’s it very spicy and mouth watering chicken tandoori is ready and move it to a serving plate.

    Mouth watering chicken tandoori is ready
    Mouth watering chicken tandoori is ready


  • Chicken Manchow Soup

    Chicken Manchow Soup

    Soup is a form of liquid food that is mostly taken before lunch as a starter.It is made by using various ingredients vegetables,meat,corn,tomatoes,water also.These ingredients are boiled along with these items and the flavor or juice that comes out of it is extracted and served as a soup.Single bowl of soup makes our taste buds feel yummy and delicious.The word soup is originated from Sanskrit Su and Po which means good nutrition.This soup before lunch or dinner is more preferable and makes our diet with very low calories.This flavorful soup is very healthy and delicious with mild spices.We can also remove the fat content present in it by removing the layer formed on the soup by using a large spoon.It is better to choose a water based soup than a cream based soup as water based has low fat and calories compared to cream based soups.

    Many of the experts say that we eat soup rather than drinking it as we consider it as a part of meal. Soup is mostly taken by using a deep cut spoon as it is convenient and comfortable having in that way. We have many types of soups which are chunky, crispy, delicious, vegetables, meat, creamy and many more,each of these having involves different preparation process.

    Popular Chicken Manchow soup
    Popular Chicken Manchow soup

     History:

    According to history soup is also having a long history around 5000 BC. Soup is a formed by the combination of various ingredients in a large pot to originate nutritious, healthy, easily digestive item. This is a perfect choice for travelers, rich, poor, every one.The soup was first added to the menu in the restaurants during 18th century in Paris.In 19th century canned and dehydrated soups are fed to trail by cowboys and Soldiers. Later these soups are diet restricted by making it with low salt and high fiber.

    Ingredients:

    Veggies:

    1) Take 200 grams of finely chopped chicken ( just ignore this if you are going for a veg soup )

    2) Take finely chopped green chillies

    3) Take one table spoon finely chopped garlic

    4) Take 1/4 cup of cabbage pieces

    5) Take 1/4 cup of chopped carrot pieces

    6) Take 1/4 cup of red bell pepper

    7) Take 1/4 cup of chopped capsicum

    8)  Take two table spoon of finely chopped spring onion

     For the preparation of sauce:

    1) Take two table spoon of tomato puree

    2) Take one table spoon of red chilli sauce

    3) Take one table spoon of soy sauce

    4) Take one spoon of vinegar

    5) Take one table spoon of ground black pepper

    6) Take two cups of chicken stock

    7) Take two table spoons of canola oil

    8) Take salt that is suitable for one’s taste

    Ingredients that are required for making Manchow soup
    Ingredients that are required for making Manchow soup

    Preparation:

    Manchow soup is a popular soup in Indian Chinese cuisine.It is very easy to prepare and it gives a great hot and spicy taste to our taste buds.We can find it ease in many restaurants in their menu cards. Many of the people like to have this soup with Manchurian,but individually it also tastes good. The color of the soup is dark brown and is made out of various vegetables, spices, chicken( if not vegetarian consider this), corn flour, soy sauce, salt required amount, garlic, chilli peppers. All these combined to give a soft hot and spicy taste to the soup.

    Step 1:

    At first take a nonstick pan and heat it with two table spoons of oil at high flame.Now add garlic that we have taken, add half of the green chillies to the oil and saute them for about 30 seconds.Care should be taken that these garlic should not turn their color to brown.After this process now add finely chopped carrot and chicken pieces and saute them for about 2 to 3 minutes on a high flame.

    Chicken Manchaw Soup preparation process step one
    Chicken Manchaw Soup preparation process step one

    Step 2:

    As the cooking process of carrot and chicken are completed, now add cabbage, bell pepper, capsicum and saute this mixture for about one minute on a high flame.As this process is done now take a small bowl where we have to mix tomato puree, red chilli sauce, soy sauce, vinegar.After mixing these well pour this mixture into the wok by adding chicken stock and stir it completely so that all these recipe gets mixed with the vegetables and chicken pieces,but be careful while stirring as it may spill over.Let this mixture be cooked for two minutes on a high flame.

    Chicken Manchow Soup preparation process step 2
    Chicken Manchow Soup preparation process step 2

    Step 3:

    As the ingredients are well mixed to form a thick substance now add few spring onion pieces and ground black pepper that we have taken earlier and switch off the flame.That’s it the hot and spicy Chicken Manchow soup is prepared and we can take it to a serving bowl.It is advisable to take the soup when it is hot only so that we can enjoy each sip of delicious Chicken Manchow soup. The chicken pieces are soft and easily digestive.These pieces are enriched with the juice of all the ingredients and have a mouth watering taste.

    Delicious hot and spicy Chicken Manchow soup
    Delicious hot and spicy Chicken Manchow soup
  • Ghee rice recipe

    Ghee rice recipe

    The main food item in south India is rice,using this rice there are many recipes prepared depending on the locality and taste.One of the most popular rice made recipe is ghee rice which is made by many people instantly in their homes.Because of its easy making,less time taking process and most adorable taste many of the busy people prefer making this at their home.This process is so simple because of the usage of a pressure cooker,it reduces the cooking time and also reduces the complications and mess that no one would like during busy hours.This is one of the best one which is very easy to make and makes a very good lunch box recipe so that people with busy working hours can do it for their children and for them which saves their valuable time.

    Famous south Indian ghee rice recipe
    Famous south Indian ghee rice recipe

    Ghee is a classified form of butter that is firstly originated in India and spread to many other countries.It is commonly being used in many countries like Pakistan,Bangladesh,Nepal,Srilanka many other other countries.The name Ghee is originated from Sanskrit and depending on the regional languages its name is followed by their regional slang.It is prepared from the extract of a residue from milk called butter.Ghee is prepared by simmering butter and removing the residue aside.The main quality factor of Ghee depends on quality of butter and the duration of its boiling.

    Home made ghee
    Home made ghee

    This Ghee has wide range of applications.It are used widely in India in various dishes which adds a better flavor of taste to the food items.In making sweets they get enriched taste because of this.Many people mix in rice along with pickle to enjoy the taste of food.It has high fat content about 8 mg of cholesterol for one table spoon of Ghee.

    Ingredients:

       1) One cup of Basmati Rice 

       2) One cup of finely chopped Onion

    3) One small Cinnamon stick (which adds its flavor)

       4) Two to Three Cloves (lavangam)

       5) One Green Cardamom (Yaalakkaya)

    6) Half teaspoon Black Peppercorns (Miriyal podi)

    7) One small Bay Leaf (Biryani Aku)

    8) Four to Five Cashew Nuts 

    9) Three to Four Raisins (Endu Draksha)

    10) One teaspoon crushed Ginger Garlic

    11) One Green Chili Finely chopped

    12) One tablespoon Ghee (Clarified butter)

    13) Two cups of water

    14) salt required amount

    Ghee rice Ingredients required
    Ghee rice Ingredients required

    Procedure:

    We can find many versions of  Ghee rice around different parts of India.Different type of recipes involve different type of making process.In few types the rice is cooked in ghee with spices and some recipes call for seasoning the spices in ghee and adding the steamed rice like the fried rice.If we go for Andhra style of making we need only pepper powder and no other spice is used.This can be cooked by using egg or without egg depending on our requirement.The main taste for this Ghee rice comes from the flavor of pepper and curry leaves fried in ghee.

    Step 1:

    For the better taste we can go for Basmati rice for effective making of this ghee rice.At the first step we have to wash the rice grains thoroughly for about two to three minutes in mineral water to remove the excess starch and dust particles present in the rice.Now keep the rice in a bowl and pour fresh water up to one third of rice and leave it to soak them for 20 minutes.because of this washing we can also avoid sticking of rice grains while cooking process.After the completion of twenty minutes leave the soaked rice to get drained.

    Washing process of Basmati rice
    Washing process of Basmati rice

    Step 2:

    As the first step has completed then keep that drained rice aside, now pressure cooker on the stove and take two spoons of ghee in it.On the stove and heat this ghee until it melts and then add cinnamon, cloves, cardamom, black peppercorns and a piece of bay leaf.all these are stirred in that pressure cooker until their color changes to brown or gold color.Now take the chopped onion and they are stirred along with the ingredients until their color changes.

    Preparing Ghee rice and deep fry chopped onions
    Preparing Ghee rice and deep fry chopped onions

    Step 3:

    To this onion, cinnamon, cloves, cardamom, black peppercorns and a piece of bay leaf mixture that we have prepared add a cup of cashew nuts, raisins, crushed ginger garlic and chopped green chilies and mix them thoroughly by keeping the flame low for about one minute.Now at this stage add drained rice to the pressure cooker.Now add salt to taste and 2 cups of water.Mix them properly and close the lid.The cooking process must be done for at least two whistles.

    adding drained rice to it
    adding drained rice to it

    Step 4:

    After the whistles are out you have to turn off the flame and leave the pressure cooker aside without taking the lid out and leave it undisturbed so that the pressure in it come down naturally.for this process to go on it takes at least 5 to 8 minutes.Now you can open the lid and stir it carefully once to get mixed the cashew nuts and other ingredients.That’s it tasty and spicy ghee rice is ready to eat.Now take it to ta serving plate and we can add decorations to it by using carrot or tomato.

    Ghee rice in a serving plate
    Ghee rice in a serving plate


  • Delicious South Indian Chicken Tikka Masala

    Delicious South Indian Chicken Tikka Masala

    Chicken Tikka masala most of the people favorite dish and a delightful place in menu of every restaurant was first originated from a Indian restaurant in United kingdom.A person named Rahul Varma a street food expert in Delhi was the first person who is responsible for the origination of this mouth watering dish.A chef belong to Pakistan named Ali Ahmed Aslam invented chicken tikka masala by the thought of making something different from routine and he added a sauce made of yogurt,cream and spices.Actually the invention has gone through a small story.One day a bus driver during night off shift came to their restaurant and have ordered a chicken curry.As he observed that the chicken being dry he sent back the waiter to bring another one.At the time he wanted to try something new and he added some tomato soup into the curry with some chicken pieces.This was served to the bus driver then he astonishingly ate that with absolute love.After that incident has happened he also used to visit along with his friends came again and again,then itself they have included it in their menu.

    Chicken Tikka Masala Recipe
    Chicken Tikka Masala Recipe

    If you love to eat Indian food items then it is advisable to take a look at chicken tikka masala which is a most delicious and spicy item found in every Indian restaurant as a favorite item in their menu.This popular chicken dish with its creamy,aromatic tomato sauce originated in Delhi,India, in the middle of the last century.In India,the dish is famously known as chicken makhanwalla,here makhan in Hindi means butter,but in Britain,this dish was renamed chicken tikka masala they named it so because tikka refers to boneless and masala means spices.thus the name originated.

    Ingredients:

      1) 1 cup plain yogurt,mixed well till it comes to soft state
      2) 3 tablespoons of Ginger Garlic Paste this recipe can also prepared by taking ginger and clove mixed
      3) 1 teaspoon kosher salt
      4) 1/2 teaspoon freshly ground black pepper
      5) 1 pound boneless,skinless chicken thighs,poked with a fork,and cut into large bite sized chunks

    chicken tikka masala ingredients
    chicken tikka masala ingredients

    Sauce:

    1) 2 teaspoons olive oil

      2) 3 tablespoons butter
      3) 1/3 cup Ginger-Garlic Paste, recipe follows (or 6 cloves garlic and 2-inch thumb ginger minced)
      4) 2 serrano peppers, minced (seeds removed if you don’t want it spicy)
      5) 2 tablespoons tomato paste
      6) 1 teaspoon garam masala
      7) 2 teaspoons paprika
      8) 8 Roma tomatoes, diced
      9) 1 1/2 teaspoons kosher salt
      10)1 to 2 cups water
      11) Oil, for grilling
      12) 1 tablespoon dried fenugreek leaves (optional)
      13) 1/2 cup heavy cream
      14) Minced fresh cilantro, for garnish
      15) Cooked rice, naan, or crusty piece of bread, for serving
      16)Ginger-Garlic Paste:
      17) 1/2 cup cloves garlic, whole
      18) 1/2 cup fresh ginger, peeled, cut into 1/2-inch slices
      19) 1/4 cup canola oil

    Preparation:

    It just takes 45 minutes to prepare an outstanding Chicken tikka masala who desired to make it.It is fresh,healthy,cheaper,and tastier than anything at this time and cost.

    Step 1:

    For the process of Chicken tikka masala we have to first take the boneless chicken breast or thigh part which is most suitable for the preparation of this recipe.In the first step of preparation of Chicken tikka masala we have to take a large deep bowl where we can mix the spicy ingredients and the chopped chicken pieces.Now mix both of them well to form a soft mixture and leave it marinated for at least 30 minutes or keep it in the refrigerator undisturbed for overnight.

    Step 2:

    Once you are ready with the marinated topic then next step is to make curry out of it.Place the pan and heat it at medium flame and add olive oil and butter to it and stir it continuously so that the butter gets mixed with the olive oil.as the butter melts then add the Ginger Garlic Paste and serrano peppers.Mix them until the color of them changes and becomes brown or golden color around their edges.Now add some tomato paste to this ingredients and cook well for about 3 minutes until the tomato becomes darkened in color.For this mixture add few more things like garam masala,paprika and saute for about 1 minute to draw out their flavors.

    chicken marination
    chicken marination

    Step 3:

    To this ingredients and masala mixture add small pieces of chopped tomatoes,salt,and 1 cup water.They are heated heated to the required level until water boils then lower the flame.Now cook this entire recipe for about 20 minutes.Here the amount of water that we have to take depends on the liquid that comes from tomatoes.

    Preparation of chicken tikka masala
    Preparation of chicken tikka masala

    Step 4:

               as the process is going on heat up the grill until it becomes a little hot.When it became nice and hot lightly have a brush for it with the oil.The chicken is taken and is placed on the heated grill,shaking off some of the excess marinade.The chicken is cooked a little on this grill but there is no need to worry the remaining gets cooked in the sauce process.

    step 5:

    Heat a skillet till it becomes quite hot then add half tablespoon of peanut oil.The entire cooking process can be done in two things.The first involves cooking of chicken breasts by turning them repeatedly for about 6 to 8 minutes until they become brown in color.Now after they are toasted move the pieces of chicken to a bowl and then clean the griddle or skillet,then cook the remaining chicken by adding the remaining half tablespoon peanut oil.As all of the chicken is cooked now add this cooked pieces to sauce and continue to gently stir it.this process must be done occasionally for 5 minutes.The final stage is to remove the pan from the heat and stir in the black pepper,chopped cilantro and season with salt.

    Step 6:

    Finally our Chicken tikka masala recipe is prepared and it is then transferred to a serving dish and garnish with additional items according to the interest.They are best to be Served with naan,and is also desired with Basmati rice.

    Chicken_Tikka_Masala_served with rice
    Chicken_Tikka_Masala_served with rice
  • Rava Khichdi a simple and comfort food

    Rava Khichdi a simple and comfort food

    Khichdi is one of the India’s best comfort food available.In India mostly south India people eat things made out of rice as it is their abundant available product.There are many items made out of rice out of them one the most comfort and easily prepared food item is Khichdi.It is done at the time of breakfast or evenings mostly.Few people who are busy with their life make this recipe which consumes their time and has a great taste.The dish is mainly inspired from the Anglo Indian dish kedgeree.It is also said that it is a inspiration for the popular Egyptian dish Kushari.Khichdi was popular at the time of Mughals mainly Jahangir.

    Rava Khichdi recipe
    Rava Khichdi recipe


    The word khichdi is originated from the Sanskrit word Khicca which means a combination of rice and pulses based dish.This Indian comfort food is considered as a light, nutritious meal, healthy food with exact amount of spices.This can be prepared and served to infants, sick people, and for the people which are really physically weak conditions.Most the people who follows Ayurveda appreciate it.We can see this Khichdi is a daily meal for some people in Gujarat and they make several varieties of it.

    At first Mughals started this dish named khichdi and they made it rich by adding strong spices, dry fruits and nuts.The Britishers during their time modified this dish by adding fish and eggs to the ingredients.During their time they named this Khichdi as Kedgeree,which became a popular dish during their ruling.They used to have it as their breakfast and later it has spread to their country also.

    Ingredients:

    1) One cup of Rava

    2) Three cups of water

    3)  Two table spoons of Oil

    4) One to two table spoon of Ghee

    5) 1/4 table spoon of Mustard seeds

    6) Take two Green chilli

    7) 1/4 table spoon of Channa dal

    8) 1/4 table spoon of Urad dal

    9) Salt required for taste

    10) Chopped onion (long pieces)

    11) One Tomato

    12) Half Chopped carrot

    13) Green Peas few

    14) Turmeric powder 1/4 tsp

    15) Curry leaves few

    16) Cashew nuts   few (optional)

    Ingredients for the preparation of rava Khichdi
    Ingredients for the preparation of rava Khichdi

    Preparation:

    Rava Khichidi the mouth watering south Indian dish mostly prepared for breakfast.But few south Indians prepare it irrelevant of the time during breakfast,lunch,evening snacks time,dinner.It can be prepared for any meal of the day.Few people take it along with coffee by which they enjoy its taste.Generally in most of the south Indian weddings they serve this rava kichadi with sambar and chutney as an accompaniment dish.The taste changes for every place and it depends on they way of preparation.Some got talent in making a perfect rava Khichdi and some are not good in making it.Try learning how to make a perfect khichdi to enjoy its complete taste.This is generally prepared by using Ghee but if we use a mixture of oil and ghee it reduces the excess calories.One can try to do this for a small change instead of making usual vegetable rava upma.

    Step 1:

    At first we have to roast the rava in a pan by taking one table spoon of ghee and make a deep fry until you get a nice aroma of roasted rava.We can skip this step if you have bought roasted rava from the shop.Chop all the vegetables finely and keep them aside for further process.Take a kadai and heat the Ghee and oil mixture and stir it for two minutes then add bengal gram to it and fry them till their color changes slightly.Now add mustard seeds,urad dal and curry leaves to it and saute them well until they turn their color to brown.Now add finely chopped onions, slit chillies and ginger.Make a deep fry of all these ingredients to turn their color.Now add all the finely chopped vegetables and turmeric powder.

    Rava khichdi preparation process
    Rava khichdi preparation process

    Step 2:

    This vegetables are cooked with the ingredients and saute them for two to three minutes.Make sure the vegetables are not over cooked as they have to be cooked along with rava again so let them be half cooked.Now to this mixture add three cups of water and add salt that is sufficient for taste as it different from one to one.While cooking we can check the taste as the salt is sufficient or not depending on that we have to add more water or salt.But if the water is quite salty don’t add water just leave it as we add the rava it will be perfect.

    Rava khichdi making-adding three cups of water and sauting
    Rava khichdi making-adding three cups of water and saute

    Step 3:

                                   The cooking process is continued until the water bubbles comes then reduce the flame and now we have to add rava slowly to this boiling water with one hand and care should be taken that the boiling water should not fall on hand.While adding rava to the boiling water stir it continuously with the other hand to avoid formation of lumps.This stirring is done till it forms a semi solid state then add a table spoon of ghee on the top of it and stir it completely so that the ghee gets mixed in it.Do this process till the water completely gets absorbed and then close the lid and cook it in a low flame then turn off the flame.That’s it we have preparead most delicious south Indian recipe rava khichdi.Move it to a serving plate and enjoy the taste.we can have it with raita as a great combination. 

    Rava-Khichidi-with raita
    Rava-Khichidi-with raita
  • Hyderabad Chicken Dum Biryani

    Hyderabad Chicken Dum Biryani

    Hyderabad Chicken Dum Biryani has a lot of specialty and particularly it is famous all over the globe. The name Biryani is  originated from a Persian word Beryan which refers to frying or roasting. Biryani is made out of fine basmati rice. The word Biryani itself enhances the feeling of joy and comfort. No one in the world want to ignore biryani, especially Hyderabad dum biryani has much more craze all over the world. There are many different types and versions of regional biryani recipes but Hyderabadi Dum Biryani is one of the most popular of all.

    Hyderabad Chicken Dum Biryani
    Hyderabad Chicken Dum Biryani

    At first the Biryani was originated in Persia and later it came in existence in India because of the Iranian travellers and their people. This mouth watering dish not only famous in various parts of the globe, daily few millions of people across the globe have this as a  favourite dish in their meal. Few people are even addicted and cant even live without having this dish daily. This popular Hyderabad dum biryani is served at all marriages, feasts, parties, occasions etc., whatever may be the occasions in India this plays a important role in all of the dishes. We can find many varieties in Biryani depending on the flavor and recipe there are nearly 49 varieties of Biryanis which includes Biryani made of chicken, prawn, goat, fish, quail, shrimp, deer and hare. Hyderabad Dum Biryani is famously named as “Kachi Akhni” Biryani as both of the marinated meat and basmati rice are cooked together which give a nice flavour of taste.

    Ingredients required:

    1) Chicken with bone : 3/4 kg  (take large pieces)

    2)Onions : 2 (cut them neatly length wise and make a deep fry)

    3)Oil : 1/4 cup

    4)Ghee : 2 tablespoon

    5)Basmati Rice : 3 cups (washed and soaked for about 20 minutes)

    6)Coriander Leaves : 1/4 cup

    7)Mint Leaves : 1/4 cup

    8)Bay leaves : 1

    9)Cloves : 2

    10)shah jeera or black cumin : 2 tsp

    11)saffron : 1 tsp

    Marinade Mix :

       1)Green Chilies : 5-6 (according to the spicy level and finely chopped)

       2)Ginger & garlic Paste : 2 tablespoon

       3)Turmeric powder : 1/4 tablespoon

       4)Coriander Powder : 1 tablespoon

       5)Salt : taken upon the required taste

       6)Yogurt : 1/2 cup

       7)Shah jeera or Black cumin seeds : 2 tablespoon

       8)Red chili powder : 2 tablespoon

       9)Lime juice : 2 tablespoon

    To Grind :

       1)Coriander Leaves :  1/4 cup (chopped finely)

       2)Mint Leaves :1/2 cup (Chopped Finely )

       3)Whole Black Pepper/Peppercorns : 7-8

       4)Bay leaves : 2

       5)Cloves : 3

       6)Cinnamon Sticks : 1

       7)Green cardamom : 3

    Ingridents required for Biryani preparation
    Ingredients required for Biryani preparation

    Preparation:

    The main ingredient which is most important for the preparation of Biryani is a good quality Basmati rice which is crucial for making best biryani. Apart from this rice other main and important one are cardamom, cloves, cinnamon, bay leaves, fresh coriander leaves, ginger garlic paste, fried brown onions and saffron are added. The best way of having a biryani combination is with dahi chutney or Raita which can be made from a mixture of curd & onions.

    Step 1:

    The first to start preparing Hyderabad Dum Biryani is that we have to marinate the chicken that we have taken which are cut into big pieces. In this step take the chicken pieces and add ginger garlic paste, fresh mint leaves, coriander leaves,chopped green chilies, pepper corns, black cumin or cumin seeds, chili powder, turmeric powder, coriander powder, salt, whole garam masala which consists of all of these following i.e., cardamom, clove, cinnamon, bay leaves, mace. Along with these masala items take few fried onions that are cut long, curd and oil and now mix all the ingredients well for few minutes until all the spices are added to each piece.

    marinate_chicken
    marinate_chicken

    Step 2:

              Take another pan and add water, salt and rice and they are made to boil such that the rice is half cooked and the flaming if offed then and keep this aside. Now take a large bottomed biryani bowl, to that add these marinated chicken pieces, they are spread linearly at the bottom of this bowl. Above this marinate chicken rice is arranged in form of layers then add mint leaves, fried onion, saffron colour used for the biryani colour and close the lid tight and make it cook for about 30 minutes over a small flame.

    Half cooked rice for dum biryani preparation
    Half cooked rice for dum biryani preparation

    Step 3:

                            The lid of the Biryani preparation bowl is covered with midha roll or chapati roll so that we can manage to see that the heat may not escape. After thirty minutes of cooking the rice gets cooked with the marinated chicken juice and it takes the flavour of chicken. Once done switch off and let it be rest undisturbed for another 15 minutes and do not open the lid and make it closed to avoid leakages this particular stage is called dum where the pressure within the vessel develops flavours.

    Dum process going on after cooking is completed let it be undisturbed closed tight
    Dum process going on after cooking is completed let it be undisturbed closed tight

    Step 4:

                     After the time of 15 minutes is completed let the lid be opened then you will notice a fine bursting flavors of the spices gushing through the steam. The streams of flavors gushes and the rice looks amazing with the soft finishing, fried onions give it a great look.It’s truly a gorgeous dish with the rich, creamy, golden sauce with the perfectly browned chicken pieces.The piece gets easily chewed which is well cooked and it gives a melted feeling with the contrasting tastes.

    Hyderabad Chicken Dum Biryani final look
    Hyderabad Chicken Dum Biryani final look

    It can be served with raita to have a better taste.Raita can be prepared by taking slices of onion and cut them into small pieces add curd,salt,mint leaves and mix them so that it gives a better taste with this wonderful Hyderabad Chicken Dum Biryani.

    Raita
    Raita