Category: Recipes

  • Cupcakes

    Cupcakes

    Cupcakes are small sized cakes suitable to be served to one person. These cakes are baked in small aluminum cups or thin paper and decorated similar to how normal sized cakes are decorated. Therefore one can see cupcakes as a miniature form of the normal sized cakes. In old times cakes used to me made in pottery cups or coffee mugs until the discovery of muffin tins which was a metal pan with or without a non sticky surface and had depressions or cups made in them. The number of such depressions ranged between 6 to 12 depending upon the length of the pan and the size of these depressions. Other than metal, such pans were made using materials such as silicone and stoneware. If we notice a cupcake, we find that the lower portion of the cake is covered with a thin sheet of paper. These are patty cases or cupcake liners which are used for bakes these cakes. This paper or cupcake liners are made up of paper or very thin aluminum foil or silicone rubber. These liners are placed in the packets of the muffin tin wherein the batter is put before it goes for baking. The main purpose or use of such liners is that they keep the cupcakes moist and makes it easy to remove the cakes from the tin once baking is over. It also saves time and efforts which would be otherwise put in cleaning the tin after baking is over. For people who could not afford a muffin tin, aluminum foils or silicone liners became handy can they could balance on their own. The paper used here are not the normal paper we find but are thicker yet lighter in nature. Some bakers use 2-3 paper liners joint together to make its stability similar to a single aluminum foil. Such liners also like muffin tin come in different shapes and sizes depending upon the size of the cupcake to be baked.

    cpcake 1

      According to food historians, cupcakes originated in the United States around the 19th century. The creation of cupcakes is considered to be a revolution in the field of baking due to the amount of time it saves in the kitchen however the origin of the name is still unknown. Historians have come up with two sets of theory which details out how the name could have come into existence. According to one theory the name “cupcakes” was devised from the fact that these cakes were made in cups or coffee mugs and the second theory states that the name was introduced because the ingredients used to make this cake was measured in cups like 1 cup of butter, 3 cups of flour etc. However nobody knows which of these theories explains the truth.

    cupcake 1

    “Sprinkles cupcakes” established in Beverly Hills is considered to be the first cupcake bakery to be started by two investment bankers who had started this business at the time when the market of cakes and bakery products was falling. Though a very risky venture, the two partners believed that the survival of the industry now rested on their shoulders. The partners finally felt relieved that their decision to run the business was correct when the first set of cakes which was produced was sold out in no time and they had to bake more in order to meet the demand for the day. Around 2500 cakes were sold that very day and this was the start of cupcake fever. Cupcakes always proved convenient when compared to the normal sized cakes because they took less time to bake and secondly because of the use of muffin tins, the base of these cakes also did not burn. Since its creation they have been a boom in the culinary world with dozens of bakeries, cookbooks, blogs specially dedicated to them. The market for cupcakes saw a 52% increase in sales during the year 2010-2011 with market speculators predicting a rise in this percent in the future.

    cupcake 3

    Cupcakes are easy to make and can be made at home as well on special occasions such a parties and family gatherings. With different recipes available to us, we have so much to choose from depending upon our taste and preferences.

    Since chocolate is a favourite of many the recipe for a dark chocolate cupcake is given below which I would say is worth a try

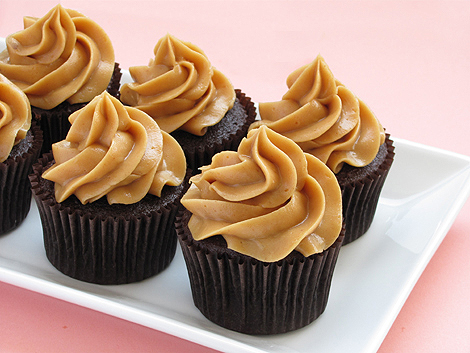
    Dark Chocolate Cupcake

    cup 5

    Directions:

    • Preheat the oven to about 350F and adjust the rack to the lower middle position in the oven.
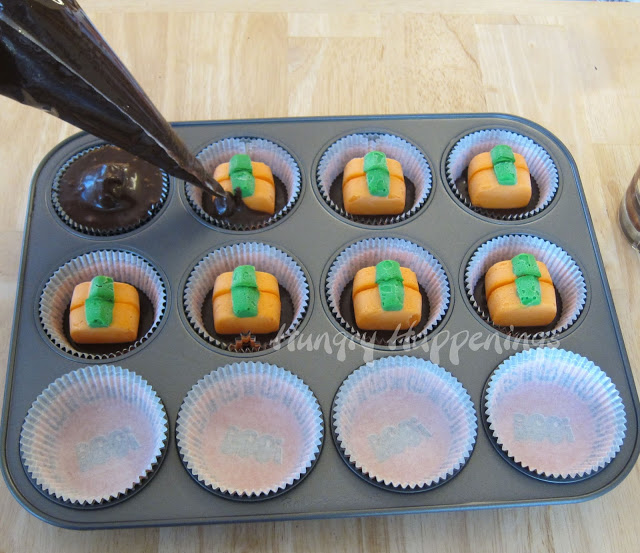
    • Take a muffin pan and line it with the baking cups and keep it aside.
    • Now in a bowl add butter cocoa and chocolate and place it on a saucepan filled with water and heat until the chocolate and the butter starts to melt. Once the melting starts mix them both till they combine with each other nicely. Then keep it aside for cooling.
    • Now in a medium sized bowl add flour, baking soda and baking powder and in another bowl add eggs, sugar, vanilla and salt and mix well.
    • Now add everything together and mix well till they combine to become thick and homogeneous in nature.
    • Divide the batter evenly inside the muffin cups and place them inside the oven. Baking takes about 18-20 minutes after which the cakes are ready to come out.
    • Once out keep them aside for cooling
    • Now in a separate bowl add peanut butter, sugar, vanilla and salt and mix well till they become creamy. Then add cream to the mix and continue to stir till we get a light and smooth batter.
    • By the time this creamy batter is made the cakes would have cooled down. Now make small holes on the cupcakes and fill them with this peanut butter frosting

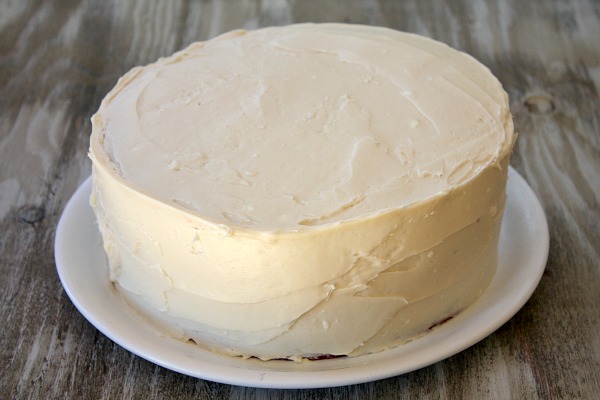
    Your dark chocolate cupcakes is ready to be served

     The popularity of this sweet dish has increased so much that according to Google, cupcake recipes are the most searched recipes in the world. So go forward and enjoy your sweet treat in the cup whether you are a child or an adult.

  • Pulaos

    Pulaos

    Rice does to a meal, what ornaments do to a woman! An ordinary meal turns into a treat if a little imagination is used in preparation. Rice can be used to prepare a plethora of dishes – biryanis, pulaos, tahirees, stir fried rice and so on.

    Pulaos are famous Indian rice dish of Persian origin. It is basically rice sautéed in a little oil or ghee and then cooked along with vegetables. Good quality basmati rice along with Indian herbs and spices are mandatory for this preparation. The rules remains the same; 1 cup of uncooked rice = 3 cups of cooked rice. Also, before cooking, rice must be soaked atleast 30 mins prior to cooking. This not only reduces time for cooking but also ensures that the rice does not stick after it is cooked. Once the pan is covered, cook on very low flame to ensure even cooking

    Enough with the rules. Let’s get to the fun part. Some famous and healthy pulao recipes are as these given below.

    I. Gobi Matar Paneer Pulao / Cauliflower Pea Cottage Cheese Pulao                Serves 4

    1

    This variety of rice combines the taste and flavours of three nutritious ingredients with a perfect blend of spices. It is light on the stomach and fine to taste. It can be served with raita or eaten as it is

    Ingredients

    Basmati rice –   1 cup

    Onion –                 1 sliced finely

    Oil –                        2 tbsp

    Bay leaf –              1 leaf

    Ginger –                1/2″ sliced into juliens

    Cloves –                2

    Cauliflower –       1 cup medium sized florets

    Shelled peas –      1 cup

    Paneer –                 1 cup

    Chilli flakes –        1/4 tsp

    Garam masala –   1/2 tsp

    Salt –                         1 1/2 tsp

    Procedure

    • In a heavy bottomed pan, fry the cauliflower till golden brown. Remove from oil and soak the excess oil on tissue sheets. Repeat the procedure for the paneer. After frying, soak the paneer in hot salted water to make them soft.
    • In the same oil, add the whole spices and onions and fry till golden brown.
    • At this stage, add the vegetables and stir lightly. Drain the rice and add to the pan. Stir the rice gently. With 1 cup rice, add 2 cups of water
    • Add the powdered spices and boil the mixture.
    • On boiling, cover the pan and continue cooking on very low heat for 12-13 mins until the water is completely absorbed and the rice is cooked to perfection.

    II. Wadi and Matar Pulao / Pulse rolls and Pea Pulao                                          Serves 4

    2

    Urad or any regular dal wadi is used extensively in Indian cookery. These can be innovatively used even in your regular pulaos. Not only does it add to the nutrition in food, but it also makes the dish look truly unique

    Ingredients

    Basmati rice – 1 cup

    Oil –                     1 sliced finely

    Bayleaf –            1 leaf

    Ginger –              1/2″ sliced into juliens

    Garlic –                2 cloves

    Cloves –               2

    Wadi –                   3/4 cup

    Shelled peas –    1 cup

    Cumin seeds –    1 tsp

    Brown Cardamom – 2

    Salt –                     1 1/2 tsp

    Procedure

    • In a cooker, add I tbsp oil and fry the wadis till golden brown. Remove from oil and soak the excess oil on tissue sheets.
    • Add a cup of water and pressure cook for 2-3 mins.
    • In a heavy bottomed pan, add oil, the whole spices, ginger and garlic and fry till golden brown.
    • At this stage, add the wadis and peas and stir lightly. Drain the rice and add to the pan. Mix gently. For 1 cup rice, add 2 cups of water left after cooking the wadis
    • Boil the mixture.
    • Cover the pan and cook on very low heat for 8-10 mins until the water is completely absorbed and the rice is cooked to perfection.

    III. Kashmiri Pulao                                                                                                         Serves 4

    3

    Faithful to its name, the dish combines the colours and flavours of the majestic and beautiful state of Kashmir. Enriched with rare and extravagant spices and fruits, this dish is both light on the palette as well as great to taste.

    Ingredients

    Basmati rice –    1 cup

    Onion –   1 sliced finely

    Oil –  2 tsp

    Bayleaf – 1 leaf

    Cinnamon –  1 stick

    Cloves –     2

    Green cardamom –  2-3

    Saffron/ Kesar – few strands

    Tinned fruit –     1 cup

    Salt –     1 1/2 tsp

    Procedure

    • In a heavy bottomed pan, add oil, add the whole spices and onions and fry till golden brown.
    • At this stage, drain the rice and add to the pan. Mix gently and fry for a while. For 1 cup rice, add 2 cups of water
    • Boil the mixture.
    • On boiling, cover the pan and continue cooking on very low heat until the water is completely absorbed and the rice is cooked to perfection. Add soaked saffron
    • Drain the tinned fruit and mix with the cooked rice using a fork gently.

     IV. Tamatar Kasooori Pulao / Tomato Fenugreek Pulao                                Serves 4

    4

    Fenugreek is much used in Indian cookery, both the seeds as well as the leaves. But the dried version is rarely used in pulaos. It is a great dish to try out for the health conscious and for people suffering from lifestyle diseases like diabetes.

    Ingredients

    Basmati rice –   1 cup

    Oil –     2 tbsp

    Cumin seeds –   1/2 tsp

    Kasoori Methi / Dried Fenugreek Leaves – 2 tsp

    Tomatoes – 1 cup

    Salt – 1 1/2 tsp

    Procedure

    • In a heavy bottomed pan, add oil, add the whole spices and onions and fry till golden brown.
    • At this stage, drain the rice and add to the pan. Mix gently and fry for a while. For 1 cup rice, add 2 cups of water
    • Boil the mixture.
    • On boiling, cover the pan and continue cooking on very low heat until the water is completely absorbed and the rice is cooked to perfection.
    • Drain the tinned fruit and mix with the cooked rice using a fork gently. 


    V. Garden of Five Senses                                                                                               Serves 4

    5

    As the name suggests, this recipe is sure to ignite all five human senses. Owing to its colour, it provides interest to the eyes; the magical aroma is sure to arouse the sense of smell; the taste is sure heavenly; the crackling of spices and aromatic oils from the masalas are music to the ears thereby arousing the sense of hearing and finally, its texture is so smooth that its sure to activate the sense of touch and feel of every single grain of rice

    Ingredients

    Basmati rice –    1 cup

    Spring Onion –    4-5 sliced finely (keep the greens separately)

    Oil –        2 tbsp

    Bayleaf –   1 leaf

    Ginger – 1/2″ sliced into juliens

    Garlic –   2 cloves

    Cauliflower –   1 cup

    Shelled peas –   1 cup

    Bread slice – 1 slice cut into small squares

    Pomegranate –  3/4 cup

    Garam masala –  1 tsp

    Salt –   1 1/2 tsp

    Baby Corn – 1/2 cup

    Capsicum – 1 cup

     Procedure

    • Pressure cook the baby corn along with one cup water and salt for 5-7 mins.
    • In a heavy bottomed pan, add oil and deep fry separately, the bread pieces, cauliflower florets, and paneer cubes till golden brown. Remove on frying and keep in absorbent sheets to soak excess oil
    • In the same pan, add the whole spices and stir for a while. Add the onions, ginger, garlic and fry till golden brown. Reduce the flame and add the powdered spices and salt.
    • Add the drained corn, capsicum, peas, cauliflower and paneer pieces and mix gently.
    • At this stage, drain the rice and add to the pan. Mix gently and fry for a while. For 1 cup rice, add 2 cups of water
    • Boil the mixture.
    • On boiling, cover the pan and continue cooking on very low heat until the water is completely absorbed and the rice is cooked to perfection.
  • Ghee rice recipe

    Ghee rice recipe

    The main food item in south India is rice,using this rice there are many recipes prepared depending on the locality and taste.One of the most popular rice made recipe is ghee rice which is made by many people instantly in their homes.Because of its easy making,less time taking process and most adorable taste many of the busy people prefer making this at their home.This process is so simple because of the usage of a pressure cooker,it reduces the cooking time and also reduces the complications and mess that no one would like during busy hours.This is one of the best one which is very easy to make and makes a very good lunch box recipe so that people with busy working hours can do it for their children and for them which saves their valuable time.

    Famous south Indian ghee rice recipe
    Famous south Indian ghee rice recipe

    Ghee is a classified form of butter that is firstly originated in India and spread to many other countries.It is commonly being used in many countries like Pakistan,Bangladesh,Nepal,Srilanka many other other countries.The name Ghee is originated from Sanskrit and depending on the regional languages its name is followed by their regional slang.It is prepared from the extract of a residue from milk called butter.Ghee is prepared by simmering butter and removing the residue aside.The main quality factor of Ghee depends on quality of butter and the duration of its boiling.

    Home made ghee
    Home made ghee

    This Ghee has wide range of applications.It are used widely in India in various dishes which adds a better flavor of taste to the food items.In making sweets they get enriched taste because of this.Many people mix in rice along with pickle to enjoy the taste of food.It has high fat content about 8 mg of cholesterol for one table spoon of Ghee.

    Ingredients:

       1) One cup of Basmati Rice 

       2) One cup of finely chopped Onion

    3) One small Cinnamon stick (which adds its flavor)

       4) Two to Three Cloves (lavangam)

       5) One Green Cardamom (Yaalakkaya)

    6) Half teaspoon Black Peppercorns (Miriyal podi)

    7) One small Bay Leaf (Biryani Aku)

    8) Four to Five Cashew Nuts 

    9) Three to Four Raisins (Endu Draksha)

    10) One teaspoon crushed Ginger Garlic

    11) One Green Chili Finely chopped

    12) One tablespoon Ghee (Clarified butter)

    13) Two cups of water

    14) salt required amount

    Ghee rice Ingredients required
    Ghee rice Ingredients required

    Procedure:

    We can find many versions of  Ghee rice around different parts of India.Different type of recipes involve different type of making process.In few types the rice is cooked in ghee with spices and some recipes call for seasoning the spices in ghee and adding the steamed rice like the fried rice.If we go for Andhra style of making we need only pepper powder and no other spice is used.This can be cooked by using egg or without egg depending on our requirement.The main taste for this Ghee rice comes from the flavor of pepper and curry leaves fried in ghee.

    Step 1:

    For the better taste we can go for Basmati rice for effective making of this ghee rice.At the first step we have to wash the rice grains thoroughly for about two to three minutes in mineral water to remove the excess starch and dust particles present in the rice.Now keep the rice in a bowl and pour fresh water up to one third of rice and leave it to soak them for 20 minutes.because of this washing we can also avoid sticking of rice grains while cooking process.After the completion of twenty minutes leave the soaked rice to get drained.

    Washing process of Basmati rice
    Washing process of Basmati rice

    Step 2:

    As the first step has completed then keep that drained rice aside, now pressure cooker on the stove and take two spoons of ghee in it.On the stove and heat this ghee until it melts and then add cinnamon, cloves, cardamom, black peppercorns and a piece of bay leaf.all these are stirred in that pressure cooker until their color changes to brown or gold color.Now take the chopped onion and they are stirred along with the ingredients until their color changes.

    Preparing Ghee rice and deep fry chopped onions
    Preparing Ghee rice and deep fry chopped onions

    Step 3:

    To this onion, cinnamon, cloves, cardamom, black peppercorns and a piece of bay leaf mixture that we have prepared add a cup of cashew nuts, raisins, crushed ginger garlic and chopped green chilies and mix them thoroughly by keeping the flame low for about one minute.Now at this stage add drained rice to the pressure cooker.Now add salt to taste and 2 cups of water.Mix them properly and close the lid.The cooking process must be done for at least two whistles.

    adding drained rice to it
    adding drained rice to it

    Step 4:

    After the whistles are out you have to turn off the flame and leave the pressure cooker aside without taking the lid out and leave it undisturbed so that the pressure in it come down naturally.for this process to go on it takes at least 5 to 8 minutes.Now you can open the lid and stir it carefully once to get mixed the cashew nuts and other ingredients.That’s it tasty and spicy ghee rice is ready to eat.Now take it to ta serving plate and we can add decorations to it by using carrot or tomato.

    Ghee rice in a serving plate
    Ghee rice in a serving plate


  • Delicious South Indian Chicken Tikka Masala

    Delicious South Indian Chicken Tikka Masala

    Chicken Tikka masala most of the people favorite dish and a delightful place in menu of every restaurant was first originated from a Indian restaurant in United kingdom.A person named Rahul Varma a street food expert in Delhi was the first person who is responsible for the origination of this mouth watering dish.A chef belong to Pakistan named Ali Ahmed Aslam invented chicken tikka masala by the thought of making something different from routine and he added a sauce made of yogurt,cream and spices.Actually the invention has gone through a small story.One day a bus driver during night off shift came to their restaurant and have ordered a chicken curry.As he observed that the chicken being dry he sent back the waiter to bring another one.At the time he wanted to try something new and he added some tomato soup into the curry with some chicken pieces.This was served to the bus driver then he astonishingly ate that with absolute love.After that incident has happened he also used to visit along with his friends came again and again,then itself they have included it in their menu.

    Chicken Tikka Masala Recipe
    Chicken Tikka Masala Recipe

    If you love to eat Indian food items then it is advisable to take a look at chicken tikka masala which is a most delicious and spicy item found in every Indian restaurant as a favorite item in their menu.This popular chicken dish with its creamy,aromatic tomato sauce originated in Delhi,India, in the middle of the last century.In India,the dish is famously known as chicken makhanwalla,here makhan in Hindi means butter,but in Britain,this dish was renamed chicken tikka masala they named it so because tikka refers to boneless and masala means spices.thus the name originated.

    Ingredients:

      1) 1 cup plain yogurt,mixed well till it comes to soft state
      2) 3 tablespoons of Ginger Garlic Paste this recipe can also prepared by taking ginger and clove mixed
      3) 1 teaspoon kosher salt
      4) 1/2 teaspoon freshly ground black pepper
      5) 1 pound boneless,skinless chicken thighs,poked with a fork,and cut into large bite sized chunks

    chicken tikka masala ingredients
    chicken tikka masala ingredients

    Sauce:

    1) 2 teaspoons olive oil

      2) 3 tablespoons butter
      3) 1/3 cup Ginger-Garlic Paste, recipe follows (or 6 cloves garlic and 2-inch thumb ginger minced)
      4) 2 serrano peppers, minced (seeds removed if you don’t want it spicy)
      5) 2 tablespoons tomato paste
      6) 1 teaspoon garam masala
      7) 2 teaspoons paprika
      8) 8 Roma tomatoes, diced
      9) 1 1/2 teaspoons kosher salt
      10)1 to 2 cups water
      11) Oil, for grilling
      12) 1 tablespoon dried fenugreek leaves (optional)
      13) 1/2 cup heavy cream
      14) Minced fresh cilantro, for garnish
      15) Cooked rice, naan, or crusty piece of bread, for serving
      16)Ginger-Garlic Paste:
      17) 1/2 cup cloves garlic, whole
      18) 1/2 cup fresh ginger, peeled, cut into 1/2-inch slices
      19) 1/4 cup canola oil

    Preparation:

    It just takes 45 minutes to prepare an outstanding Chicken tikka masala who desired to make it.It is fresh,healthy,cheaper,and tastier than anything at this time and cost.

    Step 1:

    For the process of Chicken tikka masala we have to first take the boneless chicken breast or thigh part which is most suitable for the preparation of this recipe.In the first step of preparation of Chicken tikka masala we have to take a large deep bowl where we can mix the spicy ingredients and the chopped chicken pieces.Now mix both of them well to form a soft mixture and leave it marinated for at least 30 minutes or keep it in the refrigerator undisturbed for overnight.

    Step 2:

    Once you are ready with the marinated topic then next step is to make curry out of it.Place the pan and heat it at medium flame and add olive oil and butter to it and stir it continuously so that the butter gets mixed with the olive oil.as the butter melts then add the Ginger Garlic Paste and serrano peppers.Mix them until the color of them changes and becomes brown or golden color around their edges.Now add some tomato paste to this ingredients and cook well for about 3 minutes until the tomato becomes darkened in color.For this mixture add few more things like garam masala,paprika and saute for about 1 minute to draw out their flavors.

    chicken marination
    chicken marination

    Step 3:

    To this ingredients and masala mixture add small pieces of chopped tomatoes,salt,and 1 cup water.They are heated heated to the required level until water boils then lower the flame.Now cook this entire recipe for about 20 minutes.Here the amount of water that we have to take depends on the liquid that comes from tomatoes.

    Preparation of chicken tikka masala
    Preparation of chicken tikka masala

    Step 4:

               as the process is going on heat up the grill until it becomes a little hot.When it became nice and hot lightly have a brush for it with the oil.The chicken is taken and is placed on the heated grill,shaking off some of the excess marinade.The chicken is cooked a little on this grill but there is no need to worry the remaining gets cooked in the sauce process.

    step 5:

    Heat a skillet till it becomes quite hot then add half tablespoon of peanut oil.The entire cooking process can be done in two things.The first involves cooking of chicken breasts by turning them repeatedly for about 6 to 8 minutes until they become brown in color.Now after they are toasted move the pieces of chicken to a bowl and then clean the griddle or skillet,then cook the remaining chicken by adding the remaining half tablespoon peanut oil.As all of the chicken is cooked now add this cooked pieces to sauce and continue to gently stir it.this process must be done occasionally for 5 minutes.The final stage is to remove the pan from the heat and stir in the black pepper,chopped cilantro and season with salt.

    Step 6:

    Finally our Chicken tikka masala recipe is prepared and it is then transferred to a serving dish and garnish with additional items according to the interest.They are best to be Served with naan,and is also desired with Basmati rice.

    Chicken_Tikka_Masala_served with rice
    Chicken_Tikka_Masala_served with rice
  • Rava Khichdi a simple and comfort food

    Rava Khichdi a simple and comfort food

    Khichdi is one of the India’s best comfort food available.In India mostly south India people eat things made out of rice as it is their abundant available product.There are many items made out of rice out of them one the most comfort and easily prepared food item is Khichdi.It is done at the time of breakfast or evenings mostly.Few people who are busy with their life make this recipe which consumes their time and has a great taste.The dish is mainly inspired from the Anglo Indian dish kedgeree.It is also said that it is a inspiration for the popular Egyptian dish Kushari.Khichdi was popular at the time of Mughals mainly Jahangir.

    Rava Khichdi recipe
    Rava Khichdi recipe


    The word khichdi is originated from the Sanskrit word Khicca which means a combination of rice and pulses based dish.This Indian comfort food is considered as a light, nutritious meal, healthy food with exact amount of spices.This can be prepared and served to infants, sick people, and for the people which are really physically weak conditions.Most the people who follows Ayurveda appreciate it.We can see this Khichdi is a daily meal for some people in Gujarat and they make several varieties of it.

    At first Mughals started this dish named khichdi and they made it rich by adding strong spices, dry fruits and nuts.The Britishers during their time modified this dish by adding fish and eggs to the ingredients.During their time they named this Khichdi as Kedgeree,which became a popular dish during their ruling.They used to have it as their breakfast and later it has spread to their country also.

    Ingredients:

    1) One cup of Rava

    2) Three cups of water

    3)  Two table spoons of Oil

    4) One to two table spoon of Ghee

    5) 1/4 table spoon of Mustard seeds

    6) Take two Green chilli

    7) 1/4 table spoon of Channa dal

    8) 1/4 table spoon of Urad dal

    9) Salt required for taste

    10) Chopped onion (long pieces)

    11) One Tomato

    12) Half Chopped carrot

    13) Green Peas few

    14) Turmeric powder 1/4 tsp

    15) Curry leaves few

    16) Cashew nuts   few (optional)

    Ingredients for the preparation of rava Khichdi
    Ingredients for the preparation of rava Khichdi

    Preparation:

    Rava Khichidi the mouth watering south Indian dish mostly prepared for breakfast.But few south Indians prepare it irrelevant of the time during breakfast,lunch,evening snacks time,dinner.It can be prepared for any meal of the day.Few people take it along with coffee by which they enjoy its taste.Generally in most of the south Indian weddings they serve this rava kichadi with sambar and chutney as an accompaniment dish.The taste changes for every place and it depends on they way of preparation.Some got talent in making a perfect rava Khichdi and some are not good in making it.Try learning how to make a perfect khichdi to enjoy its complete taste.This is generally prepared by using Ghee but if we use a mixture of oil and ghee it reduces the excess calories.One can try to do this for a small change instead of making usual vegetable rava upma.

    Step 1:

    At first we have to roast the rava in a pan by taking one table spoon of ghee and make a deep fry until you get a nice aroma of roasted rava.We can skip this step if you have bought roasted rava from the shop.Chop all the vegetables finely and keep them aside for further process.Take a kadai and heat the Ghee and oil mixture and stir it for two minutes then add bengal gram to it and fry them till their color changes slightly.Now add mustard seeds,urad dal and curry leaves to it and saute them well until they turn their color to brown.Now add finely chopped onions, slit chillies and ginger.Make a deep fry of all these ingredients to turn their color.Now add all the finely chopped vegetables and turmeric powder.

    Rava khichdi preparation process
    Rava khichdi preparation process

    Step 2:

    This vegetables are cooked with the ingredients and saute them for two to three minutes.Make sure the vegetables are not over cooked as they have to be cooked along with rava again so let them be half cooked.Now to this mixture add three cups of water and add salt that is sufficient for taste as it different from one to one.While cooking we can check the taste as the salt is sufficient or not depending on that we have to add more water or salt.But if the water is quite salty don’t add water just leave it as we add the rava it will be perfect.

    Rava khichdi making-adding three cups of water and sauting
    Rava khichdi making-adding three cups of water and saute

    Step 3:

                                   The cooking process is continued until the water bubbles comes then reduce the flame and now we have to add rava slowly to this boiling water with one hand and care should be taken that the boiling water should not fall on hand.While adding rava to the boiling water stir it continuously with the other hand to avoid formation of lumps.This stirring is done till it forms a semi solid state then add a table spoon of ghee on the top of it and stir it completely so that the ghee gets mixed in it.Do this process till the water completely gets absorbed and then close the lid and cook it in a low flame then turn off the flame.That’s it we have preparead most delicious south Indian recipe rava khichdi.Move it to a serving plate and enjoy the taste.we can have it with raita as a great combination. 

    Rava-Khichidi-with raita
    Rava-Khichidi-with raita
  • For the love of Chocolate!

    For the love of Chocolate!

    love-picture-quotes-forget-love-sandra-j-dykes

    That silky, smooth, velvety, so yum, exotic thing, we can’t resist is CHOCOLATE. Just the addition of Chocolate can make anything to everything delicious. It is such a thing that everyone craves and loves. It can lift up your mood and has the goodness of antioxidants. Chocolates are lovable and are a sheer bliss to humanity.
    For the love of chocolate, here are some too popular chocolate delights, easy to make at home and are fancied too.

    CHOCOLATE CHIP COOKIES

     (Recipe)

     chocolate-chip-cookies-blur_thumb (2) 
    Preparation time: 20 minutes Servings: 25 Cooking time: 15 minutes
    Ingredients: 1 and half cup chocolate chips
    Four ½ cup flour
    2 teaspoons baking soda
    2 teaspoons vanilla extract
    ½ cup white sugar
    1 and half cup brown sugar
    2 cups butter, softened
    2 packages instant vanilla pudding mix
    4 cups dark chocolate, chopped.

    chocolate-chip-cookies-blur_thumb
    Procedure: Sift together flour and baking soda. Set aside.
    In a large bowl, mix butter, brown sugar, white sugar. Beat in the instant pudding mix until blended. Add eggs and vanilla in the creamed mixture. Now, blend in the flour mixture which was kept aside after being sifted. Finally, stir in the chopped dark chocolate, chips and nuts.
    Drop cookies by rounded spoonfuls onto ungreased baking sheets or parchment paper.
    Put it in the preheated oven at 350 degrees for 10 to 12 minutes for soft or crunchy cookie as per your taste. Edges should be golden brown, it will look nice.
    This is a true chocolate lover’s cookie and can add optional ingredients like walnuts or almonds or pecans or white chocolate. Large chunks of chocolate chips is what make them extra special. Famish it. Bake it and Eat it all by yourself.

    DARK CHOCOLATE SAUCE

     (Recipe)

    dark-chocolate-sauce_png_360x360_crop-scale_upscale_q85

    Preparation time: 15 minutes                            Serves: 10
    Ingredients: 6 ounces Dark chocolate bar, broken into pieces (77% dark chocolate)
    Half cup sugar
    Half cup water
    ½ teaspoon vanilla extract
    1 ounce butter
    8 tablespoons heavy cream
    Procedure: Stir in water and sugar in small pan. Simmer over low heat and stirring occasionally, until sugar dissolves in water and forms a simple syrup.
    Transfer the simple syrup on the top of double boiler over a low heat, slowly add pieces of dark chocolate and butter, whisking occasionally until the chocolate is melted.
    Slowly add in vanilla and cream until fully blended and smooth.
    Keep stirring and when it is smooth. It is ready to serve. Serve it warm.
    This glossy dark chocolate sauce has a rich bittersweet chocolate flavor and is perfect treat for dark chocolate lovers. As, having rich cocoa content of dark chocolate, it has antioxidant benefits in good amount. Having velvety smooth texture, it tastes wonderful when served warm dribbled over icecreams.

    CHOCOLATE ICE CREAM
    (Recipe)

    decadent-chocolate-ice-cream-24400010rca-ss
    Preparation time: 1hour + freezing time
    Ingredients: 1 cup sugar
    2 ½ cup milk (with full cream)
    2 tablespoon cocoa powder
    1 tablespoon custard powder
    ½ teaspoon vanilla essence
    1 cup nuts, cherries or berries to garnish
    Procedure: Mix custard, sugar and cocoa in half cup of milk.

    Coconut Chocolate Ice Cream
    Heat the remaining milk and when it comes to boil, add custard mixture and boil again stirring continuously otherwise lumps are formed.
    When it boils, simmer the gas for 30 seconds, shut off the heat and leave it to cool down.
    When it reaches room temperature, mix the cream and vanilla essence and transfer onto a container with a tight lid.
    Freeze it in refrigerator till almost set, then take out and whip up in a blender and place it back in the same container into the freezer.
    The lid should be tightly shut as it prevents the crystals from forming. Blend once more when almost set and place back in freezer. You can adjust the cooling to normal in about two hours after the blending.
    Serve it by garnishing nuts and cherries.
    Scream, scream Icecream is like perfect treat on a hot day. Chilled icecream when made at home becomes more special and everyone loves it. Especially children. Chill out with the chilling effect of the chocolate icecream!
    After all these easy to make recipes at home, I know craving for them is at peak. These are super easy, super awesome, yum and delicious recipes with the loveliness and richness of chocolate and its chillness and warmth . Its a perfect treat for children and your loved ones. No occasion required, just make them, freeze them, bake them whenever you want to. You don’t need a reason to put these recipes into practice in your kitchen. They are just all time comfy, cosy, rich and creamy, chocolaty recipes. If its long time you havn’t been in your kitchen, then just go Start making and baking it. Put on that apron and use your wit. Be creative and add your stuff too in these recipes. You never know what magnificent taste you come out with. You can even dip the chocolate chip cookies in dark chocolate sauce or you can even drizzle this sauce on the chocolate icecream. In a way, these recipes are connected and enjoyed with one another. For me, cooking is happiness and I get excited and calm at the same time whenever I get time to cook. Cooking is worth it, So make some time out of your busy schedule and start with these Chocolaty desserts. You will love it and people in your life too.
    Keep cooking, Baking, Eating and Partying.

  • Red is the colour I’m looking for!

    Red is the colour I’m looking for!

    Red is the colour of passion. One sees red when they’re angry and one picks up a red heart to show that they love someone. Love and hatred, two sides of the same coin, can be expressed by a single colour – red. So when it’s someone’s birthday and you want to show your love for them by baking, why go with the classic chocolate cake? Maybe it’s time to get a little more creative. Show your love with the colour red. Bake a red-velvet cake!

    Even though it sounds like a complicated thing to make, a red velvet cake is perhaps one of the easiest cakes to make apart from the classic chocolate or vanilla cake . A red velvet cake is basically a light chocolate cake with red colouring in it. A red velvet cakes speaks out and shows that it’s a special occasion cake because if you bake regularly, then you need a special recipe to mark a special occasion. A red and fluffy cake is perhaps one of the easiest and also one of the prettiest way to mark a special occasion. However, there are no rules against baking and indulging in this cake without a special occasion. The melt-in-the-mouth buttercream frosting used in this recipe is one of the most amazing comfort food that you can ask for.

    so to celebrate or to indulge with style, here’s what you will need:

    CAKEMAN_RAVEN_SOUTHERN _RED_VELVET_CAKE_H_.jpg

    ingredients :

    1 cup all purpose flour

    1 cup sugar

    ¾ cup vegetable oil

    2 large eggs

    ¼ cup milk

    1 teaspoon cocoa powder

    1 teaspoon baking powder

    ¼ teaspoon baking soda

    1 teaspoon red food colour

    Once you have everything, mix the flour, sugar, cocoa powder, baking soda, baking powder and the food colour in a bowl.

    In a separate bowl, mix the eggs, milk and the oil.

    Once done, mix both of them together.

    If the batter is too thick, add some warm milk.

    Make sure the batter is not too dark in colour because the cake gets darker after it’s baked.

    Grease and flour a pan and bake the cake at 350°F for 30-35 minutes or until wooden pick inserted comes out clean and dry.

    Let the cake cool for around ten minutes before taking it out of the pan. While it’s cooling, pour yourself a drink and sip at it, Nigella Lawson style. Or you can catch up on wrapping up those gifts or putting up finishing touches to the birthday decorations. If you’re not doing any of these, you could make the frosting for the cake. The perfect frosting for a red velvet cake, in my opinion, is butter-cream frosting.

    tumblr_lzmb76BwLn1qgf0w3o1_1280

    To make the butter-cream frosting, you will need:


    100 gm butter

    1 cup icing sugar

    2 tablespoons all purpose flour

    1 cup cold milk

    (if the butter is unsalted, you will also need a pinch of salt)

    Soften the butter by either leaving it out for a while or by heating it up in the microwave for ten seconds.

    Add the salt, if you’re using unsalted butter.

    Add the icing sugar and beat until it’s light and fluffy.

    Mix the flour in the cold milk. Heat it on a low flame while stirring constantly. If the mixture is not being stirred constantly, it will form lumps.

    Once the mixture is thick and cooked, let it cool. Cover it while it is getting cooled so that it does not form a crust.

    Once it has cooled, add it to the butter and sugar and beat. This mixture will provide the extra volume and fluffiness without the extra butter.

    Before applying the frosting on the cake, make sure that the cake is cold or else the frosting will melt off. Dip a knife in warm water and use it to smooth-en the surface of the cake.

    Cover the cake with the frosting. If you’re making a layered cake, apply some frosting between the layers as well. Sprinkle some brown sugar or nuts for decorations. Pop it in the fridge for an hour to make sure the frosting sets well. Take it out, put it on a plate and you’re ready to celebrate!

    Red-Velvet-Cheesecake-Cake-6

    When you come to think of it, a red velvet cake is just a chocolate cake which is red in colour. But when you present it to someone you love, it says a lot more than a chocolate cake. Unless that person is a chocoholic, in which case, you should just go with the chocolate cake because the warm brown of chocolates is what will really please that person. Otherwise, nothing can express your love more that a red velvet cake simply because it is the universally known colour for love, for passion. It also brings a little variety and adds a little difference to the regular cakes which are either brown or white. It is also the perfect cake for kids because for a little child, it is fascinating to be able to eat something red and delicious because, let’s face it, most of the kids out there don’t really like tomatoes.


    Everyone loves a little colour in their lives and perhaps the colour you’re looking for this time is red. Try it out and let us know if it worked for you!


    Bon appetit!

  • The Goodness of Bitter Gourd

    The Goodness of Bitter Gourd

    The bitter gourd or karela is a summer vegetable mainly found in the tropical areas.  It first originated in India and then by the 14th century began to be widely cultivated in Asian countries, Africa and the Caribbean islands.  The edible fruit of this vine is extremely bitter but is a storehouse of iron.  There are different varieties of the bitter gourd, and they vary in size and colour. The medicinal value and antiseptic qualities of this humble vegetable cannot be underestimated. Its juice is often recommended for controlling diabetes, healing stomach ailments and as a natural way to good health.

    The bitter gourd vine is herbaceous and has tendrils which help it to hold on to supports.  The leaves have rugged edges and grow alternatively on the tender stem.  The bright yellow flowers, both male and female are seen on the same plant.  After flowering in June the fruits usually start forming within a few months.  The fruit is oblong in shape, with a spiky outer surface which is bright green in colour.  Flat seeds are found inside the fleshy outer cover.  This vegetable has a watery texture, and is very bitter.  The skin is tender and edible and is eaten green.  When the fruit ripens, the skin becomes tough and bitter to taste and cannot be eaten raw.  On the other hand the pith which becomes dark red in colour is used raw in some salads.

    karela

    The different varieties of bitter gourd carry the same properties although they vary in colour, size and appearance.  The white or light green variety is longer in size with less tapering ends and a moderately less spiky exterior.  The smaller, dark green variety with sharp spiky exterior is used as a stuffed vegetable and is popular in Pakistan, Nepal, India and the Asian sub-continent.  This green vegetable is generally eaten in a cooked state, while the young shoots and leaves can be eaten as greens.  The bitter flavour of the bitter gourd makes it an important ingredient in stir fries, soups and in the making of herbal teas and beers.

    In India bitter gourd is cooked differently in the south and north.  The people in north India sometimes cook it as a stuffed vegetable in oil, or cook it separately with tomatoes and potatoes as a subzi and eat it along with roti and curd.  In south India it is cooked using coconut oil, with lots of grated coconut as a thoran, or with fried coconut as a theeyal or pachhadi and is consumed with steaming brown rice.  In Tamil Nadu, the bitter gourd is made as a special dish using onions, lentil and coconut along with tamarind juice.  This is a very popular preparation and is called ‘kattu pagarkkai’. In most of the dishes, a lot of onions are used along with rich spices and tomatoes, which help to lessen the bitterness of the vegetable. The green vegetable is cooked in different forms. In many households, bitter gourd is cooked with meat, eggs, beef, pork or shrimps and use coconut milk for added flavour.  Pickles, soups, curries, stews, chutneys and stir-fries made using this wonderful vegetable are popular delicacies all around the world.

    bitter-gourd-benefits

    Bitter gourd is well known for its medicinal values also.  Since time immemorial it has been used in herbal medicine systems.  It is largely used as sure cure for various ailments, especially complaints of the gut stomach and intestines.  Research has proved that the concentrated extracts of the bitter gourd has hypoglycemic and hypolipidemic effects which make it popular as a widely used remedy for diabetes. The extract of the bitter gourd is also used as a dietary supplement for breast cancer patients because it exerts a significant effect against the growth of breast cancer cells.

    If we have leisure time and interest in cooking we can experiment and bring forth innumerable attractive and mouth watering delicacies. For example:

    Fried karela Boat

    OLYMPUS DIGITAL CAMERA

    Directions:

    • Slit open  8 long, slender karelas and clean out the inside
    • Half cook the karelas in salted water with a pinch of turmeric
    • Grind 5 green chillies and 100gms of roasted channa
    • Mix well with salt, garam masala and coriander powder
    • Add chopped coriander and stuff into the slit karela
    • Tie each karela ( boat) with a thin thread
    • Use a shallow pan and heat the oil well
    • Fry the karela on a slow flame and carefully keep turning them over till they turn into a golden brown colour.

    The dish can be served hot with tomato sauce or pudina chutney. This appetizing and spicy dish can be enjoyed with rice, parathas or rotis.

    Hot Karela Achar 

    karela achar   

    The bitter gourd can also be used to make a very tangy, sour pickle with many spices and condiments.  This “Hot Karela Achar” goes very well with rice or rotis and can be carefully preserved for some time.

    Directions:

    • Wash and dry karelas well
    • Cut the karelas and De-seed.
    • Chop karelas and few green chillies into very thin slices
    • Rub salt well, squeeze out water and sun dry for one day
    •  Heat one cup of oil, splutter mustard and lightly fry a few methi seeds.
    • Add the dried karela and green chillies, curry leaves and fry till crispy
    • Mix thoroughly with a pinch of asafetida powder and salt to taste
    • Store in dry glass jars when cool and fill oil till top
    • Keep for two days, mix oil well and then serve.
  • Basic and easy DIY snacks.

    Basic and easy DIY snacks.

    Morning blues are very real and in fact would remain so till you retire. From the moment you enter the secondary school, getting up in the morning is a bane to be faced and dealt with. Might as well do it head on. How ? Well, with food of course. For those lucky few who have breakfast waiting on the table when they get ready and have a mother hen forcing them to eat, please stop reading the misery of those who are on their own. Life outside home is more about understanding the value of a MOM and a Home cooked meal than anything else. Having had six year experience staying away and fending for my own meals, I bring to you few tricks for putting together a happy meal so that the day starts of just right and morning blues get a nice surprise. After this you will defiantly not jump up to the idea of getting up, for lets accept it, sleeping is all the more fun, but it will help you deal graciously.

    POHA.

    kande-pohe

    Among the easiest to make breakfast or snack ever. All you need is boiled potatoes, chopped onions, challis, salt, sugar, turmeric and poha of course. The meal starts with boiling the potatoes, chop them in eatable pieces once you are done. By the time have the dry poha soaked in water; add little salt when you do this. After the boiling, sauté the chopped onions, add turmeric, challis, chopped potato and salt. Stir till you get a faint yummy smell. In case you need a more specific indicator, make sure the turmeric is spread in the mix, the onions look slightly reddish. Now add the poha after straining the water. Make sure you dislodge the lumps formed in the poha. Now mix the poha into the pan. See the yellow color spread and the delicious smell waft through the house. Add little sugar, more like sprinkle it. Sprinkle few drops of water on the dish, turn down the flames and cover the pan for few minutes.

    TIP: this tastes all the more delicious if you add sev on top with few drops of lemon. A cup of piping hot tea/coffee won’t hurt at all.


    Bread Poha.

    774

    This is called a Friday poha or the leftovers dish for this dish uses all the things most likely to be leftover with you at the end of the week.  Simply replace the poha with bread pieces, no soaking required! Cut them into pieces and add to the onion, potato chili, salt and turmeric mix. It tastes just as good and more interesting.

    Boiled Corn.

    2

    Now this has been a rescue item to me and I have seriously strong feelings for the dish. Just get an ear of sweet corn, shell it out and boil them. Add salt at this point for your taste. In time when the corn is boiled, you can check with putting a fork through it or just taste one, one just needs to strain out the excess water and the perfect snack is ready.

    TIP: a dollop of butter will go a long way into making the dish irresistible.

    Sprouts

    moong-mung-bean-sprouts-photo-co-vegrecipesofindia-com


    This is same as boiled corn. Do not get into the hassle of bringing in unshrouded ones and then do it yourself. Chip in additional 10 bucks for already sprouted and ready to cook kind of deal. Add all the spices like salt, chili powder turmeric to make the basic version. One can add tomato, onions etc. to spice it up. Get the taste of it and then experiment. Lemon drops won’t hurt either.

    Eggs!

    FBD8LEUFDIZMHV9.MEDIUM

    Probably a go-to dish for youngsters on their own. Boil them for a nice English feel, poach them or make a nice omelet. Practice making a sunny side up for a delightful breakfast. Make it Mexican style of Indian way; egg is a versatile way to start your day. IF you love to cook, French toast is one of the most loved snacks. Have a go at it.

    Mashed Potatoes:

    GarlicMashedPotatoes_DT

    This is a little fancy and really easy way to get your meal ready. Boil a potato, add salt while boiling. They mash it. In an aluminum vessel, cook the potato with milk, chili flakes. This is the most basic way to do it and among the easiest way as well.

    Bread delight.

    grilled-cheese-butter-bread

    Get a loaf of bread and then let the creativity flow. Go for classic bread butter, bread jam or a toast. Go nuts with Nutella or peanut butter sandwiches. For the health freaks, add on your veggies. OF make boiled egg sandwich. If you have a pan, then put the breads on the pan slathered with ketchup. Add grated cheese on it. Cover the pan for some time. And you have a delicious cheesy snack ready. It is hassle free, cheaper than a pizza and a move over the same old sandwich.

    This concludes the easy snack tips. Look out for the one about easy lunches/dinners. Happy munching!

  • Kebabs- something you can drool over.

    Kebabs- something you can drool over.

    Kebab is a Middle Eastern dish where pieces of meat or vegetables are grilled or roasted. They can be both vegetarian and non vegetarian. The traditional meat used for the preparation of kebabs was lamb however depending upon local tastes and preferences of the consumers, other options such as beef, chicken and pork also started being used. The kebab was so famous in the Mediterranean and Southeast Asia that it became a part of the everyday cuisine. From the Middle East it travelled to Central Asia and then slowly became a worldwide favourite with time. During the earlier days, the Greeks used portable trays made up of ceramic to grill pieces of meat and vegetables while Persian soldiers used their swords to grill meat over open flames.

    Kebabs can be prepared at home as well. One of the methods for the preparation of chicken kebab is given below. Similar way can be used to make other non veg and vegetarian kebabs by just substituting chicken with any other meat or vegetable.

    4 T

    Chicken  kebab

    Directions:

    • Dilute 2 tablespoon of cornflour in 1 cup of water
    • Clean the chicken and chop the meat in medium size pieces
    • Marinate the chicken with salt, vinegar and black pepper and place it for 15 minutes
    • Add to chicken the cornflour mixture with curd, ginger green chillies and garlic with 1 tablespoon of ghee and mix well
    •  Cover and refrigerate it for about 8-10hours
    • Melt ghee in a pan and slowly add the pieces of chicken on high flame
    • Fry till the piece turn golden brown
    • Once all the pieces are fried, serve with chutney and salad.

     Chicken_Kebab

     Green chicken kebab

    This is another recipe for the preparation of chicken kebabs which uses coriander leaves, mint leaves, methi leaves and spinach as well.

    Directions:

    • Wash about 400 grams of chicken and chop them in medium sized pieces
    • Apply salt, lemon, ½ teaspoon chilli powder on the pieces and keep it aside for 10-15 minutes.
    • While the chicken is marinating, chop the methi leaves into thin slices and grind it with mint, coriander, spinach leaves, ginger, garlic and green chillies to form a paste.
    • Now add curd and spices in the paste and mix well.
    • Coat the chicken pieces with the paste and cover it and place it aside for 20 minutes. During this time span the chicken will suck in the smell and flavour of the green paste.
    • After soaking the skewers in normal water for, apply oil and arrange the pieces of chicken onto it. Spread oil over the chicken pieces.
    • Preheat the oven at about 350F for 5 minutes and after that place the skewers in the oven and leave it to grill for 18 minutes.
    • A check has to be kept to see that all the sides of the skewer sticks cook evenly.
    • Once the kebab is ready, remove it from the skewer and arrange it on a serving plate and serve with lemon wedges and spicy green chutney.

    Veg-Chilli-Milli-420

    Veg Chilli Milli Kebab recipe

    This is a vegetarian kebab recipe for the vegetarians out there

    • Mash 4 potatoes in a bowl and at the same time boil spinach for some time then drain and blend the spinach to form a puree.
    • Combine 1tsp of ginger and garlic each with 4 green chillies and capsicum and chop them finely.
    •  Now mix all the items together. The boiled potatoes, the spinach puree and chopped mixture of ginger garlic with chilli and capsicum.
    • To this add red chilli powder, turmeric powder, black pepper, coriander and garam masala powder (1/2 teaspoons each)
    • Also add 2 tablespoon of breadcrumbs and salt to taste.
    • Wash and clean the skewers and then apply oil over them.
    • Preheat the oven at about 350F and arrange the kebabs onto the skewers and then again apply oil over the kebabs.
    • Grill the kebabs for about 20 minutes till they are golden brown and have a crispy crust.
    • Once the kebabs look nice and golden, remove them from the skewer and place it on a serving plate and garnish it with some fried chillies.
    • Your vegetarian kebab is ready to be served.

    sheeshakebabimg4

     Vegetable Seekh Kebab

    This is another vegetarian dish of Hyderabadi cuisine. This dish can be eaten both as a snack as well as a starter. The main ingredients used in this dish are French beans and cabbage and the special fact about this dish is that it is prepared on a stone.

    Directions for cooking:

    • In a pan heat 2 tablespoon of oil and then add chopped french beans, carrot and cabbage on one side of the pan and on the other side add about ¾ cups of green peas and mash them nicely.
    • Mix everything and cook for about 3-4 minutes.
    • In another pan roast gram flour (3 1/2 tablespoon) and caraway seeds for about 2 minutes.
    • Now mix the flour with the vegetables along with ginger garlic paste and green chillies and mix well for half a minute.
    • Add salt, chat masala and cashewnut powder with the flour and mix everything well.
    • Take portions of this mixture and cover it on the skewer and press it around the stick till it’s evenly layered.
    • Put oil on the grill stone and heat.
    • Now place the kebabs on the hot stone for about 3 minutes till all the sides are slightly coloured.
    • Serve the dish by sprinkling it with some chaat masala.

    There are many more of such tasty kebab dishes which can be prepared at home. Earlier kebabs used to be consumed only by the royals but with time it became a favourite of all.

    Georgie Rajan