Tag: recipe

  • The Curious Case of Mrs. Hen’s kids!

    The Curious Case of Mrs. Hen’s kids!

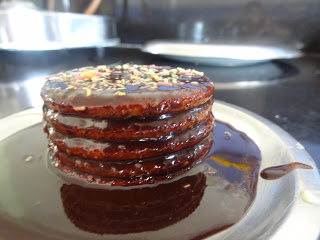
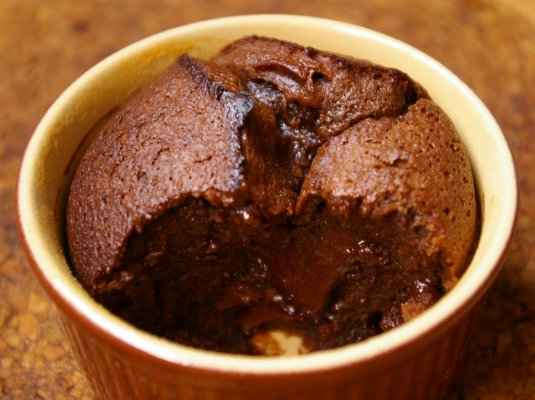
    With an amazing lot of activity happening in a day, bachelors or bachelorettes staying alone seldom have time to treat their taste buds right. One day it is a meeting with the boss, another day it is work at home and till the third day you get so tired that it takes an effort to even get up from your bed. And preparing a meal in all this haste seems extravagant and too elaborate an activity to be carried out. And in this rigorous lifestyle of yours, the only thing that suffers is your stomach and more importantly, your taste buds. But we say no more of this! Today let us learn about some new tricks and revisit some old ones about Mrs. Hen’s kids – the eggs.

    Eggs are often restricted to the breakfast and that too you seldom have. Eggs are undermined most of the times, but its importance becomes clear when you need some quick fixes to get you jumpstarted. So, let’s start our romantic affair with eggs which should last longer than your relationship with any other human being.

    1. The Quintessential Omelet:

    omelet

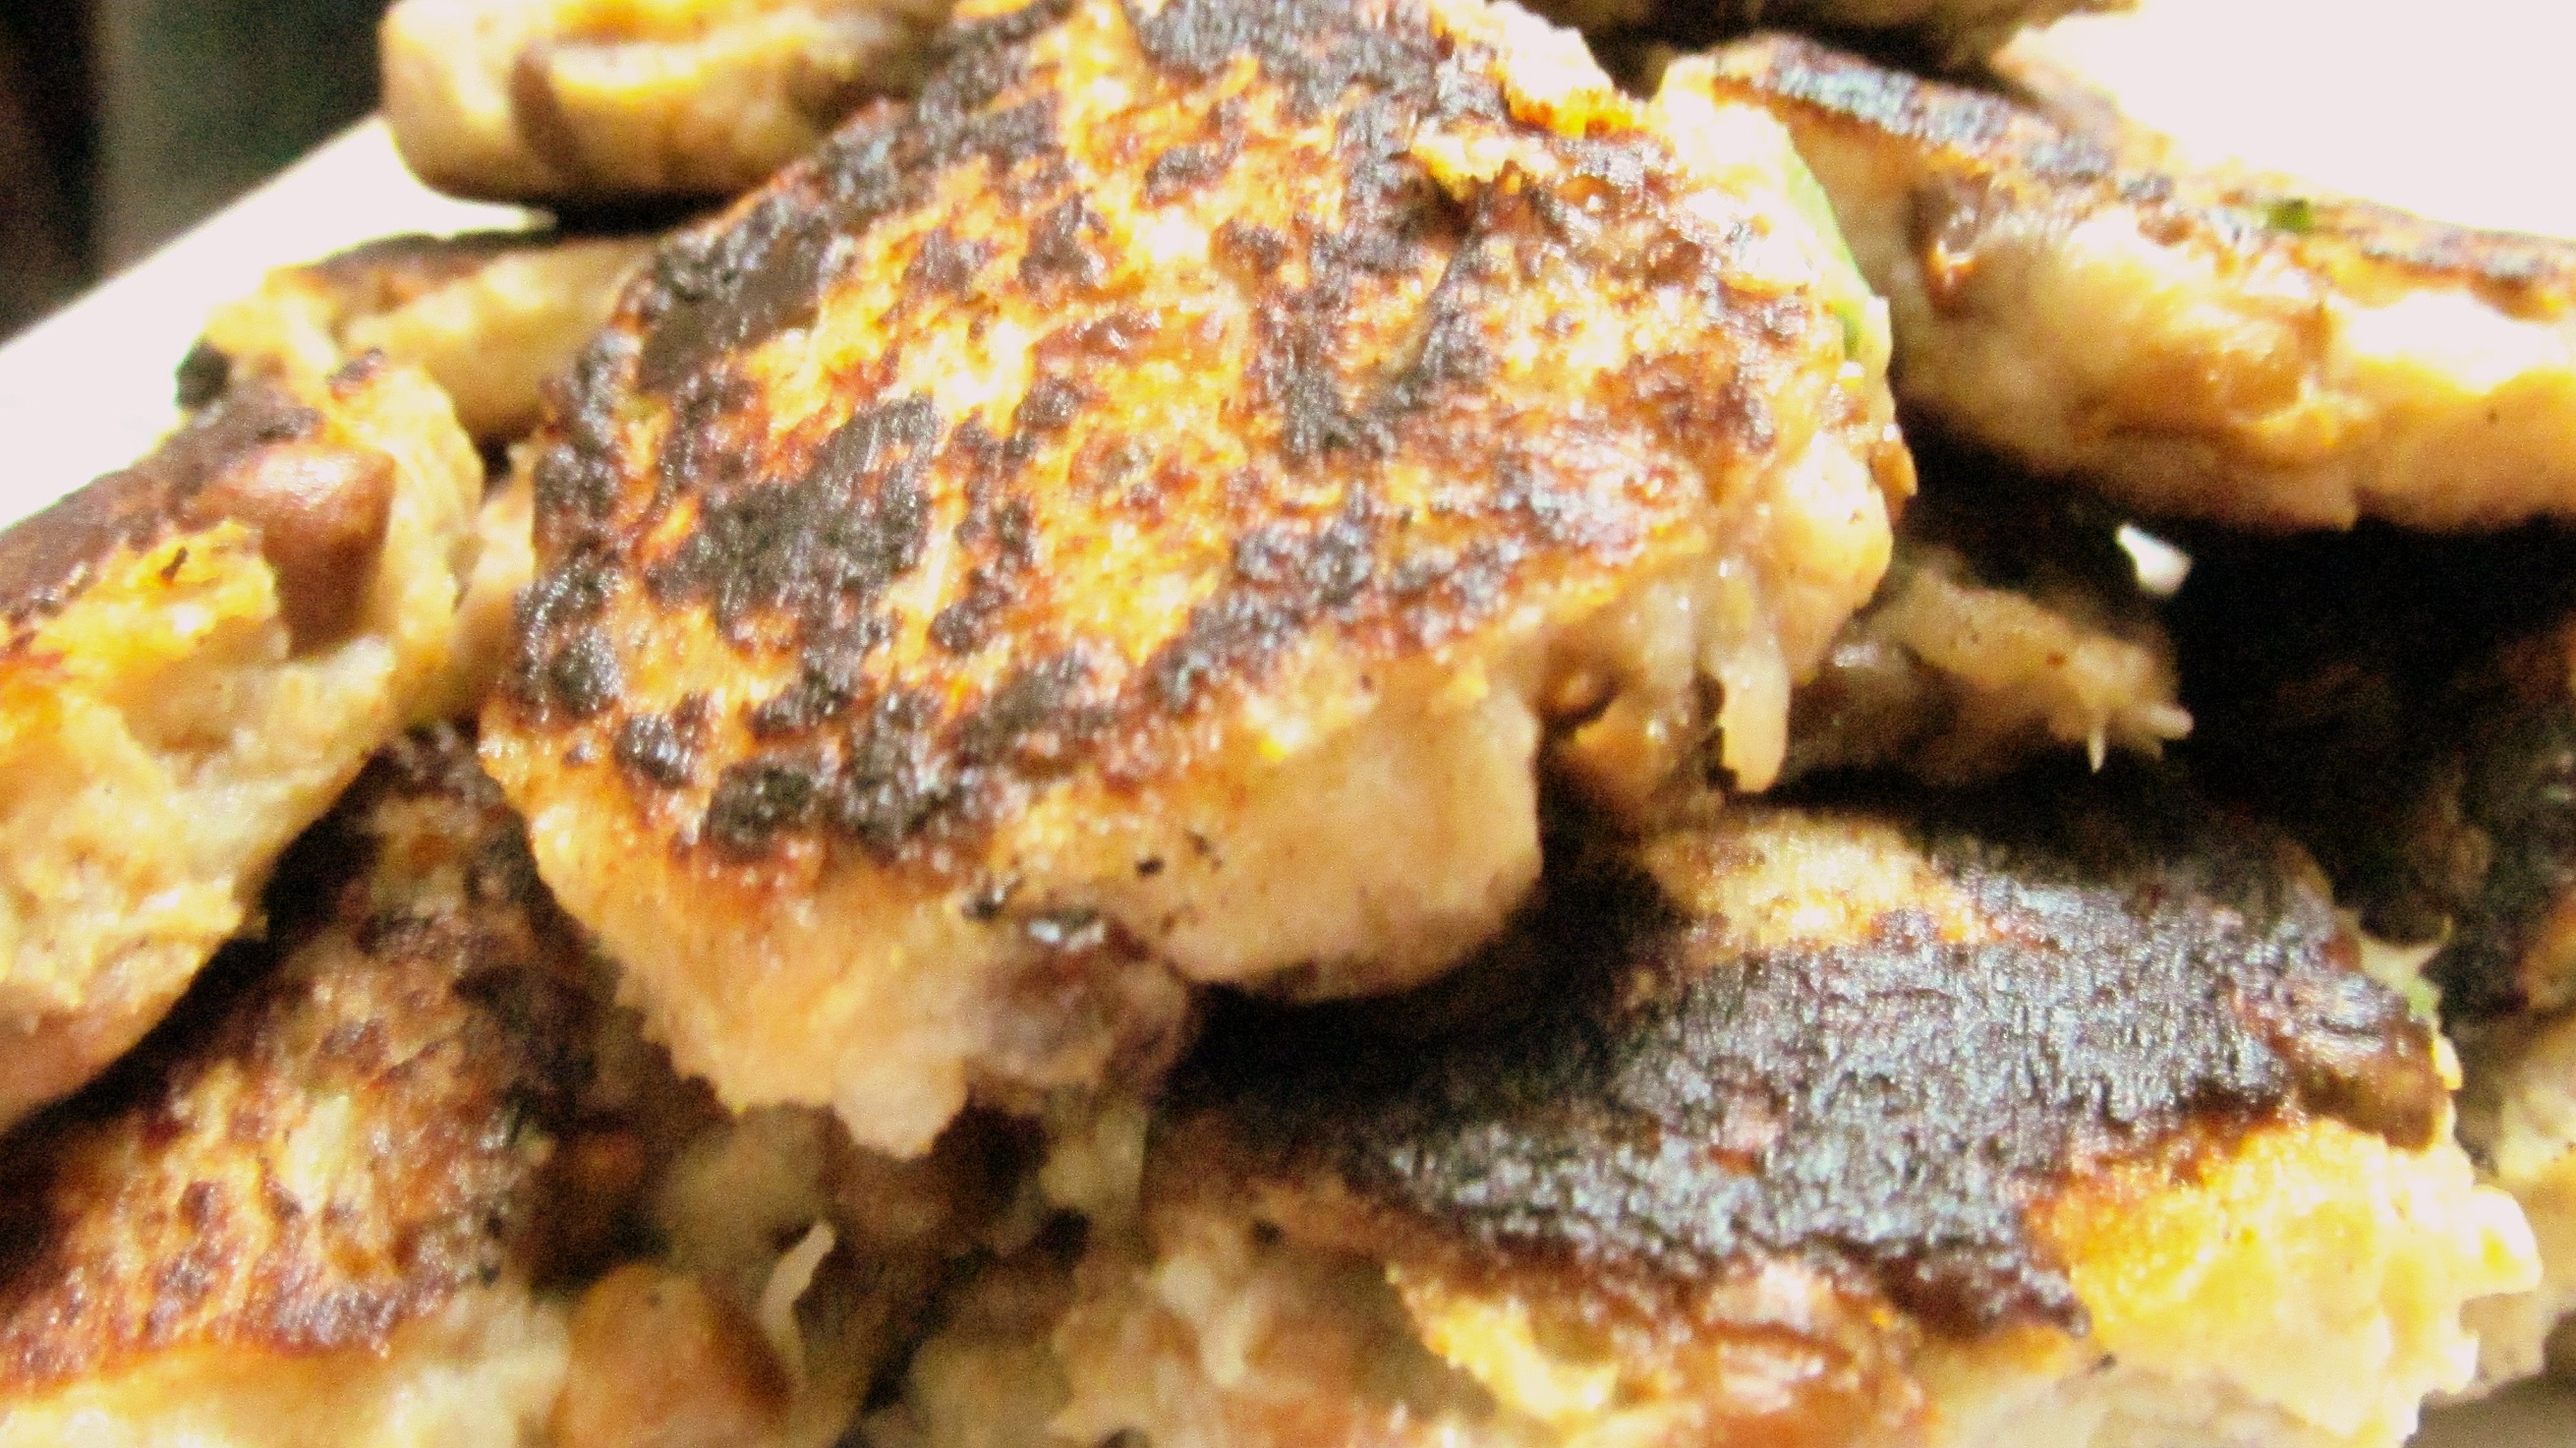
    This dish comes in handy when your refrigerator is running dry and your patience is running lose with all that hunger. Two eggs is what it takes to quiet down your stomach till the time you can arrange for something heavy or till Dominoz delivers that pizza you ordered. Breaking the eggs, mixing in some spices that you desire, a pan slicked with oil and the battered egg mixture on the pan. Blink your eyes and your omelet is ready. This recipe is heart-rote to everyone so much so that a more elaborate description would be shaming this article. But people might not be aware of the nutrient punch this wonder sphere packs with itself. An egg contains 6 gms of Protein and 70 calories. Now while you rejoice that omelet with toasted bread, let’s move onto our next big egg thing.

    2. Eggs with soldiers:

    sol

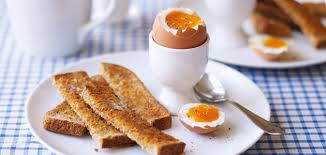
    There are times at night when you just crave for something to eat and are bored of the traditional egg recipes. Well in that case we have this amazing recipe for you. If you only have 5 minutes to spare, this recipe will be even more perfect for you. Place 4 eggs in boiling water and cook over low flame for 4-5 minutes. Caution: Do not let the eggs come to a boil. Now remove the eggs from the saucer and peel off the tops of the eggs. Add in some salt and desired spices on the top and eat the newer rgg recipe with bread sticks. Taste bhi, health bhi!!
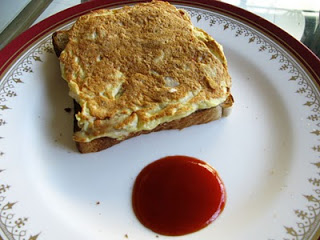
    3. French Toast:

    fr

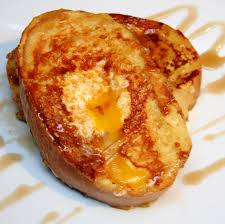
    Again. A relatively new and old recipe. Take out that borderline expired loaf of bread from your refrigerator and batter 4 eggs with spices added. Meanwhile, light up the stove and put a pan over with a slick of oil. Dip both the faces of a bread piece deep into the battered eggs such that both the faces are smeared with egg residue over their entire surface. Put it on the pan and cook for a minute maximum both sides. And voila! Your French toast are ready in a jiffy. Soak in 4-5 breads and you will be content for the next few hours to go.

    4. Tea Egg:

    tea

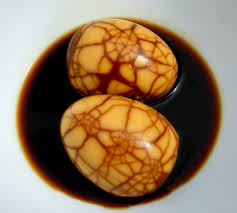
    Now Tea egg might take up some time, but this is nevertheless a newer recipe that people might have heard less about. Tea egg is basically a Chinese snack. Take a few eggs and boil them for 7-8 minutes. Boil them till the point where cracks develop on its surface. Drain the water but don’t peel the eggs yet. This crack-laden egg is then again put to boil in tea or sauce or spices. This dish is also called marble egg because the cracks in the shell create darkened lines with marble-like patterns. Chinese people commonly use a five-spice powder which contains cinnamon, fennel-seeds, cloves and Szechuan peppercorns. The eggs are boiled in the spiced-tea liquid and simmered at medium heat. The simmering allows the liquid to seep through the cracks and attribute flavors to the boiled eggs.

    5. Quick Egg muffin:

    Southwest_EggMuffins2

    People with a frenetic paced lifestyle must already be making merry at the name of the dish. The name in itself has quick in it. And you can be sure of one thing; this dish lives upto its name. Egg muffins are like Frittatas just smaller in size. This dish is prepared using scrambled eggs added with fresh chopped spinach and shredded sharp Cheddar Cheese. Whisk the eggs just like you do for an omelet, with spices, onions and spinach if you like. Cook in the microwave oven for 45 seconds and your hunger is done. It’s gone with the sound of the microwave’s beep.

    6. Eggs Benedict:

    benedict

    Eggs Benedict is an American breakfast and usually served along with ham or bacon. To make this dish you will have to devote some of your precious time, but the result will have you amazingly thrilled. First you have to make something the world calls the Hollandaise sauce. This is made by whisking egg yolks and squeezed lemon juice together in a bowl till the mixture is thickened and doubled in volume. Put the bowl in a steam bath and do not let the eggs get too hot or they will scramble. Add some froze butter cubes and continue to whisk till the btter melts. Remove from heat and whisk in salt and pepper and cover it. Heat the bacon and toast the English muffins. Cook some more eggs till the egg white is set and the yolk is soft. Lay down the muffin, bacon on its top, the half fried egg on its top and pour the Hollandaise sauce over. Garnish with some salt and pepper.

    And there you have it, 6 quick fixes with eggs that are not to be missed.


  • A Platter of Vegetarian Kebabs

    A Platter of Vegetarian Kebabs

    Originating in the coastal countries of the eastern Mediterranean area, kebab is a versatile dish made by roasting and grilling pieces of meat, fish, and vegetables, over a skewer or a spit. The dish quickly spread in popularity and consumption throughout the nations of the Middle East, and then central Asia. The kebab traces its historic roots to before the 17th century B.C., and even the ancient Greek poet Homer mentions an erstwhile archaic dish resembling the same, and enjoyed all over his country in his works. However, a Turkish script by Kyssa-i Yusuf which dates back to around 1377, first properly mentions the culinary concept of the word, which is derived from the Persian language, and literally means “fry”, and sometimes “fry and burn”. Legend has it that the kebab was invented by medieval Persian soldiers who grilled meat on their swords over open-air fires in the battlefield. It quickly gained favour of both the classes and the masses, being served as the royal fare in various Islamic states over the ages, and as a much sought after and easily accessible snack or main course dish for many commoners, and the trend continues even today.

    Although lamb is the traditional choice of meat for making the kebab, there are many variants available in different meats and vegetables all over India due to religious constraints and direct or indirect dietary restrictions. Indian kebabs, whether they are vegetarian or non-vegetarian, have a unique and popular flavour of their own, owing to the wide spectrum of masalas (spices) and herbs native to the subcontinent. Apart from the numerous Indian innovations in the art of kebab making, the sheesh, shammi, tikka, and shawarma, original types of kebabs are also available everywhere, and can be found easily in small roadside eating joints as well as in top notch restaurants and hotels. The cities of Lucknow and Hyderabad are famous all over the country, owing to their thousands of decades-old, local eateries and food establishments which sell different types of primarily meat kebabs, ranging from tunday to kalmi and tangdi to reshmi, and have thus contributed a lot to culture, food, tourism, and economy.

    While you can get non-vegetarian kebabs from anywhere, the vegetarian types are a rarity to find outside one’s house, and they are generally overpriced in the restaurants they are available in. Vegetarian kebabs can be easily made at home, with simple ingredients, and less elaborate methods than their non-vegetarian counterparts. This article will provide you with three novel recipes, all made wonderfully by my favourite chef in the world, my grandmother, for these lesser known variants, namely, shalgam ke kebab, kela chane kebab, and chukandar ke kebab.


    Shalgam ke Kebab (serves 4-6 people)

    Ingredients needed:

    • 7-8 bulbs of turnips
    • 2 tablespoons of roasted besan (gram flour)
    • Finely chopped onions
    • Finely shredded coriander, chilli, and ginger
    • 2 medium sized boiled potatoes
    • Salt to taste
    • 1 small teaspoon of garam masala powder
    • Vegetable oil

    Steps required:

    • Thoroughly wash the turnip bulbs, and then carefully peel their outer skins off.
    • Put the skinned turnips in a pressure cooker and steam thoroughly.
    • Once the turnips cool down, mash them and drain out the excess water.
    • Mash the boiled potatoes and mix them with the turnips. Add coriander, chilli, ginger, and onion to the mixture and be careful to make it consistent with dough.
    • Add garam masala and salt accordingly.
    • Make small balls of the prepared dough and flatten it into small cutlets or flattened disc shaped portions.
    • Shallow fry on a tawa (pan) until the kebabs are thoroughly cooked and are a rich golden-brown in colour.
    • Top with sprigs of coriander and rings of onion. Serve hot, with a chutney of your choice.


    Kela Chane ke Kebab (serves 4-6 people)

    Ingredients needed:

    • 5 clean green unripe bananas
    • 1 bowl of soaked chana dal (gram beans)
    • Finely chopped onions
    • Finely shredded coriander, chilli, and ginger
    • Salt to taste
    • 1 small teaspoon of garam masala powder
    • Vegetable oil

    Steps required:

    • Make sure to wash the bananas thoroughly with fresh water before beginning. Once they are clean, steam them in a pressure cooker with their skins intact.
    • Steam the dal separately to a soft consistency.
    • Once both ingredients cool down, peel the bananas, and mash together with the dal to make a dough.
    • Add garam masala and salt. You can also add other spices such as red chilli powder if you prefer.
    • Shallow fry on a pan.
    • Garnish with sprigs of coriander, and serve with onions and chutney.


    Chukandar ke kebab (serves 4-6 people)

    Ingredients needed:

    • 7-8 beetroots
    • 2 tablespoons of roasted besan (gram flour)
    • 2 boiled potatoes
    • 250 grams of paneer
    • A few whole clean leaves of cabbage
    • Finely chopped onions
    • Finely shredded coriander, chilli, and ginger
    • Salt to taste
    • 1 small teaspoon of garam masala powder
    • Vegetable oil

    Steps required:

    • Steam the beetroots thoroughly after cleaning them.
    • Mash the beetroots to a dough-like consistency. If necessary, add a little bit of boiled potatoes as well. Add roasted besan to this mix.
    • In a separate bowl, mash potatoes and mix them with paneer chunks.
    • Add coriander, chilli, ginger, and onion to the beetroot dough.
    • Make miniature balls of the paneer and potato mix after adding salt and garam masala to it.
    • Wrap them in a leaf of cabbage.
    • Encase this in an even layer of beetroot dough. Make it firm with more besan if required.
    • Shallow fry on a pan until the kebabs are thoroughly cooked.
    • Cut the kebabs open from the centre, top with coriander, and serve hot with chutney.
  • Sweet Potato: Delicacies you cannot miss

    Sweet Potato: Delicacies you cannot miss

    SWEET POTATO DISHES

    Sweet potato is the healthier replacement of our beloved potatoes and it is loved by most of us. Packed with important vitamins and other nutrients, sweet potato helps us stay fit. They are also a good source of potassium and iron which are two most important minerals for our body. Sweet potatoes are not only delicious but they also come with long list of health benefits. So, head to the nearest grocery store now and grab some sweet potatoes. Here are a few dishes to get you started.

    -sweet-potatoes-m

    1. Sweet Potato Biscuits

    Ingredients:

    • 1/2 kg of all-purpose flour

    • 1/2 teaspoon salt •

    I cup butter

    • 1 sweet potato

    • 4 teaspoon baking powder

    • 1/2 cup buttermilk

    • 1/4 -1/2 cup unsalted butter

    • 3-4 tablespoon maple syrup

    Method:

    • Cook and mash the sweet potato.

    • Now, add buttermilk to mashed sweet potato and blend it well.

    • In another bowl add the all-purpose flour, baking powder and salt. Add the butter to this and mix it well.

    • Add the two mixtures and mix it well into soft dough.

    • Roll out the dough on a smooth surface to about a thickness of 1 inch. Use a biscuit-cutter to cut into your desired shapes.

    • Bake it for 15 minutes approximately and your sweet potato biscuits are ready.

    For the Maple Butter:

    • Mix the maple syrup with the butter to get a smooth mixture.

    • Serve with the warm biscuits.

    sweet potato biscuits


    2. Sweet Potato Patties

    Ingredients:

    • 4 sweet potatoes

    • 3 eggs

    • 1 cup of chopped onion

    • 1-2 teaspoons of chilli powder

    • 1 teaspoon salt

    • 1/2 teaspoon cumin seeds

    • 1 teaspoon pepper

    Method:

    • Grate the sweet potatoes and keep it aside.

    • In a pan, sauté the cumin seeds until brown.

    • Whisk the eggs and add the grated sweet potato, chopped onion, chilli powder, pepper, salt and the cumin seeds.

    • Heat oil in a frying pan. Now put spoonful of batter into it and fry until golden brown.

    • Serve it with sauce or chutney.

    sweet-potato-bites-300x300

    3. Sweet Potato Pancake

    Ingredients:

    • 1 cup wheat flour

    • 1 cup all-purpose flour

    • 1 sweet potato

    • 2 tablespoons sugar

    • 4 teaspoons baking powder

    • 2 cups of milk

    • 2 eggs

    • Butter

    • Maple Syrup

    Method:

    • Cook the sweet potato and peel it. Now, puree it and keep it aside.

    • Take a bowl and whisk the eggs. Add wheat flour, all-purpose flour, sugar, baking powder and milk.

    • Heat a pan and butter it properly. Cook a spoonful of the batter until golden brown on both the sides.

    • Serve the hot sweet potato pancakes with maple syrup and enjoy!

    4. Sweet Potato Pasta Ingredients:

    • 1 cup of whole wheat pasta

    •1 sweet potato

    • 1 red bell pepper (thinly sliced)

    • 1 cup diced tomatoes

    • 1 teaspoon crushed garlic

    • 1 tablespoon lemon juice

    • 2-3 tablespoons of chopped parsley

    • 1/2 cup cheese

    • Salt

    Method:

    • Peel and shred the sweet potato and keep it aside.

    • Cook the pasta until tender.

    • Take a skillet and add 1 tablespoon of oil along with garlic. Keep stirring until you get the aroma of the garlic. Now, add the sweet potato, tomatoes, bell pepper and water. Cook until the bell pepper is crisp and tender. • Drain the pasta but keep half of the water it was cooked in. Now, put the pasta back into the vessel and add the sweet potato mixture, 1 tablespoon oil, parsley, lemon juice, salt and cheese. Add the retained pasta water and combine the mixture well. Your delicious sweet potato pasta is ready!


    5. Sweet Potato Chocolate Pudding

    Ingredients:

    • 1 large roasted sweet potato

    • 1/4 cup unsweetened cocoa powder

    • 2-3 tablespoons maple syrup

    • 1/4 cup milk

    • 1/2 teaspoon vanilla extract

    Method:

    • Peel and puree the roasted sweet potato until smooth.

    • Combine all the ingredients and blend it well until smooth. It should in a puree form. Your easy-to-make sweet potato chocolate pudding is ready to serve!

    6. Sweet Potato Wedges

    Ingredients:

    • 2-3 sweet potatoes

    • Pepper

    • Salt

    Method:

    • Peel the sweet potato and cut into wedges.

    • Mix the wedges with some oil, pepper and salt. Blend it well.

    • Roast the wedges in the oven for around 15 minutes until they turn golden brown.

    • Sprinkle some pepper on the top and serve them hot with ketchup.

    potato-wedges-

    7. Sweet Potato Soup

    Ingredients:

    • 1 sweet potato (peeled and diced)

    • 1 chopped onion

    • 1/2 teaspoon chopped garlic

    • 3-4 carrots (peeled and sliced)

    • 1 red pepper, sliced

    • 1 teaspoon ginger

    • 1/4 cup yogurt

    • 1 cup chicken broth

    Method:

    • Heat oil in a pan. Add chopped onion and garlic. Sauté for 2-3 minutes.

    • To this add the chicken broth and two cups of water. Stir well.

    • Now, add sweet potato, carrots, red pepper and ginger. Cook it well.

    • Once it is done, keep this mixture in the fridge for around 25 minutes. • Next, remove the vegetables from the mixture and puree them until thick.

    • Put this puree into the soup and blend them well. • Cook until the soup thickens. When it almost finished, add yogurt and mix it well. Serve and enjoy!

  • Chutneys are Yummy! Part 2

    Chutneys are Yummy! Part 2

    Chutney (also translated as Chatney or Chatni) is a family of condiments mainly associated with South Asian cuisine that usually contain some mixture of spice(s), vegetable(s), and/or fruit(s). Chutneys may be either wet or dry, and can have a coarse or fine texture. There are various types of chutneys.

    Traditionally, chutneys are ground with a mortar and pestle made of stone or an ammikkal . Spices are added and ground, usually in a particular order; the wet paste thus made is sauteed in vegetable oil, usually gingelly (sesame) or groundnut (peanut) oil. Electric blenders or food processors can be used as labor-saving alternatives to stone grinding.

    Chutney

    Let’s explore two new mouth-watering recipes of Chutneys which one can make easily at home!

    • Garlic Chutney:

    garlic chutney

    This is a fiery-spicy chutney made from garlic cloves and red chilies. It is a taste-enhancing must-have accompaniment for South Indian dishes like Dosa, Idli, etc. In this customized Indian Garlic Chutney recipe, garlic, soaked red chillies and coconut are first sautéed in oil, and then crushed with tamarind pulp to make delicious Chutney having a complex hot, sour and spicy taste altogether.

    • Ingredients:

    1)  8 chopped garlic cloves (skin removed).
    2)  2 whole dry red chillies, seeded and broken into pieces.
    3)  ½ cup grated fresh coconut.
    4)  1 teaspoon tamarind pulp.
    5)  ¼ cup water.
    6)  2 teaspoons oil.
    7)  Salt according to taste.

    • Directions:

    1)  Heat 1 teaspoon oil in a pan. When the oil is hot enough, sauté the chopped garlic over a low flame for a minute and then transfer to a plate.
    2)  Heat the remaining 1 teaspoon oil in the same pan and sauté the dry red chillies over a low flame for 20-30 seconds. Again, transfer them to the same plate.
    3)  Let the sautéed garlic and dry red chillies cool for about 3-4 minutes. Transfer the garlic and the dry red chillies to the chutney jar of a grinder or food processor. Grind them until a medium coarse paste is formed.
    4) Add the grated coconut, the tamarind pulp, ¼ cup water and salt (according to taste) to the jar.
    5)  Grind them till a medium coarse paste is formed. Tasty South Indian Garlic Chutney to be enjoyed along with Dosa and Idli is ready to be served!

    • Tips:

    1)  You can also use 2 teaspoons of the red chilli powder in place of the usual dried red chillies.
    2)  Dry Kashmiri red chillies are specially added to get that nice red color and also to make a less spicy Chutney when compared to other varieties of chillies as such.
    3)  Replace the tamarind pulp with 1 teaspoon of lemon juice for a slight variation in the overall taste of the Garlic Chutney.

    • Preparation Time: 5 minutes.
    • Cooking Time: 5 minutes.
    • Servings: 6 (½ cup).


    • Pudina Chutney:

    pudina chutney

    Pudina (Mint) is an herb known for its medicinal benefits for indigestion, acidity, headache, dental and skin diseases. It is an integral part of Indian cuisine as well. This Pudina Chutney recipe makes for an extremely flavorsome and tempting Chutney prepared right from fresh mint and coriander leaves. However, its main taste comes from the tamarind paste which is added to give a nice tang to its spiciness. The whole texture of the Chutney is derived from the fresh coconut.

    • Ingredients:

    1)  ¼ cup fresh Pudina (mint) leaves.
    2)  1 cup chopped coriander leaves.
    3)  ½ cup grated fresh coconut.
    4)  2 chopped green chillies.
    5)  ½ inch piece ginger, chopped.
    6)  2 teaspoons tamarind pulp or lemon juice.
    7)  1 teaspoon sugar (optional).
    8)  Salt according to taste.
    9)  ½ cup water.

    • Note:

    This recipe requires tamarind pulp as an ingredient. You can easily find ready-made tamarind pulp to be bought in the market. If the tamarind pulp is not available, then you can also prepare it at home by simply following the directions which are given below-

    1)  Soak the tamarind in hot water for roughly 1 hour.
    2)  Remove the seeds of the tamarind.
    3)  Strain the whole mixture to prepare fresh and homemade tamarind pulp.

    • Directions:

    1)  Clean the mint leaves and the coriander leaves well by running them under fresh tap water.
    2)  Grind the fresh coconut, green chillies, ginger, sugar and salt together in the chutney jar of a mixer or a food processor until a very smooth paste is formed.
    3)  Add the mint leaves, the coriander leaves, the tamarind pulp (or the lemon juice) and ½ cup water. Grind again until a very smooth consistency of chutney is arrived at.
    4)  Fresh Pudina Chutney is ready to be served along with your favorite condiments!

    • Tips:

    1)  Replace the tamarind pulp with an alternative of lime juice for an even more delicious tang of the Pudina Chutney.
    2)  Store it in an airtight container in refrigerator for up to 3-4 days. You can then use as and when it is required.
    3)  You can always add more water and adjust the spices according to your own tastes so as to make the Pudina Chutney more diluted and thin, or of a concentrated and strong flavor.

    • Preparation Time: 10 minutes.
    • Servings: 8 (1 cup chutney).

    So there you are – two delicious Chutneys which you can easily make at home by following some simple instructions. These are very good from the health point of view. They also acts as excellent taste enhancers.

    Keep watching this space for more delicious recipes!

  • RECIPE AND RESTAURANT SURVIVAL GUIDE

    RECIPE AND RESTAURANT SURVIVAL GUIDE

    r1

    We have come a long way since the days when veggies meant overcooked carrot and a lump of stodgy potato. It’s a great treat to have the list of food choices we enjoy nowadays. But the pretentious language that’s built up around dinning is enough for us to grind our teeth so hard that whatever we choose to eat will soon need to be consumed through a straw.

    Celebrity chefs need to take a large share of blame. Who cares if back in the kitchen (preferably a closed kitchen, out of eye line and ear shot of the dinning table); they call the meaty component of a dish “the protein”? Thanks to legions of professional cooks fleeing the kitchen to bask in the glow of TV studios, we all have seen this. But when the suburban cooks start talking about balancing the protein, something’s gone awry. By all means, the chef, ask your apprentice to “check the protein on the grille,” if you must; by the time it makes it to my table, I want to hear it as a chop. If ostentatiously basic terms are annoying, the absurdly florid ones are positively infuriating. Even the fast food chains aren’t above trying to co-opt the English language to confer prestige upon themselves: the staffs who prepare food at Subway are officially known as “sandwich artists.” It’s time for a return to reality.

    Even the street restaurants these days offer you a list of dishes and drinks with the names and information which go straight over our heads, with this they try to show you the intelligence and ability of the chefs, this makes really hard to even order what you desire.

    Here, then is the restaurant survival guide to get you through your next meal.

    r2

    Haute barnyard- 

    Not satire, nor a criticism, but a tern coined by New York magazine’s Adam Platt to describe basic, good quality seasonal ingredients served up at hugely inflated prices in high- end restaurants. These are rare and very specific in their taste.

    Deconstructed-

    Translation: if you didn’t know what it was meant to be, you’d never recognize it. For example, for serving a boiled egg we mix core ingredients such as tuna, green beans and olive. In a deconstructed version, the egg might be infused with tuna; green beans might be mere smear of sauce on the plate, and the olives might se served separately, possibly to the neighboring plate. This is like experimenting with the ways of serving and mixing the ingredients.

    Mouthfeel-

    A highly technical and self important way of describing the way food feels in your mouth. This word requires you to give feedback of your taste buds through your expressions after having the food.

    EVOO-

    Short for “extra virgin olive oil.” Believe it or not this word has actually made into at least one dictionary. It’s also the priciest version of OO-prompting the new extra virgin coconut oil.”

    Compote-

    you’ve probably been eating compote since you were a child, you just didn’t know it. Its fruit stewed in sugar syrup. Yes, just like mother used to make, but at a price she’d assume was a misprint.

    Wilted-

    This used to be a bad thing-who would want to eat wilted veggies? Now it describes: a) greens that have been lightly cooked; and b) diners who have admitted defeat in the face of chef’s pretensions.

    Muddled-

    Cocktail ingredients, such as fresh lime or mint, which have been bashed about a bit with a pestle rather than chopped or blended.

    Molecular gastronomy-

    Molecular gastronomy is commonly used to describe a style of cuisine in which chefs explore culinary possibilities of borrowing tools from science lab and ingredients from food industry. All cooking relies on the change that heat produces in molecules, so “molecular gastronomy” (MG) is technically a redundancy. But that hasn’t stopped being taken up by the chefs and foodies around the world, who use it as an umbrella term to mean “cooking” but not as you and I would recognize it.

    Sous vide-

    Beloved of MG enthusiasts, this is long, super slow cooking in a low temperature water bath or in a temperature controlled steam environment for longer than normal cooking times. The intention is to cook the item evenly, ensuring that the inside is properly cooked without overcooking the outside and retain the moisture. It has become a common feature in television cooking shows. And for mere $900 a home version of the equipment could be yours.

    “Chef’s special sauce” (what are all the others- ready-mix in a jar?), and “pan-fried.” (As opposed to waiting for the pavement outside to get hot enough, perhaps?)

    The worst part of it all is that this overdone approach is unnecessary-sometimes the truly great chefs know. As acclaimed British restaurateur Alastair Little once put it, “you don’t want to read that your squash blossoms were handpicked underwater by Panamanian virgins. All you need to know are the primary ingredients, the main method of cooking and perhaps where the food has come from.” His compatriot Fergus Handerson shows how it should be done, at the acclaimed St Jones Bar and Restaurant in London. Sample entries from the bar menu: “Gull’s Egg and Celery Salt”; “Cheese and chutney sandwich”; Cured beef, Beetroot and Red Cabbage.” Now that’s appetizing.

  • Nutella, Nutella… Everywhere!

    0520_nutella_630x420

    Have you heard about Nutella Chocolate? Freaky Question. I Know! Nutella, the hazelnut chocolate spread, is deliciously, awesomely, supertasty, lovely, chocolaty, creamy, fancy, uber, yum, nutty thing. You just need a spoon and there you go. Eat it and keep eating it and spreading it on breads, cookies or cakes or on anything you want. And the fascinating thing, you know 5 February,2014 is celebrated as Nutella Day. Nutella lovers must have beautiful memories with nutella from their childhood to even now,  from oozing crepes to breakfast on vacations to free spooning sessions on the couch, nutells has prominent place in almost everyone’s lives. And now, the nutty chocolaty spread is turning 50. So let’s just celebrate its half century and know more about this awesome spread.

    Nutella is the brand name of a hazelnut chocolate spread, which is manufactured by the Italian company Ferrero and was introduced in the market in 1964. Made by young confectioner , who had a vision of an affordable luxury made of a small amount of cocoa and lots of hazelnuts, His name was Pietro Ferrero. What’s in Nutella? If count on the ingredients and the nutrition, here’s what goes in Nutella? Well, in numbers if I say, 97 hazelnuts goes in each 750 grams jar. The other ingredients being, sugar, skimmed milk powder, palm oil(non-hydrogenated), low-fat cocoa, whey powder, vanillin, emulsifier. The nutritional information per 100 gram of nutella spread is 544 kcal, sugar 56.7g, fat 31.6g, protein 6g. It is produced on huge scale in 11 factories located in Italy, france, Poland, Russia, Germany, Mexico, Canada, Turkey, Brazil, Australia. Well, the ingredient hazelnut, is good for health of your heart, making it fairly nutritious food to occasionally include into your healthy eating plan. Nutella is beneficial for you, though you do get very small amount of key nutrients from nutella like saturated fat and sugar. Occasional intake of saturated fat is good for heart in maintaining cholesterol levels and do not harm your health. But you should limit your consumption and have in moderation as excess is always bad.

    imagens-tumblr-nutella-cute-delicia-candy-brushes-photoscape-by-thata-schultz013

    Gone are the days , you were caught with a a spoon in the nutella jar, now we have some super awesome tips and tricks to put this spread into versatile uses and as an ingredient in various sweet pick ons. Just go through and give variety to your breakfast.

    DSC06706

    NUTELLA CAKE RECIPE:

    Serving: 6-8                                                                                                      Preparation Time: 20-25 minutes

    Ingredients: 100 gram nutella

    4 eggs

    100 gram butter

    200 gram castor sugar

    200 gram self-raising flour

    ½ tsp baking powder

    1 tsp cocoa powder

    Nutella-chocolate-cake

    Method: Preheat the oven at 220 degrees Celsius and grease the baking dish with oil or lina 9 inch cake tin with greaseproof paper.

    Well, First In a large mixing bowl, whisk all the ingredients together with a hand blender or electric blender. Once mixed and blended well, pour the batter into the cake tin making sure that you have got the even amount in it.

    Bake it for 20-25 minutes until spongy soft to touch.

    You can bake two cakes if you want a two layer cake. Now, take it out of the oven and let it cool down on a rack. When the two cakes are warm, not hot enough, decide which layer of cake is going to be a base and spread it with thick layering of nutella.

    Now, Pop the other cake onto the nutella layer and press it firmly, sandiwiching them together. Spread more nutella layer on the top of cake and decorate it with strawberries or cherries or Cadbury shots or gems or use any other creativity of your own.

    If you’re a big nutella lover, you will enjoy this recipe all the more. As, this is a rich chocolate cake with a thick nutella topping, this is perfect treat for nutella and chocolate lover. This delicious, mouth watering delicacy can be served with a dollop of vanilla icecream or thick cream and enjoy it.

    Also, some more lovely recipes are here to make with nutella;

    marquee_1

    Spread it on a toast or bread or waffles with peanut butter and nutella on it . Quite a basic recipe but is loved the most.

    You can slice the banana lengthwise and put nutella on it. Also, you can slice up apples thinly in circle pieces and put nutella on slices and sandwich them. Even, you can dip strawberries in nutella and eat them. Putting nutella on fruits make them all the more sweeter and gives an exotic taste, enjoyed by all.

    Make a nutella shake with milk and blender. You can drink your nutella if you don’t like licking it from spoon and bored from spreading it.

    You can frost banana cupcakes or any other cupcakes by nutella and vanilla swirl buttercream. Just looks and tastes yum.

    Make a nutella covered bacons and enjoy them.

    Put nutella on your icecream cups or cones and enjoy the deliciousness, richness and the iciness.

    large (1)

    Nutella goes with anything to everything and makes things sweeter. Just perfect to satisfy your sweet tooth with the hazelnut delicacy. Enjoyit and keep eating till it gets over. Then, bring it more and eat it more and repeat.

    Keep licking it. Keep spreading it. Because; Happy Eating is Happy Life.

  • 4 Romantic Desserts That Will Take Your Heart Away

    4 Romantic Desserts That Will Take Your Heart Away

    Romantic dessert…that just sounds a bit redundant, doesn’t it? There is nothing better than the combination of two of the best things in the world, namely dessert and romance. Science has proved that there are certain fruits and other edible items that can turn on your mood and are a must have for that perfect date. we all know that chocolates and strawberries are great aphrodisiacs too. No wonder the entire human race is crazy about chocolates like anything. Whether you are preparing dinner for your loved one or you are just feeling low, these desserts will surely uplift your mood and bring a 100 Watt smile on your face. Try these out and feel yourself floating in epicurean heaven.

    1. Chocoberries

    Chocoberries

    Chocoberries are strawberries that are coated with chocolate and served chilled. This quick dessert has the most romantic things ever available on the planet Earth. The sweet and tangy flavour of strawberries goes aptly well with the velvety touch of chocolate, making it an absolutely amazing dessert. It is perfect for every occasion and non-occasion. The best part of this dessert is that it takes such less time that you can count on this one for those last minute surprises.

    Ingredients:

    10-12 strawberries (remember to have the stems intact)

    3/4 cup semi sweet chocolate chips or chocolate chunks

    3/4 tablespoon corn syrup

    2 1/4 tablespoon butter

    Method:

    1. Wash the strawberries and pat dry. Make sure you have all the strawberries fresh and clean.

    2. Spread them out on a paper tissue until they reach room temperature.

    3. Melt the chocolate chips in a double boiler. Add corn syrup and butter to the double boiler. Make sure you keep stirring in between else you will run the risk of burning your chocolate mix.

    4. Remove the mix from heat and dip the starwberries into the chocolate but do not dip more than 2/3 of the strawberries.

    5. Let the excess chocolate drip off the strawberries.

    6. Place the strawberries stem side down and referigerate for about 15-20 minutes and serve with a spark in your eyes.


    2. Chocolate Mousse

    chocolate mousse

    Everybody loved this dessert as kids. everybody loves it as adults. This dessert never gets old. The texture of this dessert is simply perfect and the way it melts in the mouth, makes it all the more adorable. The enigmatic smell that it emits makes one fall in love with everything around them. Almost.

    Ingredients:

    60 grams chocolate chips

    1 1/2 tablespoon water

    1/2 teaspoon vanilla

    1/2 cup whipping cream

    1 tablespoon confectioners’ sugar

    Method:

    1. Melt the chocolate and water in a saucepan.

    2. Add vanilla to the mix and whisk it thoroughly.

    3. Leave the mix to cool and whip the cream in a separate bowl.

    4. Add confectioners’ sugar to it.

    5. Blend in the chocolate mix to this and beat it in cut-and-fold manner.

    6. Take a scoop of the mousse created and pour it into a clear bowl.

    7. Garnish with some grated chocolate to give it an extra chocolatey taste.


    3. Strawberry Pie

    strawberry pie

    A pie is one dessert which is not too sweet and so, does not go overboard in making one feel its sweetness. The crispness of the pie mixed with the gooey texture of strawberries make it a complete dessert. Strawberry pie tastes brilliant but it looks even better! And a tempting looking dessert is always better than every other dessert.

    Ingredients:

    1 pie crust, pre-baked

    1 pint strawberries

    100 grams strawberry Jell-O gelatin dessert

    2 tablespoons cornstarch

    1 cup cold water

    1 cup hot water

    1/2 cup sugar

    Whipped cream

    Method:

    1. Pre-bake the pie crust and let it cool.

    2. Slice the strawberries into the pie crust.

    3. Take a saucepan and mix the jello with cornstarch. Add water and sugar to it.

    4. Cook over medium heat. Let the mixture boil. Make sure you keep stirring in between lest you burn it.

    5. Pour this boiling hot mixture over the strawberries and let it spread evenly.

    6. Keep the pie in the referigerator and chill it for 3-4 hours.

    7. As the glaze of the jello sets, bring it out and serve with generous dollops of whipped cream.


    4. Chocolate Marie Logs

    chocolate marie logs

    Chocolate logs are easy to make and easier to have. These have a perfect blend of biscuits and chocolate which gives it a smooth taste. The subtle flavour of coffee enhances the effect the logs have on the tongue. These are one of the quickest and easiest things you can make and make whenever you want.

    Ingredients:

    12 Marie biscuits

    1 tablespoon cocoa powder

    4 tablespoon unsalted butter

    4 tablespoon powdered sugar

    1/2 teaspoon coffee powder

    1/4 cup warm milk

    Method:

    1. Take the milk in a container and add coffee powder to it. Mix it well.

    2. Soak the biscuits in it and stack them on top of the other. Make sure that you do not soak them too much otherwise your biscuits will get all soggy and crumble.

    3. Take the butter and sugar in another container and mix them evenly. Add cocoa powder to it and blend in.

    4. Spread the mixture on the stack of the biscuits or the log. cover the entire log generously with the cocoa mix. Run a fork on the mix so as to give it the look of a wooden log.

    5. Keep the log in the referigerator to chill for two hours and cut it into diagonal slices.

  • Ten Minutes or Less: Food Tips and Tricks

    Ten Minutes or Less: Food Tips and Tricks

    We live in a fast track world where things happen like… whoooosh. There are mornings when one doesn’t have enough time to make a breakfast and there are nights when after a hard day’s work no one has enough energy to stand in the kitchen and cook food for one more hour. In the age when Pizza comes under 30 minutes, who wants to wait for 1 hour for the food? So, here we are today with tips and tricks of Food meals that can be cooked in 10 minute or less.


    1. Cereal Breakfast:-

    This is the easiest thing that can be made in less than 10 minutes. Even you can get time to read your email and wash the dishes while you complete the 10 minutes of this dish.


    Ingredients needed:-

    1 cup low fat yogurt

    1 tbsp honey

    1/2 cup corn flakes

    Sliced almonds to taste


    Directions:-

    Put 1 cup low-fat yogurt in the cereal bowl (we are using this instead of milk). Add 1 tbsp honey to it. Now put the ½ cup corn flakes and sliced almonds for the extra flavor if needed.


    1. Egg Toast:-

    Egg is simply the easiest food item for any meal. It hardly takes any time to cook and is always a great source of energy.

    egg toast

    Ingredients Needed:-

    2 Eggs

    Salt (as required)

    2 Bread slices

    1 pinch Nutmeg

    2 tbsp Butter


    Direction:-


    In a bowl whisk the eggs. Add together salt, other spices (if required) and a pinch of nutmeg. Put the bread on this mixture and let it absorb the mixture. Now turn the bread over and let the other side absorb.

    On a pan, put 2 tbsp butter and let it heat for a minute. Now, put the well soaked bread on the butter and cook until golden brown and crispy on both sides. Repeat the same steps with other bread slice. Serve with tomato sauce.  Enjoy the food.


    1. Fried Rice:-

    You can prepare a delicious meal with last day’s leftover rice without a fuss. Follow these steps.


    Ingredients Needed:-

    Cooked rice

    ½ cup finely cut Tomatoes

    ½ cup finely chopped Onions

    Salt and spices as required

    2 tbsp Oil or butter


    Directions:-

    Put 1 tbsp oil or butter in a pan and heat for 1 minute. Now add ½ cup onions to it and finely cook till it is golden brown in colour. Add tomatoes to it as soon as the onions change the colour. Add salt and other spices to taste. You can add a little Soy sauce too for the taste. Now let it cook and turn into a thick paste and in the mean time, in another pan put 1 tbsp oil or butter. When it is hot, Add cooked rice to it and let mix it well so that every grain of rice has a little oil over it.

    Now, Put this rice in the paste and mix it well. Cook it for 4-5 minutes. Taste and add a little more soy sauce if needed.


    1. Scrambled Eggs:-

    The secret to cooking egg is that you can do anything with them. But in case you are not in mood to do anything, just break the eggs in the pan and get done with them.


    Ingredients Needed:-

    2 eggs

    2 tbsp cream

    A little salt

    ¼ cup finely chopped Onion

    1 tbsp butter


    Direction:-

    Add eggs, cream, onion and a little salt to a bowl and whisk.

    Put butter on a pan and let it heat for a minute. Now put the eggs mixture in the pan and cook on medium heat. Use a wide spatula to scrape the mixture off the pan and turn it over. Cook until it gets creamy and take it off the head.

    Serve with toast if you wish.


    1. Pasta:-

    pasta

    No doubt, it is the undisputed master of 10 minutes club. It is tasty, least fussy and also classy serve to show off.


    Ingredients Needed:-

    350 gm pasta

    ½ onion finely chopped

    3-4 tomatoes finely chopped

    1 tbsp oregano

    1 tbsp red pesto

    2 tbsp vinegar


    Directions:-

    Cook pasta according to instructions in the pack.

    In another pan, put 1 tbsp butter and heat the onion and tomatoes. Now, put all the ingredients including onion and tomatoes to a mixer and mix them well into a paste.

    Tip the paste into the pan again and bring to boil. Reduce the heat and cook for 5 minutes. Drain the pasta, put into this gravy mix it well and serve.


    It isn’t over yet. As the food is incomplete without dessert, here is the recipe of a dessert as a bonus that can be cooked in less than 10 minutes too.


    Instant Chocolate Cake:-

    This is the easiest and tastiest chocolate cake that can be cooked in such less time.

    cup cake

    Ingredients Needed

    ½ Cup Flour

    ¼ cup Sugar

    4 tbsp Cocoa Powder

    Egg

    ¼ cup Milk

    4 tbsp Vegetable Oil

    3 tbsp Vanilla Cream

    Pinch of Salt


    Direction:-

    Beat flour, sugar, cocoa powder and egg in a bowl. Add milk and vanilla cream when it is made into a thick paste. Now add the vegetable extract and a little salt. Keep mixing it till it is made into a smooth mixture. Put the mixture into the microwave until it is smooth and puffed. It will take 2-3 minutes. Take the dish out and enjoy.


    Now, what are you waiting for? Go, make the dishes in 10 minutes or less and enjoy life without any compromise with taste due to time constrain.

  • KARIM’S: A must visit restaurant for the non-vegetarians

    KARIM’S: A must visit restaurant for the non-vegetarians

    Karim’s is one of the most famous non vegetarian destinations located in the Jama Masjid area of Old Delhi. The popularity of this restaurant can be described by the fact that today Karim’s is synonym to the area in which it is located. This place provides the best and most delicious Mughlai cuisine. None of the non-vegetarian food chain in India is more famous than Karim’s. This hotel has simply created its utmost position in providing the ultimate non vegetarian dishes. The reason behind its rise is the use of the secret exotic spices which they use in their dishes.

    2


    This hotel was started by the veteran cook Haji Karimuddin who served as the royal chef in the court of the Mughals. In the year 1857, when the Mughal Empire came to end after the last ruler Bhadur Shah Zafer was overthrown by the Britishers, Haji Karimuddin had no other options but to run away from the shackles of the Britishers. He spent the next few years in the small area near the Jama Masjid. Although Haji Karimuddin was in a condition which he never expected of, he never forgot the recipes of mouthwatering dishes that he used to cook for the Mughals. During this time of struggle he taught his son all the secret recipes that were used in these dishes. Finally in the year 1911, when people from different parts of India were coming to Delhi to join the coronation ceremony of the King George V, Haji Karimuddin opened a Dhaba to help the people by providing them with the tasty food during their stay. He started by selling only two dishes. With the overwhelming response that he received, he finally opened his own restaurant in the year 1913 with a view to serve people with the dishes that he used to cook in the Mughal’s kitchen. Since then this family has been serving the royal foods. At present it is the fourth generation of this family which is looking after this famous restaurant chain.

    3

    Karim’s has a wide range of the main course and starters in its menu that ranges from chicken to mutton. One can simply select the dish as per their choice and experience the taste they will cherish for a long time. One of the reasons why Karim’s food is famous is because of the fact that they are delicious in taste and quite spicy in flavor. After the mouthwatering meal, one can simply enjoy a variety of desserts which this place has. If you are planning to visit Delhi, then this city has lots to offer in terms of the tasty and delicious food options that will be available in front of you. But if you are one of the non-vegetarians then this is one such place which you must visit. You will surely have the pleasure of experiencing the cuisines that you have never had before.

    1

    This is not one of the very highly priced restaurants and so people from all section of the society visit this place to get the taste of the Mughlai foods. Every time you visit this place you will find it filled with people more than its capacity. From the time the restaurant opens and till it gets closed, you can find people all over it. This is the power of the delicious food that they serve. This restaurant is the recipient of the many prestigious awards such as the Golden Plate Best North Indian Restaurant Award for the year 2005. Recently when the Prime Minister of Pakistan visited India on the oath taking ceremony of the Indian Prime Minister Narendra Modi, he expressed his desire to taste the food from this veteran restaurant. This shows that not only in India, people in various other countries are also aware of the finest food that this place provides and whenever they get a chance to visit India, they do take out time to visit Karim’s. Even the painter M. F. Hussain had words of praise after he visited this restaurant.

    5

    Almost all the magazines and shows based on the Indian food have mentions the delicious non-vegetarian food served at the Karim’s. Pioneer described Karim’s as a place which is served by a family which has a rich heritage and expertise in cooking the non-vegetarian food. Not a single hotel or restaurant can match the food being served at Karim’s. In one of its edition, the world famous Time magazine termed Karim’s as one of the best restaurants in Asia. Leading newspapers such as The Hindu, The Sunday Observer, The Asian Age, The Indian Express and everyone else have constantly reviewed this place for their readers and have mentioned it as one of the must visit non place serving restaurant. The world’s famous travel and food shows being telecasted by the National Geographic and the BBC World Guide have also praised this restaurant and have telecasted the story of a family which is so much dedicated in serving the best Mughlai dishes in India.

  • Paneer Tikka

    Paneer Tikka

    Paneer Tikka
    Paneer Tikka

    Paneer Tikka is a popular tandoori snack which is a simple recipe. Paneer Tikka is a marinated paneer cubes which are arranged on skewerss,which are used for holding food and then baked in an oven.It is considered as one of the best paneer recipes.There are many varieties in paneer tikka to prepare.Mostly,paneer tikka is prepared on a tandoor and hence it can be named as tandoori paneer tikka but it can also be made simply through an oven.

    Paneer Tikka Masala is used to make Paneer Tikka which is  a spicy dish of onions and garlic.The garlic flavor richens the dish.This dish is originated in India and considered as an popular dish in Middle-east and Europe.This dish is popular for both vegetarians and non-vegetarians as many varieties lies in this recipe as it can always be substituted with chicken and also Chicken Tikka Masala can also be added inspite of normal masala powder  while preparing.

    Paneer
    Paneer

    Paneer is a dairy product now-a-days become majorly famous due to its elegance in taste.It is a type of cheese of milk curdled from sheep,goats, cows.It has a good quantity of calcium which helps in building strong body and it strengthens the bones,teeth.It also develops insulin resistance syndrome and helps in  back pain and joint pains.As it is rich in proteins,it reduces the risk of cancer and also prevents stomach disorders and is mostly useful for elder women.

    Recipe of Paneer Tikka:

    Paneer Tikka can also be made in a tawa instead of oven.We also can make paneer at home easily which tends to be healthier than which are available in markets.

    Method to prepare Paneer

    muslin cloth
    muslin cloth
    1. Boil 2 litres of fresh milk and add vinegar or curd or lemon juice to the milk and stir well and keep it aside.
    2. After the milk has been curdled,wrap it in a muslin cloth(a thin delicate sheet) and rinse it with fresh water and squeeze the water.
    3. Now,form it like a ball and place it under a saucepan for nearly 20 minutes.
    4. Then,paneer of 200 gms is ready and we can use it in all foods.

    Ingredients needed for Paneer Tikka-

    ingredients needed
    ingredients needed
    requirements
    requirements
    • 2 green and red cubed capsicums cut into cubes
    • 1 onion cut into cubes
    • 1/2 cubed tomato
    • 1 1/2 cup of paneer cubes
    • 1/2 tsp of tandoori masala powder
    • 1/2 tsp of lemon juice
    • 1 cup of hung curd or yogurt
    • 1 1/2 tsp of ginger-garlic paste
    • 1 tsp of red chilli powder
    • 1/2  tsp of garam masala powder
    • 1 tsp of coriander powder
    • 1 1/2 tsp of oil
    • 1/2 tsp of kasturi methi leaves
    • 1 onion sliced for garnishing
    • toothpicks
    • salt to taste

    Preparing Paneer Tikka

    1. Take hung curd or yogurt in a bowl and beat it until it turns into a smooth paste.
    2. Add all spice powders such as red chilli powder,garam masala,coriander powder,tandoori masala powder and also add ginger-garlic paste,kasturi methi leaves and salt.
    3. Mix well and prepare a  marinade(a mixture where the food is soaked to give flavor).
    4. Now,add paneer and add the capsicum pieces,onions and stir them so that all ingredients are mixed up and leave it for an hour to marinate them.It can also be covered and placed in a  refrigerator.
    5. Now ,take a toothpick and arrange capsicums red and green,onion,paneer in an order.
    6. Switch on the stove and heat tawa and put 1 1/2 tablespoons of oil.After mil heating,lightly fry paneer and vegetables over the heat. and cook them until those items turn light brownish in color for 3-4 minutes.
    7. Now,Paneer Tikka is transferred to a plate and slowly remove the toothpicks by pushing the vegetables into the plate.
    8. Add 1 -2 tsp of lemon juice over the food and garnish them with sliced onions and serve them.
    Paneer Tikka
    Paneer Tikka
    • Paneer Tikka can also be served as a roll wrapped.The vegetables we arranged in toothpicks can be taken or also kept like it while serving.
    • Paneer Tikka can also be grilled in an oven.The marination process  should be more than 2 hours.The more it marinates,the flavors gets fused much more that they get even more tasty after preparation.
    • You can also use mushrooms,babycorn,cauliflower,tomatoes in this dish.
    • For low fat,we can add 1/4 cup of milk.
    • We can add gram flour to the marinade such that it prevents from sticking paneer in the pan.
    • Also,we need to ensure that the paneer are not overcooked and it is cooked on all sides.

    Paneer Tikka is a freshly made spicy Indian dish which can be accompanied with naans,chapati,bread.It is a tasty dish with several variations.It is also served with a gravy known as Paneer Tikka Masala.It has been popular such that even International fast food chains have added this recipe in their menu.Now-a-days,instant making packages are available in markets by different companies.It can be made within less amount of time.But the home made taste can’t compare with any taste which needs to be tasted once in a life time.