Category: Recipes

  • The Love For Cherry

    The Love For Cherry

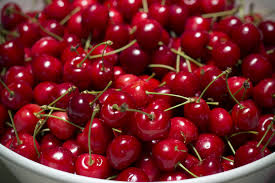
    If life is a bowl full of cherries, then we are all in for a treat…!!!

    images

    This bite size stone fruit in its vivid red hue is a summertime favorite- and each little sweet cherry packs a powerful punch of nutrients. Sweet or sour, cherries are bursting with nutrition.

    Cherries have a very short fruiting season. In Australia, they are usually at their peak around Christmas time. In many parts of North America, cherry fruit trees are among the first fruit trees that ripen. In addition, to being a delicious fruit, they have attractive  flowers and are commonly planted for their flower display in spring.

    A handful of fresh cherries in the summertime are a natural gourmet natural. Cherries, along with other berries, are a rich source of anti-oxidants. Queritrin – a flavinoid is rich in cherries, and has been found by researchers to be one of the most potent anti-cancer agents.

    More than just a delicious fruit, cherries are low in calories. Eating cherries can help u lose weight and stay trim. A cup of cherries is less than 100 calories and packs only in 3 gm of fiber, which helps you in keeping full for a longer time.

    images (1)

    Also, these little beauties contains vitamin B such as- thiamine, riboflavin and vitamin B 6, these vitamins are crucial for the body and help in conversion of nutrients to energy.

    Cherries are not only healthy and delicious, but versatile also. They can be added to anything to everything from dairy, to pork, eaten raw or cooked down to make a sauce or a shake.

    They are a power-pack remedy to a large number of disorders-

    1. Lowers down blood pressure-

    Cherries are an excellent source of potassium, which helps in lowering of blood pressure by helping the body to get rid out of  excess blood pressure. Eating cherries can help you maintain the balance between sodium and potassium.

    2. Cherries get good sleep-

    Tart cherries contain melatonin, a hormone that makes you sleepy. Two tablespoons of little tart juice is used as a tasty bedtime sleep aid.

    images (4)

     3. Cherries help fight cancer-

    The distinctive red hue of the cherry is due to the flavinoid called cynaidin, which in combination with anti-oxidants of cherry can help fight the free radicals of the body. Also cynaidin, helps to keep cancerous cells in control.

    4. Cherries help ease arthritis pain-

    For those who suffer from arthritis and gout, eating 2 cup of binge cherries can give a lot of relief. Cherries can also reduce painful inflammation by decreasing the amount of the reactive protein produced.

    5. Helps cure migraine-

    Cherries help in curing migraine problem, by reducing the inflammation in the body. The cynaidin flavinoid of the cherry can aid  in reducing the migraine headaches.

    6. prevents premature ageing-

    cherries are rich in two important flavinoids- queritrin and isoqueritrin, which act as antioxidants and work by removing the by-products of oxidative stress, thereby slowing down the process of pre-mature ageing.


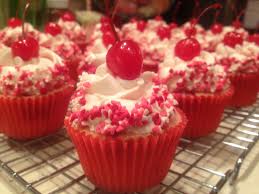
    Some easy cherry recipes:
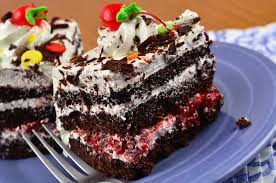
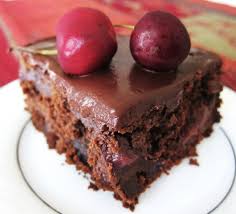
    1. Cherry beer cake-

    images (7)

    A. 3/4 cup cherries

    B. 2 cup all- purpose flour

    C. 2 tbsp baking powder

    D. 1/4 tbsp salt

    E. 4 eggs

    F. 2 cup granulated sugar

    G. 2 tbsp vanilla extract

    H. 2 tbsp melted butter

    I. 1 cup cherry wheat beer

    J. 1 tbsp baking soda

    K. 1 pack cream cheese

    L. 1/2 cup chopped walnuts

    images (8)

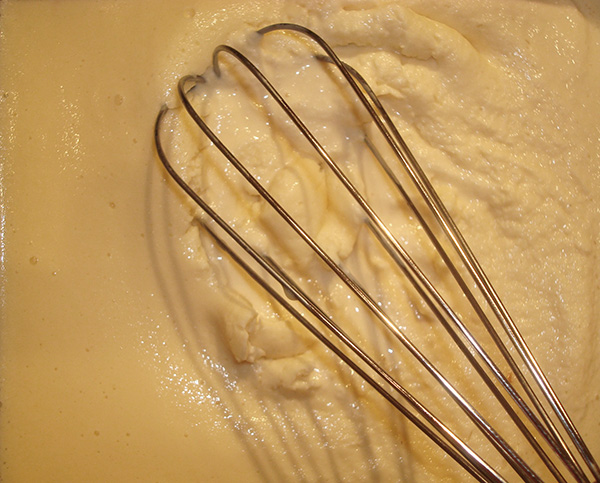
    In a large bowl, add butter and sugar until fluffy. Add eggs, flour, baking soda, vanilla extract, baking powder and salt. Add walnuts and cherries to the mixture.

    Transfer the mixture to a battered pan, which is greased with oil. Bake the cake in the preheated oven kept at 350` C for 25-30 minutes. Cool it for 10 minutes.

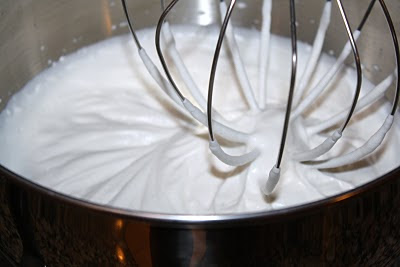
    For frosting in a large bowl, beat cream cheese till fluffy. Then add sugar and water, to achieve consistency. Add food coloring, if required. Spread the frosting over and between the cake layers.

    Spread walnuts over the top layer.

    2. Cherry milkshake-

    images (5)

    1.  Vanilla ice-cream
    2.  2 tbsp milk
    3.  Fresh cherries
    4.  Marshmallows for garnishing

    Chop the cherries, into small dices by removing the stalk and the seeds. Blend ice-cream, milk and the chopped cherries until smooth. Do not over blend it. Pour the shake into glasses and garnish with stalked cherries and marshmallows.
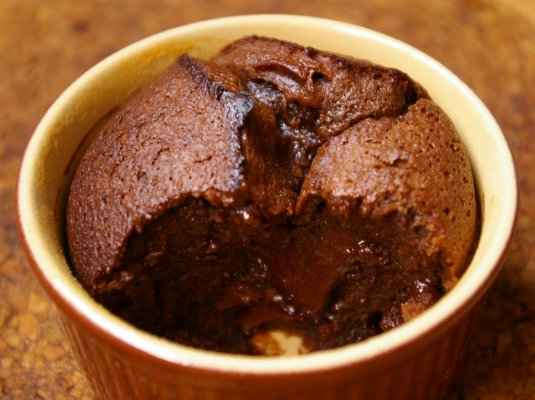
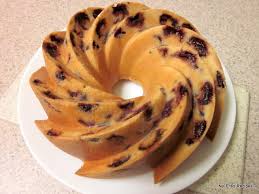
    3. Vegan cherry pie-

    images (6)

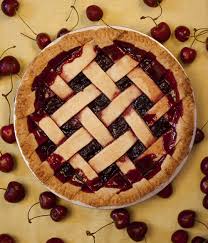
    A. 1 1/4 cup dark cherries

    B. 1 1/2 cup whole wheat pastry flour

    C. 1/3 cup unsweetened cocoa powder

    D. 1 tbsp baking soda

    E. 1/2 tbsp salt

    F. 1 cup sugar

    G. 1/2 cup oil

    H. 1 tsp vanilla extract

    I. 1 cup coffee powder

    J. 2 tbsp apple cider vinegar

    Preheat the oven to 375` C and in a medium bowl mix together flour, cocoa powder, sugar, baking soda and whisk them. In another bowl, add coffee powder with cold water, oil and vanilla extract. Now mix both of them together. Now, add the apple cider vinegar and mix till it is evenly distributed in mixture. Add cherries to the mixture, and do not whisk now. Bake for 35 minutes and then let it cool.

    Garnish with chocolate chip and stalked cherries.

  • Yummy Chocolate Recipes For This Summer!

    Yummy Chocolate Recipes For This Summer!

    chocolate


    As Charles M. Schulz once said, ‘all you need is love. But a little chocolate now and then doesn’t hurt.’ Chocolates make you happy. Eating a chocolate makes your brainssecrete those ‘feel good’ endorphins. Dark chocolates contain chemicals that protect you from cancer and other diseases. The caffeine content in dark chocolate makes you feel alive. Did you know that eating chocolates widens up your arteries and fosters a healthy blood flow that prevents plague from building up in your arteries and blocking them.Chocolates are rich in phenolic, the same protein found in wine. The protein helps lower the risk of heart diseases and prevent clot like substances from clogging the arteries. Research provides that candy eaters live almost an year more than those who abstrain.   Also, chocolate melts at 97 degrees Celsius which is just below your body temperature. It melts in your mouth and leaves you wanting for more all the time.

    So true, isn’t it? We all crave for chocolates, don’t we? From chocolate cakes, to chocolate ice-creams to chocolate biscuits and what not! Its rich, it’s creamy and amazingly delicious.

    So this time, I bring to you, some of the yummiest chocolate recipes for the summer:

    • Black-Forest Vanilla Cake (and yes, with the cherry on the top of course!)

    BLACK FOREST

    A delicious black-forest cake with vanilla ice-cream sand-witched between chocolate sponge is a must eat this summer. So how do you try and bake it?

    Here’s the recipe:

    All that you need: A 70mm diameter chocolate sponge cake, 2tbs sugar, 1 tbs rum,  ½ glass of water, 2 cups of whipped cream, ½ cup dark chocolate chips, 3 canned cherries which should be cut into half, 2 ½ cups of vanilla ice-cream, 5 tbs chopped cherries, 7 tbs grated chocolate.


    All set with the ingredients?

    So here’s how you prepare it:

    • Firstly, you need to cut the cake into 4 parts.
    • The bottom layer of the serving plate should be sprinkled with ½ soaking syrup.
    • Now, on this soaked layer of sponge, spread 1 ½ cup of ice-cream.
    • Top this layer with 3tbs cherries and 4 tbs chocolate.
    • Now, another layer of sponge should be placed on this.
    • Sprinkle some more soaking syrup on this sponge layer.
    • Arrange the remaining cup of ice-cream on this layer.
    • Top it with remaining cherries and chocolate.
    • Sprinkle the remaining soaking syrup.
    • Top the cake with whipped cream
    • And finally, garnish the cake with cheese and grated chocolate.
    • Freeze till the cake becomes firm.

    Your delicious Black-Forest Vanilla Cake is ready to be served!


    • Chocó-Almond Cupcake: Its small, it’s petite, but it’s definitely a treat for your taste buds. This is definitely going to be an unforgettable experience one you get to taste this luxurious combination of almonds and Chocó. The frosting of Almond and chocolate make this cupcake taste very different from the others. A chocolate ice-cream cake. (And again, with the cherry on the top!)


    CHOCO ALMOND CAKE


    Here’s a list of all that you need: 8 chocolate sponge, 7 tbs butter
    12 tbsp icing sugar, 6 1/2 tbsp melted chocolate mixed with 1 tbs milk, 4 tbs powdered almonds , 1/2 tsp almond essence, 6 tbs soaked and chopped almonds and
    6 cherries.


    How to prepare it:

    • Put all the butter in a bowl
    •  Beat it with the help of a spatula.
    • Now, add some icing and sugar to it.
    • Mix well the powdered chocolate and the almond and put it into the batter.
    • Now, the frosting needs to be filled in a piping bag.
    • Swirl out whichever shape you would love to see on your little cupcake.
    • Garnish them with frosting and almonds and don’t forget to add the cherry on the top.

    Your little surprise is ready to be served.


    • Chocó-Brownie Milkshake: The perfect summer cooler for you this summer. A totally different kind of a milkshake made from the combination of vanilla ice cream, brownie and milk.

    CHOCO SHAKE


    What all do you need:  200 gms of chocolate, 500 ml of milk, 2 tbs vanilla essence, some crush ice cubes, 2 scoops vanilla ice cream.

    How to prepare it:

    • Combine all the ingredients and churn them. Keep the ice out of the mixture for now.
    • Transfer to bowl
    •  Add ice to it and mix well.

    Your milkshake is ready to be served.


    • Chocolate Fondue: The super yummy hot mixture of marshmallow, dipping fruit and cake pieces.


    FONDUE
    What all do you need: 100 gms of milk chocolate, broken into small pieces, 1/3 cup of milk, 1 tbs flour, 4 tbs cocoa powder, 4 to 5 tbs sugar, ½ tbs vanilla essence, 1 tbs butter, 2 tbs brandy, fresh fruit, cake pieces and marshmallows for dipping.

    How to prepare it:

    1. The butter had to put in a glass bowl and beaten
    2. Microwave the batter for 1 ½ minutes
    3. Stir twice after every 30 seconds
    4. Add milk, Chocó chips, cocoa, cream, sugar, a teacup of water.
    5. Stir the batter after 30 seconds.
    6. Pour the mixture in a dish.
    7. Stir well and add brandy.

    And finally, your chocolate fondue is ready to be served.

  • Rasgulla: The syrupy taste of India

    Rasgulla: The syrupy taste of India

    Don’t you people got bored with the same khichdi and daal all the time in your lunch and dinner? Have some change and make your appetite more interesting and delicious..!! Go on and try some desserts, sweets, ice-creams. What can be more yummy and delicious than Rasgulla..! Rasgulla, the name itself can make you salivate.  The most historical and yummy Bengali dish is famous all over the country and also spread its taste over neighbouring countries like Nepal, Bhutan, Pakistan and Bangladesh. It is a white spongy variant also popularly known as Rossogolla in Bengal.

    ras2

    It is a syrupy dessert based on cheese (chhena) is popular in the whole nation mainly in West Bengal and Orissa. It is typically served on various occasions and parties. They are white sweet yummy balls which is spongy and rubbery in nature.

    Sri Nobin Chandra Das, who is remembered as the father of Rossogolla succeeded in inventing this National Sweet of India in 1868. He is responsible for modifying this recipe of white variant spongy dish all over the nation. He popularised this sweet dish among various sweet-makers and finally canned rasgullas were prepared to gain this popularity outside Kolkata.

    This sweet dish not only popular among parties or dinner instead in Puri this is most widely used as an offering to the Goddess Lakshmi as a tradition. There people believed that Jagannath tried to pacify Lakshmi with these rasgullas and that’s why she is offered this as a ‘Bhog’. Due to this tradition scholars perceived this offering as the origin of this dish.

    ras6

    This Bengali sweet doesn’t exist as a single rather several variants exist. Starting with Notun Gurer Rasgulla, which are the most famous seasonal variants with the addition of Fresh Jaggery in it. Then comes Kamola Bhog, which is rich in orange flavour.  Originally the rasgullas used to be creamish in colour and less spongy. In Orissa it is very common to embed a piece of cashew or raisin which increases its taste. Conventional Rossogolla, Cream Chop, Sponge Rossogolla, Rajbhog, khasta are another variants that are available in different shapes and sizes. They are generally served to the guest at room temperature but sometimes they are also served them chilled. This is not enough instead hot rasgullas are also famous among Indian household.

    ras5

    Manufacturers of Rasgullas do not generally disclose the recipe of this sweet dish and it seems that its preparation might be difficult. But it is not so. It has an easy and convenient way. Its preparation initially needs the preparation of Chhena balls and syrup.

    Ingredients: Flour (2 tspn), milk (1 litre), sugar (200gm), Lemon juice, Water.

    Preparation of Chhena balls:

    • Initially boil full cream milk and allow it to cool down.
    • For separating chhena and water add lemon juice to it.
    • After separation, bundle up the content of milk in muslin cloth and keep it for 6-8 hours so that extra water is drained out.
    • Now add flour to the Chhena and prepare fine dough.
    • From that dough make small balls.

    Preparation of Syrup:

    • Boil water and add sugar to it.
    • After sugar is dissolved then add ½ cup of milk.
    • Some un-dissolved particle would float which needs to be separated from it to obtain clear syrup.
    • Add Chhena balls to it and boil it along with the addition of water to it in a span of 15 minutes.

    Rossogollas is ready and it needs to be cooled now.

    How much delicious this sweet dish is depends mainly on its serving size. The size of rasgullas varies greatly but usually small size of 3.5 oz is preferable. The serving size will directly affect nutritional value of this sweet.

    Generally a person believes that sweet dish is responsible for various diseases and they tend to avoid sweets. All the wishes of them are marred. But it is just their perceptions and in reality it is highly nutritious dish after taking your lunch or dinner. This delicious sweet consists of 186 calories (153 calories for carbohydrates, 17 calories for fats and 16 for proteins).

    ras4

    In ancient times Rasgullas are served normally at room temperature but now days demands changed and it has led them to be served chilled. They are also served with Ice cream as a dessert to make ice cream rasgullas. In restaurant to add more cream to this dessert it is served with blueberry sauce. It is entitled as Oriya dessert. Sondesh is similar as rasgulla and is another Chhena dish prepared in Bengal. The Chhena balls prepared is also used in Rasmalai which is popular throughout India. In this sweetened milk is mixed instead of syrup. In Creamy chop chhena is sandwiched in the middle of the clotted cream. This dish is served in various occasions such as marriages, parties and it shows the symbol of your high dignity. This is also served as a welcome dish on various festive occasions.

    Go on and try it..!!

    ras3


  • INSTANT ACCHARS: PICK YOUR PICKLE

    INSTANT ACCHARS: PICK YOUR PICKLE

    Growing up in India “Acchars” or the Indian pickle has been a substantial part of my childhood experience. I would see my Mom and Aunts spending considerable time in preparing the vegetables, gathering the spices and making arrangements for their storage for days on end. A very tedious affair indeed!! But the end product makes up for all the trouble caused. Pickles are tangy and immediately add savor to anything they are consumed with, be it- paratha, burger or pancakes.

    Pickles are formed by the anaerobic fermentation of vegetables and unripe vegetables in the presence of brine (salt-water) or vinegar. This caused them to dehydrate and thus, discourages the growth of microbes. Moreover, their pH is less than 4.6 which further kills most bacteria. Thus, they can be preserved for months and depending on the recipe, even years!!  The vegetables pickled in brine as opposed to vinegar, are known to contain Lactobacillus and are thus, probiotic.

    Like mentioned above, making “Acchars” can be a pretty tiring job especially if you are a student or working a 24×7 job. Not anymore. Here are 5 instant Pickle recipes anyone can make. They can be stored for lesser duration as compared to the traditional pickles, but the tang it brings to our food is so worth it!!

    1.  CARROT PICKLE

    carrot

    Ingredients

    1. 10 carrots
    2. 1 ½ tbsp crushed mustard
    3. 1 ½ tbsp lemon juice
    4. 1 ½ tbsp oil
    5. Cumin powder
    6. Turmeric powder

    Method

    Wash the carrots and peel them to remove a thin layer of outer covering. Cut the carrots into desired shapes, preferably rectangular. Gather all the ingredients in a bowl and mix them thoroughly. And you are good to go!! Finish this preparation within 2-3 days.

    1. GREEN CHILLI  PICKLE

    chilli

    Ingredients

    1. 1 cup green chilies
    2. ¼  tbsp fenugreek seeds
    3. ¼  tbsp cumin seeds
    4. 1/8 tbsp turmeric powder
    5. 1/8 tbsp grounded asafetida
    6. 1 tbsp lemon juice
    7. 2 tbsp oil
    8. ½ tbsp sugar
    9. ½ tbsp salt
    10. ¼ tbsp amchoor or dried mango powder

    Method

    Wash green chilies and give them a longitudinal cut right in the middle such that they still remain joined at the end. Put oil in a pan and allow it to heat it till it is ready enough to fry. Add cumin and fenugreek seeds and keep whisking them lightly till they begin to crackle. Add amchoor, asafetida, turmeric powder, salt and chilies and mix them for a few minutes. Finally, add sugar and lemon juice. Mix them properly and turn off the heat.

    1. LEMON PICKLE

    lemon

    Ingredients

    1. 10 lemons
    2. 6 tbsp salt
    3. 2 tbsp red chili powder
    4. ½ tbsp turmeric

    Method

    It takes a little longer to prepare this pickle. But it can be stored for months and is extremely easy to make. Cut the lemons into half or make 4 pieces. Gather the lemons in a large bowl and pour all the other ingredients i.e. salt, turmeric and chili powder. Mix the constituents properly. Remember, depending on the climate and temperature of the place, the amount of ingredients has to be adjusted. Put the mixture in a glass-jar and put it daily under sunlight for a week or so. The pickle is considered ready when the lemon loses water and becomes soft. To store it for longer duration, add oil.

       4. MANGO PICKLE

    mango

    Ingredients

    1. 1 cup sliced unripe mango
    2. 1 tbsp chili powder
    3. ½ tbsp salt
    4. 1 ½ tbsp mustard oil
    5. 1 tbsp cumin seeds roasted
    6. ¼ tbsp grounded asafetida
    7. ½ tbsp turmeric powder

    Method

    Mango pickle is arguably the most famous and mouth-tickling pickle there is. Traditionally, it requires a long for the mango “acchar” to get ready. But you need not compromise with taste in your hectic life. So let’s get started. Firstly, take the mango strips in a bowl and add salt. Mix these two ingredients properly and leave them aside for one and a half hour. Once the mangoes lose water, drain the water and collect the mango strips. Put these strips in a large bowl and add all the other ingredients. Mix these thoroughly and your delicious pickle is ready to be served. It can be stored up to 3-4 days when refrigerated.

        5. AMLA OR INDIAN GOOSEBERRY PICKLE

    Amla_Pickle_Stp3

    Ingredients

    1. 10 Amlas
    2. 1/8 tbsp Red chili powder
    3. 1/8 tbsp asafetida
    4. 1/8 tsp fenugreek powder
    5. A pinch of turmeric powder
    6. Salt-to taste
    7. 1 tbsp oil
    8. 1/8 tbsp yellow mustard seeds

    Method

    Boil water in a pan with a pinch of salt. Slowly add Amlas to this boiling mix and let it heat for 5 to 6 minutes. Drain water from the Amlas and allow them to cool for some time. Once they cool down, separate them into their natural wedge shape by cutting and remove the seed in the middle. Heat oil in a pan and add asafetida and mustard seeds. When the seeds begin to crackle, add amla wedges followed by the rest of the ingredients and cook them for 3-4 minutes. Turn off the flame and allow it to cool. Refrigerate for prolonged storage.


    Pickles add flavor to your life, they make your food come alive and dance. In our hectic lives, we often compromise with our meals. So the next time, you decide to half-heartedly swallow bread and a sad not-so-tasty vegetable that you prepared, think again!! Just few minutes of your precious time and you can add soul to your snack. so, come on- PICK YOUR PICKLE!!

  • Home made vanilla ice cream

    Home made vanilla ice cream

    Ice cream is a frozen dessert that is made from the dairy products like milk and cream and often combined with fruits or other ingredients and flavors.Most of these ice creams contain sugar and few uses some other sweeteners.While few of them uses artificial colors and flavors in addition to the natural ingredients.These mixture of ingredients are stirred slowly in order to incorporate air and to prevent formation of large ice crystals.The obtained product in semi solid state and is served as scoops.

    So yummy and delicious Ice cream
    So yummy and delicious Ice cream

    History:

    Ice creams origin took place almost far back in second century BC., Although we dont know the specific date of discovery and by whom but we know that the great Alexander enjoyed snow and ice flavored with honey and nectar.Biblical references also show that King Solomon was fond of iced drinks during harvesting.Also we know that during the Roman Empire, Nero Claudius Caesar frequently used to sent runners into the mountains for the snow and is flavored with fruits and nuts.The historians say that the recipe evolved during 16th century.England have discovered ice cream even earlier than the Italians.

    Ingredients:

    1) Take one cup of whole milk

    2) Take about 3/4th cup of sugar

    3) Take one vanilla bean and it is split lengthwise

    4) Take two cups of heavy cream

    5) Take five large egg yolks

    6) Take one teaspoon pure vanilla extract

    7) Take a pinch of salt

    Ingredients that are required for making vanilla ice cream
    Ingredients that are required for making vanilla ice cream

    Preparation:

                       There is a delightful taste for the home made vanilla ice cream.This can be served alone or even along with the fruit salad which is even tastier.This vanilla ice cream can be prepared by using a ice cream maker or even with out using it. All you need is the best quality ingredients you can find and a little patience.Once you have prepared this at home you will never eat ice cream that is brought from out.When ever the climate is hot ,there is nothing better than a frosty scoop of home made ice cream that is pulled right from your freezer.

    Step 1:

    At first take a medium sauce pan and heat up the milk, sugar and salt in it.By using a knife scrape the seeds from vanilla bean carefully.Add the seeds that are scraped to the milk.After that the flamed is turned off and the sauce pan is covered by using a lid and leave it undisturbed for at least one hour.The next thing we have to do is to keep the heavy ice bath chilled.Take a large bowl and fill it with chilled water and ice cubes and let the heavy cream sit in the ice bowl until it is cooled.Take a bowl and whisk egg yolk until it is combined.Now again heat the vanilla mixed milk.After it is heated mix it with the egg yolk little amounts and stir it continuously.After they are mixed take the mixture into a saucepan and heat it on a low flame. Place the saucepan on a low heat and stir the custard constantly.When the custard forms a light coat on the back of the spoon or spatula, it is ready. Strain the custard into the heavy cream, and then stir in the vanilla extract.Now take the mixture in a container and refrigerate it overnight.

    Heating the ingredients milk sugar and salt in a saucepan
    Heating the ingredients milk sugar and salt in a saucepan

    Step 2:

    Take out the ice cream mixture from the refrigerator and stir it continuously with a rubber spatula.Now transfer the mixture into a bowl and cover it with a plastic cover and make it air tight and place it back in a refrigerator.

    Take out ice cream mixture from freezer and stir using rubber spatula
    Take out ice cream mixture from freezer and stir using rubber spatula

    Step 3:

    After forty five minutes take it out when the edges of the mixture started to freeze.At this stage take it out and mix it with a handheld mixer.After stirring well keep back in freezer for two to three hours and stirring should be done for every 30 minutes for soft taste.Stirring continuously is important when we are not using a ice cream maker.

    Take out ice cream mixture from freezer and stir using rubber spatula
    Take out ice cream mixture from freezer and stir using rubber spatula until the freezed edges are softened

    Step 4:

    After the two hours is completed take it out from refrigerator and beat the mixture again with a hand mixer.The mixture should be thick but still too soft to scoop which is prominent for making an ice cream with good taste.If the ice cream is not so thick return it back to the freeze and leave it to freeze for some more time.If the ice cream has become thick then at this stage we can add some ingredients like chocolate chips, cookies, dry fruits to it.

    Take this type of container and fill the ice cream in it
    Take this type of container and fill the ice cream in it

    Step 5:

    This is the final step and here we can take the mixture into plastic container and close by using a plastic wrap and keep it in a refrigerator.Make sure that we have left some gap while filling the ice cream in the plastic container.That’s it yummy delicious vanilla ice cream is ready.

  • Ten Minutes or Less: Food Tips and Tricks

    Ten Minutes or Less: Food Tips and Tricks

    We live in a fast track world where things happen like… whoooosh. There are mornings when one doesn’t have enough time to make a breakfast and there are nights when after a hard day’s work no one has enough energy to stand in the kitchen and cook food for one more hour. In the age when Pizza comes under 30 minutes, who wants to wait for 1 hour for the food? So, here we are today with tips and tricks of Food meals that can be cooked in 10 minute or less.


    1. Cereal Breakfast:-

    This is the easiest thing that can be made in less than 10 minutes. Even you can get time to read your email and wash the dishes while you complete the 10 minutes of this dish.


    Ingredients needed:-

    1 cup low fat yogurt

    1 tbsp honey

    1/2 cup corn flakes

    Sliced almonds to taste


    Directions:-

    Put 1 cup low-fat yogurt in the cereal bowl (we are using this instead of milk). Add 1 tbsp honey to it. Now put the ½ cup corn flakes and sliced almonds for the extra flavor if needed.


    1. Egg Toast:-

    Egg is simply the easiest food item for any meal. It hardly takes any time to cook and is always a great source of energy.

    egg toast

    Ingredients Needed:-

    2 Eggs

    Salt (as required)

    2 Bread slices

    1 pinch Nutmeg

    2 tbsp Butter


    Direction:-


    In a bowl whisk the eggs. Add together salt, other spices (if required) and a pinch of nutmeg. Put the bread on this mixture and let it absorb the mixture. Now turn the bread over and let the other side absorb.

    On a pan, put 2 tbsp butter and let it heat for a minute. Now, put the well soaked bread on the butter and cook until golden brown and crispy on both sides. Repeat the same steps with other bread slice. Serve with tomato sauce.  Enjoy the food.


    1. Fried Rice:-

    You can prepare a delicious meal with last day’s leftover rice without a fuss. Follow these steps.


    Ingredients Needed:-

    Cooked rice

    ½ cup finely cut Tomatoes

    ½ cup finely chopped Onions

    Salt and spices as required

    2 tbsp Oil or butter


    Directions:-

    Put 1 tbsp oil or butter in a pan and heat for 1 minute. Now add ½ cup onions to it and finely cook till it is golden brown in colour. Add tomatoes to it as soon as the onions change the colour. Add salt and other spices to taste. You can add a little Soy sauce too for the taste. Now let it cook and turn into a thick paste and in the mean time, in another pan put 1 tbsp oil or butter. When it is hot, Add cooked rice to it and let mix it well so that every grain of rice has a little oil over it.

    Now, Put this rice in the paste and mix it well. Cook it for 4-5 minutes. Taste and add a little more soy sauce if needed.


    1. Scrambled Eggs:-

    The secret to cooking egg is that you can do anything with them. But in case you are not in mood to do anything, just break the eggs in the pan and get done with them.


    Ingredients Needed:-

    2 eggs

    2 tbsp cream

    A little salt

    ¼ cup finely chopped Onion

    1 tbsp butter


    Direction:-

    Add eggs, cream, onion and a little salt to a bowl and whisk.

    Put butter on a pan and let it heat for a minute. Now put the eggs mixture in the pan and cook on medium heat. Use a wide spatula to scrape the mixture off the pan and turn it over. Cook until it gets creamy and take it off the head.

    Serve with toast if you wish.


    1. Pasta:-

    pasta

    No doubt, it is the undisputed master of 10 minutes club. It is tasty, least fussy and also classy serve to show off.


    Ingredients Needed:-

    350 gm pasta

    ½ onion finely chopped

    3-4 tomatoes finely chopped

    1 tbsp oregano

    1 tbsp red pesto

    2 tbsp vinegar


    Directions:-

    Cook pasta according to instructions in the pack.

    In another pan, put 1 tbsp butter and heat the onion and tomatoes. Now, put all the ingredients including onion and tomatoes to a mixer and mix them well into a paste.

    Tip the paste into the pan again and bring to boil. Reduce the heat and cook for 5 minutes. Drain the pasta, put into this gravy mix it well and serve.


    It isn’t over yet. As the food is incomplete without dessert, here is the recipe of a dessert as a bonus that can be cooked in less than 10 minutes too.


    Instant Chocolate Cake:-

    This is the easiest and tastiest chocolate cake that can be cooked in such less time.

    cup cake

    Ingredients Needed

    ½ Cup Flour

    ¼ cup Sugar

    4 tbsp Cocoa Powder

    Egg

    ¼ cup Milk

    4 tbsp Vegetable Oil

    3 tbsp Vanilla Cream

    Pinch of Salt


    Direction:-

    Beat flour, sugar, cocoa powder and egg in a bowl. Add milk and vanilla cream when it is made into a thick paste. Now add the vegetable extract and a little salt. Keep mixing it till it is made into a smooth mixture. Put the mixture into the microwave until it is smooth and puffed. It will take 2-3 minutes. Take the dish out and enjoy.


    Now, what are you waiting for? Go, make the dishes in 10 minutes or less and enjoy life without any compromise with taste due to time constrain.

  • Good Morning, Breakfast!

    Good Morning, Breakfast!

    Breakfast

    Did you have your Breakfast today? If yes, then good going! But if not, C’mmon! You can’t skip it. Breakfast really is the most important meal of the day. You should prioritize it, even when you’re late or even when you’re not willing to have it. Yes, your mom is right. Breakfast is something which gives life to your day. It is actually important and is the first and foremost meal of the day. To have a fresh start in your lovely mornings, breakfast is must for everyone. Not only it gives us energy to start a day, it is also linked with many health benefits, which we can avail. Eating breakfast is important to everyone, especially to children and adolescents as they are in their growing stage. According to American dietetic association,”Children who eat breakfast perform better in the classroom and on the playground, with better concentration, problem solving skills and eye-hand coordination.” Even there’s one theory that suggests that eating a healthy breakfast can reduce hunger throughout the day and also help you to make better food choices on other meals and also control cravings and thus in turn makes your weight less instead of those who are breakfast skippers. Obviously, your breakfast must be rich in protein or whole grain and vitamins and nutrients and not the ones loaded with fats and calories.
    With all this, unavoidable stuff morning, I am enlisting some of the key benefits of Breakfast. If you are trying to maintain a healthy diet, consider the following reasons to have your fancy breakfast each and every morning.
    Weight control: Many studies have shown that people who eat breakfast tend to weigh less than the ones who skip their breakfast. It’s worth noting that the studies linking breakfast to weight control loss looked at a healthy breakfast routine containing protein and whole grains; not meals loaded with fats and calories. So, breakfast eaters are leaner and this pretty good reason to always have a healthy happy breakfast.
    It keeps you in a good mood: First and foremost, since your body won’t think that it’s starving after a nutritious meal in the morning, it’s easier to get in a good mood and stay that way. This also provides you with needed energy to help you get throughout the day, which can keep your mood bright and optimistic. Feeding yourself in the morning will keep your spirits up and can also help to regulate your blood sugar levels through lunch time, which plays a vital role in your mood upliftment. Overall, eating something for breakfast is always better than eating nothing at all.
    It keeps you from Binging: Obviously, if you eat up good in the morning, you won’t feel the urge to famish on something or binge eating can be avoided. As, not eating breakfast can save you from some calories for the time being, but it prepares for the day failure as you won’t feel energetic. This is because not feeding your body for several hours overnight, a lack of food in the morning will leave you hungry very early in the day and then when lunch time rolls down, you’re more likely to choose a food high in fat and calories to satisfy your food cravings. If you hold off till dinner, you will most probably feel an overwhelming urge to snack all night along, which is just a bag of calories.
    It increases your Metabolism and makes you feel more energized: When your body receives food in the morning, it tells your brain that you’re going to need to start working to digest it which warms up the metabolism so it’s ready to work throughout the day. But when you don’t eat breakfast in the morning, slows down your metabolism, which results in a decrease in the amount of calories you burn all day long. Eating breakfast is a great way to get your metabolism working well for the day.

    very-healthy-breakfast
    Here are some creative, simple-to-make, healthy ideas for maximizing the most important and the first meal of the day.
    Breakfast Sandwich: You can make it by topping English whole wheat bread or Indian chapatti with 1 ounce ham and a flavored mustard. Pair it with fresh fruit and low fat cheese.
    Berries and muffins: Split open a small bran muffin (you can get it easily from supermarket) and place on a plate. Top it with a fresh berries an some nuts and a dollop of fresh yoghurt.
    Bagel and chutney: its very tasteful for anyone and especially for one who loves mangoes. Spread mango chutney on a small bagel, and pair it with a cottage cheese sprinkled with cinnamon.
    Breakfast Shake: Blend 1 cup fat free milk or plain yoghurt with ½ cup fruit, 1 teaspoon wheat germ and add 1 teaspoon nuts or nut butter and whirl and your shake is ready.
    Big Breakfast is way healthier than big dinner. You must have heard that saying, “Eat breakfast like a king, lunch like a prince and dinner like a pauper.” This simple quote is a great way to remember that how to eat throughout the day and balance your diet. Not only it gives a nice and peaceful start to the day, but it is also good for brain and bodily health. So, never forget or skip your super-awesome breakfast.

    TS-161146814_family-with-small-kids-eat-in-kitchen-breakfast_lg
    Happy and Healthy Breakfast. Happy Life.

  • Chicken 65 Recipe

    Chicken 65 Recipe

    Chicken 65 is a delicious Indo Chinese dish which is very popular in south India.This recipe can be found in many of the dhabas and restaurants around every part of the country. Many of the people like to order this dish whenever they have visited dhabas and it is also most adorable by the children.This can be served as a great starter and many people like to have it with the drinks. This dish gets the flavor from the ingredients like ginger, garlic, red chillies and vinegar.For the preparation of this dish we can take either chicken with bone or without bone.The main important ingredient from which the whole flavor comes to this dish is only from the curry leaves.

    Delicious Chicken 65 Recipe
    Delicious Chicken 65 Recipe

    Different stories for the name chicken 65:

    This famous chicken recipe is originated in Chennai.Universally this dish is called as chicken 65,but there are many stories  regarding the name of the dish. But many people exactly don’t know the correct reason why does it so called.Few people say that the dish is so called because the first price of this dish was 65 rupees and few say that the weight of each chicken piece is about 65 grams and thus the name came into acceptance.But many people say that the number 65 in the chicken 65 represents the year in which this dish was introduced by a famous hotel in Chennai named Buhari.Thus the name chicken 65 was originated.This dish is used as a simple meal for the Indian military during the year 1965.

    But the exact name Chicken 65 came as follows.Actually this dish was started from a Military canteen in Chennai where there were a set of Indian army soldiers from the northern states of India usually visited as it was one of the popular canteens. As they don’t know the regional language they used to suffer a lot with this problem.Most of the Soldiers tried to order this item by showing the number in the menu.As it is the 65 item on the menu later when ever they visited this canteen they get used to that number in the menu and they easily ordered this item by saying the number 65 to the canteen members, later it became famous with that number and spread all over as chicken 65.

    history-of-chicken-65
    history-of-chicken-65

    Ingredients:

    1) Take one 450 grams of Chicken ( make sure it is boneless and is cut into small cubes )

    2) Take half table spoon of rice flour

    3) Take one table spoon of corn flour

    4) Take one table spoon of red chilli powder

    5) Take one table spoon of garam masala powder

    6) Take one table spoon of ginger garlic paste

    7) Take one table spoon of lemon juice

    8) Take one pinch of red food color

    9) Take one pinch of turmeric powder

    10) Take two table spoons of curd or yogurt

    11) Take one raw egg

    12) Take salt that is sufficient for taste

    13) Take refined oil required for making a deep fry

    14) Take chopped onion cut in the form of rings for garnishing

    15) Take chopped coriander leaves for garnishing

    Ingredients that are required for making chicken 65
    Ingredients that are required for making chicken 65

    Preparation:

    Chicken 65 is a spicy, red and deep fried chicken mostly taken as a snack item before meal or at the evenings and is accompanied with the onion slices, slit green chilies and lemon slices.The preparation of chicken 65 is different from one place to another depending on their taste requirements.This dish can be prepared by using boned chicken or boneless,here we are we are taking boneless chicken.Basically chicken 65 is red in color because it is deep fried and red food color is added to it.Chicken 65 can be prepared in many ways but the taste is lied within the spices.

    Step 1:

    At first take a bowl and add all the ingredients rice flour, corn flour, red chilli powder, garam masala powder, ginger garlic paste, lemon juice, red food color, turmeric powder, curd, salt sufficient for taste and mix all of them along with the egg yolk for about two minutes, now add the chicken pieces slowly to the ingredients mixture and mix them well until each piece is gets the spice attached to it and leave it undisturbed to marinate for few minutes.

    Chicken marination for making chicken 65
    Chicken marination for making chicken 65

    Step 2:

    Now take a pan on the stove, switch on the flame and add oil to it that is required for making a deep fry.Leave the pan on a medium flame so that the oil gets heated up.Now take the marinated chicken pieces that are ready for cooking and put them slowly in the oil piece by piece and care should be taken that the oil should not spill.After adding all the pieces to the oil make a deep fry until their color changes to nice reddish brown color.After their color is changed take a plate with a tissue paper placed evenly on it and move the chicken pieces on to it.That’s it very hot and spicy mouth watering chicken 65 is ready.Garnish it with vegetables or onion, green chillies, lemon slices, coriander leaves and serve it.

    Hot and spicy mouth watering chicken 65 recipe
    Hot and spicy mouth watering chicken 65 recipe


  • Pickle your Mangoes this Summer

    Pickle your Mangoes this Summer

    Mango pickle refers to a variety of pickles that are prepared by using mangoes.Mango pickle is a very popular in south India and few parts of south Asia. Mango pickle is a spicy dish that can be enjoyed with any variety of food.This traditional south Indian dish can be available in many forms either spicy one or sweet one.As it is summer we can find mangoes abundant in all the markets and streets.As the availability is more most of the women at home are busy making pickles with raw mangoes.In Andhra mango pickle is famously known as Avakaaya pachadi or Mamidikaaya pachadi. As different regions in India have different preparation process the taste also varies.South Indian Pickle has quite different taste from the flavor of  pickle in north India.Even the main ingredients are same in any of the preparation process but south Asian pickles are having different flavor from others as it undergoes different process and uses different spices in the preparation.The main difference in the preparation is, in the southern states sesame oil is used where as in northern states mustard oil is preferred for  for making pickles.

    Hot and spicy mouth watering spicy mango pickle
    Hot and spicy mouth watering spicy mango pickle

    The pickle has a flavor which tempts every one for its fragrance and everyone likes to taste it because of its attractive color and spiciness in it. It is a favorite dish for many people,this has a great taste when it is eaten with hot rice and ghee.Generally this pickle is prepared in summer season just after the ugadi festival as raw mangoes are abundantly available.The ingredients that give spicy and great taste for mango pickle are cumin seeds, curry leaves, fenugreek powder, garlic, hing , mustard powder, mustard seeds, oil, raw sour green mango, dried red chillies, red chilli powder and little turmeric powder.The overall taste of mango pickle is like sour, tangy and spicy flavour.

    Ingredients:

    For making spicy pickled mango:

    1) Take one kg of raw green mangoes

    2) Take one and half cup of mustard oil ( Aamudamu )

    3) Take three table spoons of fenugreek seeds ( Mentulu )

    4) Take four table spoons of fennel seed ( Sompu )

    5) Take two table Red chilli powder

    6) Take two table spoons of turmeric ( Pasupu )

    7) Take two strands curry leaves

    8) Take two table spoons of 2 vinegar

    9) take salt that is sufficient for taste

    Ingredients that are required for making mango pickle
    Ingredients that are required for making mango pickle

    Preparation:

    The pickling process in India is quite different as it follows different preparation steps and fermentation process.These pickles are used as side dishes and some times used as main dishes depending on the situations and occasions.For the preparation of this delicious spicy yummy mouth watering dish we mostly prefer to take raw mango or tender mango.We can find many types of mango pickles in the market but the most famous types are whole baby mango pickle or cut mango pickle.Whole baby mango is popular in South Indian and is prepared by using baby mangoes that are only few weeks old.The other is cut mango pickle in which we will use a special type of mango that is only used for pickle purpose and they cannot be consumed directly as ripe fruit.The baby mangoes are pickled and added with some spices by undergoing some process so that the pickles can be preserved for years.

    Spicy pickled mango preparation:

    Step 1:

    Wash the mangoes thoroughly and cut them into four pieces each.Then remove the pit from the mango and add salt to the pieces and mix them well until the salt gets absorbed by the mango pieces and leave it undisturbed for about 20 minutes.After that dry the mango pieces in the sunlight for two to three hours so that the moisture present in them can be evaporated.

    Mango preparation process step 1
    Mango preparation process step 1

    Step 2:

    Take one and half cup of mustard oil in a pan and heat it for about one to two minutes.If you don’t have mustard oil you can take cooking oil and heat it with mustard seeds.Now lightly crush the fenugreek seeds ( mentulu ) until they become are fine enough.Mix these crushed fenugreek with the remaining ingredients and half of the oil.Then mix the fenugreek with the fennel seeds, turmeric, chilli powder, curry leaves, vinegar, salt, and half of the mustard oil.After making this mixture add mango pieces to it and mix them well in this mixture until each piece gets the spice evenly.

    Mixing of ingredients and spice with mango pieces
    Mixing of ingredients and spice with mango pieces

    Step 3:

    After mixing well move the pieces into a sterilized jar and the remaining oil that is present poured over the pieces.Then place a muslin cloth on the jar and use a rubber band to secure the cloth.Later place the jar in sun for four to five days so that the pieces get enough time to fully absorb the spicy pickling mixture.after five days remove the muslin cloth and cover it with a lid.Once the mango is fully pickled, just use a jar with a tight lid which will help it to last for longer time.That’s it the spicy South Indian variety mango pickle is ready and it can be served with daal, rice, roti, ghee and many more.

    Jadi that are mostly used for preserving pickles
    Jadi that are mostly used for preserving pickles


  • Cooking Classics- Mother’s Day Special

    Cooking Classics- Mother’s Day Special

    While I was busy pulling out the memory strings to think out the best Mother’s day dessert for mum, (of course), I realized how disappointed she’d been with last year’s Choco-mousse with blueberry topping! The reason however, wasn’t my inexperienced cooking skills because surprisingly it came out real good. It was rather my mum’s unbelievable disgust for Chocolate, and yes UNBELIEVABLE is the word. So, I had pledged never to go global, while cooking for her. At least not with desserts. And, that’s when the idea of going traditional clicked my mind. It’s time for not just me but for us all to turn back to the roots and unearth the Indian traditional delish-delights. That’s in vogue, I tell you!

    So, here’s the list of classic desserts from four different states of India that I’d made to decide on my show-stopper. This is for you all, who have mums with similar nationalistic-gastronomic ideas and of course for all those newly-wed wives trying on cooking tricks to impress their in-laws and husband!

     Pineapple Kesari Bath/ Semolina Pudding:

    Pineapple-Kesari11

    To start with I present to you this diva of Kannada Cuisine! Served as a prasad on the Satyanarayana Swami pujas, this ‘sweetie’ is indeed an uncommon version of the well-known Suji ka halwa, for its use of pineapple.

    INGRIDIENTS

    1. 1½ cups Semolina/Rava(use chiroti rava for best results/Sooji)
    2. 1¼ -1½ cups Sugar( According to preferrences)
    3. ¾ cups Pineapple, finely diced (you can also puree it if you want)
    4. ¾ -1 cup Ghee (Be generous!)
    5. ¼ tsp. Saffron, soaked in a tbsp. of warm milk or water
    6. 12-15 Cashew Nuts, broken
    7. Around 20-24 Raisins/Sultanas (Optional but recommended)
    8. 5- 6 green cardamoms, powdered (optional)

    METHOD

    1. To speed up things, boil 4 cups of water and keep aside. Heat 2 tbsp of ghee in a heavy bottomed pan and add broken cashews to it. When the colour turn light golden, add raisins or sultanas and fry till golden.Remove with a slotted spoon and keep aside.
    2. Then,dissolve 1 cup of sugar in ½ cup of water and add the finely chopped or pureed pineapple to it. Cook them on medium flame, until all’s cooked through and the liquid is boiling, say about for 5 minutes.
    3. Add a tsp. of ghee to the already greased and hot pan, followed by semolina or sooji,and roast till fragrant and golden.Keep stiring it for around 3-4 minutes and don’t let it turn brown.
    4. Add around that 4 cups of boiling water,you’d kept aside to the roasted rava or sooji and let it cook unperturbed for some 3 minutes on medium flame.
    5. Next, blend in the semolina with remaining sugar, the pineapple and sugar syrup and keep stirring so that no lumps are formed.Do this for some 3-4 minutes.
    6. Be brave and slowly keep adding the ghee, one tbsp at a time, while stirring the mixture alongside. Once you’re ghee indulgence has reached its summit, keep stirring till the grain is tender and gooey, and the ghee starts to separate to the edge of the vessel.
    7. Add the roasted cashews and raisins and the saffron soaked in warm milk,and the powdered cardamom and blend.
    8. Once done with that,don’t stop to catch a breath,and instantly pour in the Pineapple kesari Bhath into a greased plate or a cake tin and spread it well. Now’s the time to hold on to your patience, while it rests for 5-10 minutes. Shape them as desired and serve hot,warm or chilled.You can even top it up with your favourite ice-cream flavour!

    Dudh Puli / Coconut Stuffed Rice Dumpling:

    Dudh Puli_03

    This traditional (and nostalgic) Bengali dessert(also known as pitha) is especially made for the occasion of Makar/ Poush Sankranti. This sweet-shell puli is something I was about to choose as my show-stopper, till I realized on the very last moment that mum perfected it, and so didn’t dare to move further! However, its awesomeness deserves exposal and so here’s the recipe for it!

    INGREDIENTS : (for around 25-30 Pulis)

    For the kheer or milk

    1. Full cream Milk : 1.5 litre
    2. Palm Jaggery : 8tbsp (Generous alert!)
    3. Green Cardamom :2-3,crushed

    For the stuffing

    1. Grated coconut : 2 cups
    2. Sugar/ Jaggery : 1 cup

    For the outer shell/puli

    1. Rice Flour : 500 gm. (My mum, as per the tradition,mixes boiled rice flour with non-boiled rice flour in 2:1 ration,however to avoid the hassel,you can also opt for the store-bought rice flour)
    2. Salt : a pinch
    3. Lukewarm water to make the dough

    METHOD

    1. For the filling : Make small pieces of the jaggery to help it blend well with the grated coconut. First dry roast the coconut in a wide pan on low flame, and then add jaggery, one tbsp at a time. Keep stirring until the browned mixture starts to stick together. Once the mixture stops sticking to the pan, give a good stir for a minute or two on medium flame and then remove it from heat to cool off. When cool enough to touch, take 2tbsp of the mixture on your palm and start preparing small oval balls. Line them up on a flat plate.
    2. For The Outer shell or puli: Sift in rice flour, and salt in a mixing bowl and make a soft dough, while adding lukewarm water in turns. When the dough soft and nice ,quickly make balls out of it and keep them in the same bowl.Cover it with a cloth or Clingfilm to avoid it from hardening
    3. For the Puli : Now’s the tricky part! Take the dough balls and flatten them with your fingers, on the palm to form the shape of a circular disk. Remember, that the shell should be medium thin. Place the oval-shaped filling balls on them and press the both the edges of the shell together, to form a half moon. Pinch the edges to seal it( a lot like momos!) .Continue this till you’re out of filling and dough balls!
    4. For the sweetened and thickened milk/kheer : In a heavy bottomed saucepan,boil milk and simmer on low flame, until its amount reduces to half. Let it cook for some 10 minutes on very low flame.Bring it to room temperarture and add jaggery (never add it to hot boiling milk at it can curdle the milk).Then slowly start adding the pulis or dumling into it and cook them for 7-10minutes on medium flame. Once the pulis have changed colour and have started to float on top, one by one, its then, and the ‘pull-off’ alert! Remove from flame and add the crushed cardamom and mix,but be carefull not to break the pulis. Continue to cook,there again,for 5-10 minutes,until u’ve reached the desired consistency.However the milk should neither be too thick nor too thin.
    5. Done all this, you’re good to go! Transfer to serving bowl. Garnish with pistachios or saffron if desired and serve fresh (never cold as it would harden the pulis)!

    Thekua/Khajur:

    Thekua Khajur 2

    This is a quintessential Bihari dessert, that dazzles almost every festivity, but is synonymous to the occasion of Chhat Puja. So here’s how you need to proceed:

    INGREDIENTS

    1. Whole wheat flour (preferably hand ground) -500 gm.
    2. Dry Coconut (chopped-rectangular approx.3x5mm ) -2 tbsp
    3. Jaggery or sugar- 300 gm
    4. Green Cardamom( peeled and mashed) – 4
    5. Fennel seeds(optional) – 1 tsp.
    6. Whole pepper seeds(optional) – 1 tsp.
    7. Ghee ( or vegetable oil) – 2 tbsp.
    8. Ghee, for deep frying – 500 gm.
    9. Water – 1½ cup
    10. Mould or Saancha( for making imprint on Thekua cookies)

    METHOD

    1. Melt jaggery, in water and add green cardamom to it. When dissolved, remove from heat allow to cool. It should have syrup consistency
    2. Mix wheat flour, 2tbsp. of ghee, coconut, fennel and whole pepper, in a large mixing bowl
    3. Pour in the jaggery syrup slowly, for making the dough, out of the dry mixture. Remember to use as much jaggery syrup as required, not excess. As you can use the remaining syrup as an optional dip!
    4. Clean and grease you palms with ghee, as it’s time to make balls out of the dough.Take a fistful of it, press it flat on the palm to create an elliptical shape. Once you’re satisfied with the shape, transfer it to the mould by pressing the dough against the mould to imprint the pattern on each side.
    5. Continue this procedure until you’ve used up all your dough.And,now They’re ready to be deeply fried in ghee.Drop the thekuas few at a time,into the hot ghee,and deep fry them on low flame,till light golden and crisp.
    6. Drain it all,and allow to cool,and then their ready to be served or stored in airtight containers

    Rava Cake / Semolina Cake:

    rava cakes

    The ultimate Maharastrian delish delight, that caught me by both surprise and awe! It’s super-simple and light and yet it’s rich authentic flavour, fills you with nostalgia!

    INGREDIENTS

    1. Fine semolina (rava) – 2 cups
    2. Yogurt(regular low fat) – 2 cups
    3. Sugar – 2½ cups
    4. Ghee (or softened butter) – 3tbsps.
    5. Baking soda- 1/4tsp.
    6. Milk( to make the batter) – as required
    7. Cardamom pods (powdered) – 2/3tsp.
    8. Saffron- a pinch
    9. Vanilla extract (optional) – 1/2tsp.
    10. Sliced almonds(optional)-1/4 cup

    METHOD

    1. Mix semolina(rava), yogurt(dahi),ghee or butter and sugar, in a mixing bowl and make a batter while adding milk from time to time to smoothen it( you can add eggs also at this step)
    2. Then, let it rest for 30 minutes to an hour. Only add the baking powder, vanilla extract and almonds, 5 minutes before baking it(or cooking it on gas stove,which is the traditional way)
    3. If you’re cooking it, then pour in the batter into an aluminium cake dish and place it on a frying pan or kadhai.Cover it with another hollow pan or kadhai and cook over high flame.In about 10 minutes,it would be done.
    4. However, (like me) if you love baking,then preheat the oven at 180 degrees and pour in the batter into a greased cake tin. Sprinkle the saffron on top and let it bake for about another 30 minutes.
    5. When done, bring it on a cooling rack and cling on to your patience for 10 more minutes,until its ready to be sliced and served
    6. It’s goes really well as tea party snac,however, I prefer it with ice cream topping!

    Rava Cake-DSC_0082

    I ended up choosing the Pineapple Kesari Bath for the occasion, though I’m in serious love with the others.I tried them on every other event, with a little bit of experimentation and guess what? My mum was never more pleased!